Heat your oven to 425 degrees Fahrenheit. Line a large baking sheet with parchment paper using a few spots of butter or cooking oil to stick it in place. Set the prepared baking sheet aside while you prepare the other ingredients.
Hull your fresh strawberries and dice them finely into small, uniform pieces. Place the diced strawberries on several sheets of paper towel to absorb their excess juice. This step is crucial because those paper towels draw out moisture that would otherwise make your dough too wet and difficult to work with. Let them sit for a few minutes while you prepare the dry ingredients.
Combine the all-purpose flour, 1/3 cup sugar, baking powder, salt, and ground nutmeg in a large bowl. Zest half of a lemon into the ingredients, being careful to remove only the outermost yellow skin and not the white pith underneath. Whisk these dry ingredients together thoroughly so everything is evenly distributed and the leavening agent is well incorporated.
Add the cold butter pieces to the dry ingredients. Using two butter knives or a pastry blender, cut the butter in until the flour-coated pieces are about the size of peas. This is the crucial step that creates the delicate texture in your scones. Don't skip it or rush it, as proper butter incorporation is essential for achieving the desired light and flaky crumb.
Remove the strawberries from the paper towels, as they should have released a significant amount of moisture by now. Add the drained strawberries to the flour mixture and toss them gently with a fork to coat them evenly. Be very gentle during this step so you don't crush the delicate fruit pieces and release more juice.
Make a well in the center of the flour and strawberry mixture. In a measuring cup, blend together the 1/2 cup of light cream and the vanilla extract. Pour this wet mixture into the well you've created. Using as few strokes as possible, gently stir the dough until it forms a ball. This is where minimal mixing is absolutely crucial, as you want to combine everything without overworking the dough. Once it forms a ball, stop mixing immediately.
Let the dough rest for 1 minute on the counter. This brief resting period allows the flour to fully hydrate without requiring additional mixing, which would toughen the scones. This simple step makes a significant difference in the final texture.
Clean and flour your hands and dust your work surface generously with flour. Place the dough on the floured surface and knead it very gently just three or four times. That's all you need. You're not trying to develop gluten; you're simply bringing the dough together into a cohesive mass. Transfer it to the prepared baking sheet and gently pat it into an 8-inch circle of even thickness.
Using a lightly oiled pizza cutter or a serrated knife, cut the dough into 8 equal wedges, as you would slice a pizza. The oil on the cutter prevents the dough from sticking and ensures clean cuts. Make sure your cuts go all the way through to create distinct wedges.
Use a small spatula or pie server to carefully separate the wedge pieces from each other. Leave at least an inch of space between them so they can bake evenly without touching or merging together during baking. This spacing ensures each scone develops its own crispy exterior.
Brush the tops of all the scones with the remaining 1 tablespoon of light cream using a pastry brush. This creates a beautiful, shiny finish. Sprinkle the surfaces generously with additional sugar, creating a crunchy, pretty finish that adds texture and visual appeal to the baked scones.
Bake the scones in the preheated oven until the outsides are crusty and starting to brown, approximately 18 minutes. You're looking for a golden brown color, not dark brown, which indicates perfect doneness. Watch them carefully near the end of baking to avoid overbaking.
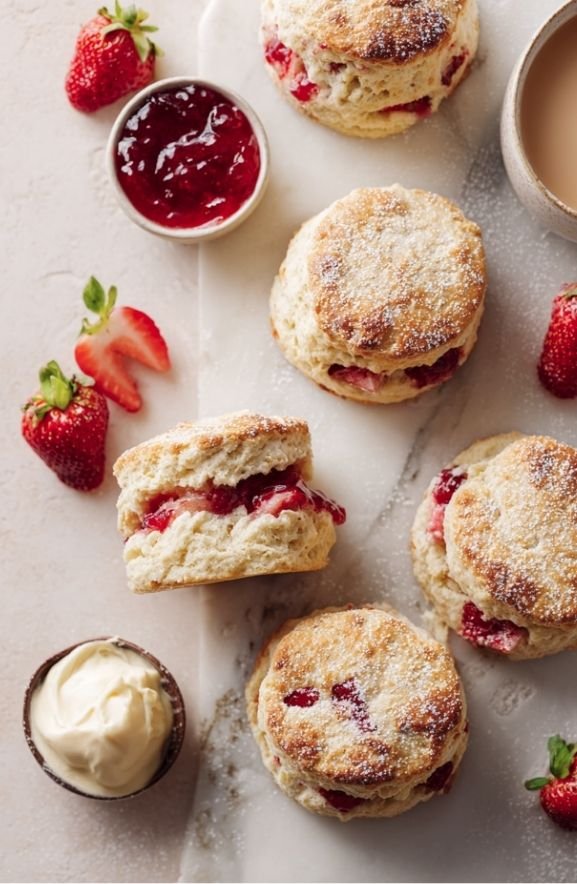
Let the baked scones cool on the baking sheet for 2 minutes. Then carefully slide the parchment paper and the scones onto a wire rack to cool for another 20 minutes before serving. This cooling time is important because it allows them to set properly so they're tender but still hold their structure. Serve warm with whipped cream and jam for an authentic afternoon tea experience.