I first made these ranch pretzels at 11 PM on a Friday night because I was bored and had nothing better to do.
My sister was coming to visit the next day, and I wanted to have some good snacks on hand that didn’t feel like I’d just grabbed a bag of chips from the store.
I texted my mom asking if she had any snack recipes, and she sent me this one with a note that said “this is so easy and so good, you’ll make it all the time.”
I was skeptical. It seemed too simple. Oil, seasonings, pretzels, sit overnight, bake. That’s it?
I made them anyway because at that point I was already committed.
The next morning, I pulled them out of the oven and one bite completely changed my mind about how simple they were.
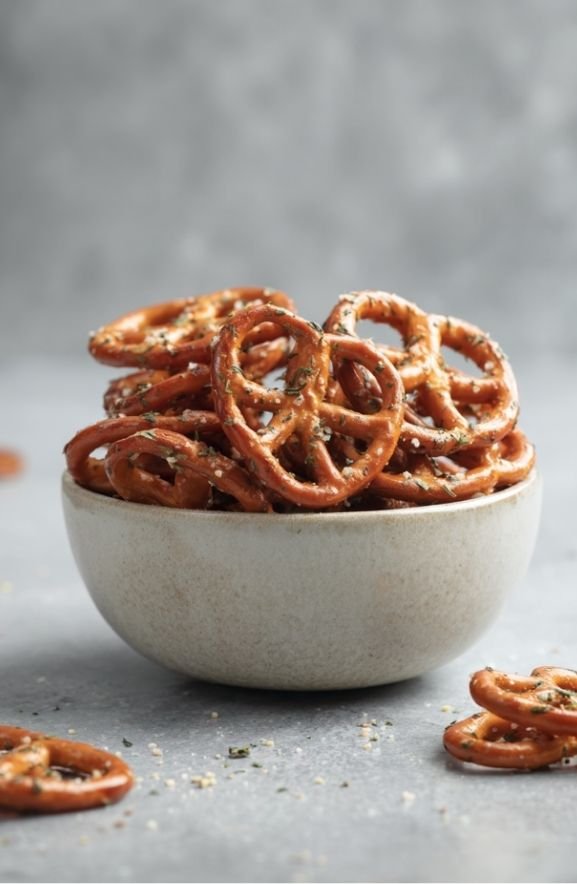
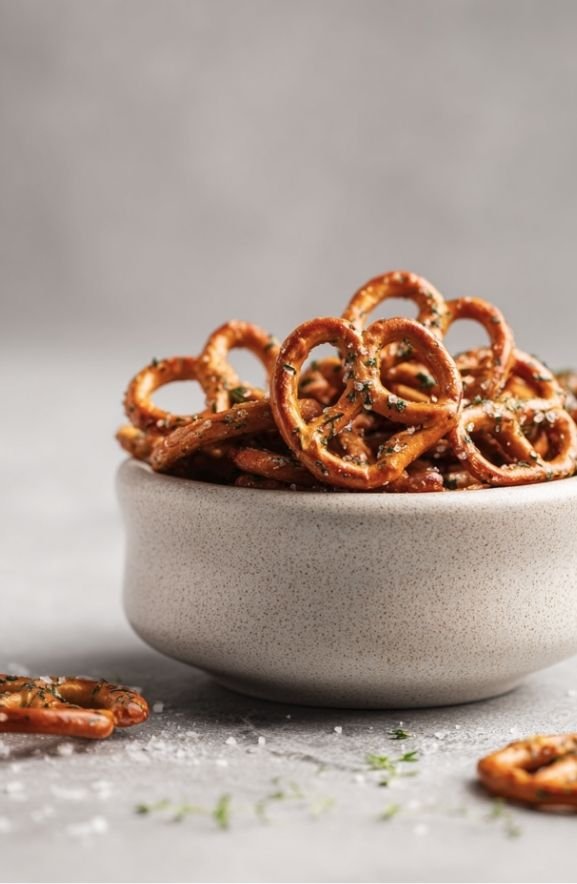
They were crispy, crunchy, intensely flavored, and somehow tasted way more sophisticated than they had any right to.
My sister arrived, I offered her some, and she ate probably half the batch in the first hour.
That was about four years ago. I’ve made these ranch pretzels more times than I can count since then.
For parties, for holiday gifts, for random Tuesday nights when I need something to snack on, for game day gatherings.
People ask for the recipe constantly. And they always seem shocked when I tell them it takes five minutes to prepare and the hardest part is remembering to stir them overnight.
This is genuinely one of my most-made recipes, and I think it deserves way more attention than it gets.
Why Ranch Pretzels Are Genius
There’s something about the combination of ranch seasoning and pretzels that just works at a fundamental level.
Ranch is already a beloved flavor. Most people like ranch or at least don’t mind it.
But when you add the lemon pepper, dill, and garlic to the ranch base, it elevates the entire thing.
The lemon pepper adds brightness and a tiny hint of citrus that cuts through the richness.
The dill adds earthiness and a subtle tangy quality that makes people try to figure out what they’re tasting.
Also read: Seasoned Pretzels Recipe: Addictive Homemade Snack Mix
The garlic powder grounds everything and adds savory depth.
Together with the oil coating, these seasonings create a snack that tastes complex and interesting but is genuinely simple to make.
The baking step at the end is the secret ingredient that most pretzel snack recipes miss.
Baking these brings out the flavors even more and creates a crispness that’s absolutely addictive.
It’s not the kind of crispy that’s fragile and breaks apart. It’s sturdy, crunchy, the kind of crispy that makes you want to keep eating.
The Ziplock Bag Method
One of the best things about this recipe is that you use a 2-gallon ziplock bag to make it.
Everything happens in the bag. You add the pretzels, pour in the oil and seasonings, seal it, and shake.
This means minimal cleanup. No large bowls to wash. No spoons to clean. Just one ziplock bag.
It also means you can make this anywhere. Kitchen, camp, a friend’s house. All you need is a bag and ingredients.
The shaking motion ensures that everything coats evenly without having to manually stir with a spoon repeatedly.
You still stir occasionally while it sits overnight, but the initial coating happens through shaking, which is faster and more efficient than stirring.
Ingredient Breakdown
Oil (1 cup)
You can use any neutral oil for this. Vegetable oil, canola oil, or even light olive oil all work.
Some people prefer to use butter-flavored oil for extra richness, but regular oil is fine too.
The oil is what carries the seasonings and creates the coating that bonds everything to the pretzels.
One cup of oil might seem like a lot, but remember you’re coating an entire bag of pretzels, so it’s actually proportional.
The amount of oil is important because too little and the seasonings won’t coat evenly, too much and you’ll end up with overly oily pretzels.
Ranch Dressing Mix (1 envelope)
This is the flavor foundation of the entire snack.
Use the packet form of ranch dressing mix, which is usually found near the soup mixes in the grocery store.
One standard envelope is what you need. This creates a strong ranch flavor base that the other seasonings build on.
If you want a milder ranch flavor, you could use half an envelope, but the recipe as written really calls for the full amount.
Dill Weed (1 teaspoon)
Use dried dill weed, not fresh dill. Fresh dill would get soggy and lose its potency.
Dried dill adds an earthy, slightly tangy quality that’s absolutely crucial to making these taste interesting.
It’s one of those ingredients that people taste but can’t quite place, which is part of the appeal.
Make sure your dried dill is relatively fresh. Old dried herbs lose their flavor intensity.
Lemon Pepper (1 teaspoon)
Lemon pepper seasoning is that magical blend of black pepper and dried lemon that adds brightness and complexity.
You can buy it pre-mixed at the grocery store in the spice aisle, or you can make your own by mixing black pepper with lemon zest powder.
The lemon pepper prevents these from tasting flat and adds a fresh note that makes the recipe special.
Don’t skip this ingredient. It’s small but mighty in terms of what it contributes to the final flavor.
Garlic Powder (1 teaspoon)
This adds savory depth and makes the snack taste more sophisticated.
Use actual garlic powder, not garlic salt (which would add too much salt).
Garlic powder is a pantry staple that most people have on hand anyway.
It grounds all the other flavors and creates a savory backbone that the ranch and lemon pepper build on.
Pretzel Nuggets or Regular Pretzels (1 bag)
You can use pretzel nuggets (the small, bite-sized pieces) or regular full-sized pretzels that you break up yourself.
Most people find pretzel nuggets convenient because they’re already the right size.
Regular pretzels work fine too. Just break them into roughly bite-sized pieces before putting them in the bag.
Don’t use those tiny snack pretzels. You want something substantial enough to coat evenly and hold up to baking.
The size of bag isn’t super specified, but you’re looking for probably 10-12 ounces of pretzels.
Ranch Pretzels Recipe
Ingredients
- 1 cup oil (vegetable, canola, or light olive oil)
- 1 envelope ranch dressing mix
- 1 teaspoon dried dill weed
- 1 teaspoon lemon pepper seasoning
- 1 teaspoon garlic powder
- 1 bag pretzel nuggets or 1 bag regular pretzels, broken into bite-sized pieces
Instructions
Step 1: Prepare Your Ziplock Bag
Get a 2-gallon resealable ziplock bag and place it on your counter or in a bowl to keep it open and stable.
Pour your bag of pretzels into the ziplock bag.
If you’re using regular pretzels, make sure they’re broken into roughly bite-sized pieces. They should be small enough to coat evenly but substantial enough to stay crunchy.
Seal the bag most of the way, leaving just a small opening at the top to pour the oil and seasonings in.
Step 2: Mix the Oil and Seasonings
In a separate bowl, combine the oil, ranch dressing mix, dill weed, lemon pepper, and garlic powder.
Whisk this together until it’s well combined and relatively smooth.
The ranch mix is powdery, so you might have some tiny particles floating around, and that’s fine. Just make sure everything is evenly mixed.
This mixture is your coating. It carries all the flavor.
Step 3: Pour Over Pretzels
Carefully pour the oil and seasoning mixture over the pretzels in the ziplock bag.
Seal the bag almost all the way, leaving just a tiny opening if needed for air.
Or seal it completely. You can always open it to stir later.
Step 4: Shake and Coat
Now comes the fun part. Shake the bag vigorously for about a minute or two.
You want all the pretzels to be coated with the oil and seasoning mixture.
Shake from multiple angles. Rotate the bag. Make sure the seasoning reaches all the way to the bottom.
This is more effective than trying to stir with a spoon and much more fun.
Step 5: Let It Stand Overnight with Occasional Stirring
Lay the sealed bag flat on a counter or in a pantry.
Let it sit for 12 hours. This waiting period allows the seasonings to fully absorb into the pretzels and for the flavors to develop and meld.
Every few hours (or at least 2-3 times during the 12-hour period), shake the bag again or open it and stir the contents from the bottom up.
This prevents the seasonings from settling to the bottom and ensures even distribution.
Most people do this right before bed, in the morning, and maybe once or twice in between.
Don’t stress about perfect timing. Just try to stir occasionally. That’s it.
Step 6: Spread on Baking Sheets
After the 12-hour rest period, spread the pretzels out on large baking sheets in a single layer.
Try to distribute them relatively evenly so they bake consistently.
If they’re piled up too thick in some spots, they won’t bake properly.
You might need two baking sheets depending on how many pretzels you’re making.
Step 7: Bake at 350 Degrees
Preheat your oven to 350 degrees Fahrenheit.
Once it’s preheated, place the baking sheets in the oven.
Bake for 15-20 minutes, checking around the 15-minute mark.
You’re looking for the pretzels to be crispy and dry. They should not look wet or oily when you pull them out.
The exact baking time depends on how wet they were after the overnight sitting and your specific oven.
Start checking at 15 minutes. If they still look slightly wet, bake for another 2-3 minutes and check again.
You don’t want them brown or burnt, just crispy and dry.
Step 8: Cool and Store
Remove the baking sheets from the oven and let the pretzels cool on the sheets for about 10 minutes.
Transfer them to an airtight container once they’re completely cooled.
Stored in an airtight container, these will stay crispy and fresh for about 1-2 weeks.
If they start to get a little soft after a few days, you can recrisp them in a 250-degree oven for 5-10 minutes.

Ranch Pretzels Recipe
Ingredients
Method
- Get a 2-gallon resealable ziplock bag and place it on your counter or in a bowl to keep it open and stable. Pour your bag of pretzels into the ziplock bag. If you’re using regular pretzels, make sure they’re broken into roughly bite-sized pieces. They should be small enough to coat evenly but substantial enough to stay crunchy. Seal the bag most of the way, leaving just a small opening at the top to pour the oil and seasonings in.
- In a separate bowl, combine the oil, ranch dressing mix, dill weed, lemon pepper, and garlic powder. Whisk this together until it’s well combined and relatively smooth. The ranch mix is powdery, so you might have some tiny particles floating around, and that’s fine. Just make sure everything is evenly mixed. This mixture is your coating. It carries all the flavor.
- Carefully pour the oil and seasoning mixture over the pretzels in the ziplock bag. Seal the bag almost all the way, leaving just a tiny opening if needed for air. Or seal it completely. You can always open it to stir later.
- Now comes the fun part. Shake the bag vigorously for about a minute or two. You want all the pretzels to be coated with the oil and seasoning mixture. Shake from multiple angles. Rotate the bag. Make sure the seasoning reaches all the way to the bottom. This is more effective than trying to stir with a spoon and much more fun.
- Lay the sealed bag flat on a counter or in a pantry. Let it sit for 12 hours. This waiting period allows the seasonings to fully absorb into the pretzels and for the flavors to develop and meld. Every few hours (or at least 2-3 times during the 12-hour period), shake the bag again or open it and stir the contents from the bottom up. This prevents the seasonings from settling to the bottom and ensures even distribution. Most people do this right before bed, in the morning, and maybe once or twice in between. Don’t stress about perfect timing. Just try to stir occasionally. That’s it.
- After the 12-hour rest period, spread the pretzels out on large baking sheets in a single layer. Try to distribute them relatively evenly so they bake consistently. If they’re piled up too thick in some spots, they won’t bake properly. You might need two baking sheets depending on how many pretzels you’re making.
- Preheat your oven to 350 degrees Fahrenheit. Once it’s preheated, place the baking sheets in the oven. Bake for 15-20 minutes, checking around the 15-minute mark. You’re looking for the pretzels to be crispy and dry. They should not look wet or oily when you pull them out. The exact baking time depends on how wet they were after the overnight sitting and your specific oven. Start checking at 15 minutes. If they still look slightly wet, bake for another 2-3 minutes and check again. You don’t want them brown or burnt, just crispy and dry.
- Remove the baking sheets from the oven and let the pretzels cool on the sheets for about 10 minutes. Transfer them to an airtight container once they’re completely cooled. Stored in an airtight container, these will stay crispy and fresh for about 1-2 weeks. If they start to get a little soft after a few days, you can recrisp them in a 250-degree oven for 5-10 minutes.
Notes
Baking Tips And Tricks
Monitor Closely Every oven is different, so watch your pretzels starting at the 15-minute mark. The goal is crispy and dry, not brown or burnt. If your oven runs hot, check at 12-13 minutes instead. Shake the Pan Midway Halfway through baking, shake the baking sheet or stir the pretzels to ensure even cooking. This helps prevent some from getting overdone while others are still slightly soft. Don’t Overcrowd Use two baking sheets if needed. Overcrowding means uneven baking. The pretzels should be in a relatively single layer with some space between pieces. Cool Completely Before Storing Let the pretzels cool completely before putting them in an airtight container. If they go into storage while still warm, they’ll release steam and get soft. Cool, then store is the key.Timing Flexibility
The 12-hour rest period is ideal, but you can be flexible with it.
You can do 8 hours if you’re in a time crunch, though the flavor won’t be quite as developed.
You can also do 24 hours if that’s more convenient. The pretzels will continue to absorb the seasonings and won’t be harmed by the extra time.
Most people find 12 hours perfect because you can prepare them in the evening and bake them the next morning.
If you need them faster, you can still make them with less resting time. The results will be slightly different but still delicious.
Flavor Variations And Customizations
Spicy Ranch Pretzels
Add 1/2 to 1 teaspoon of cayenne pepper to the oil and seasoning mixture for a spicy version.
You can also add 1/2 teaspoon of red pepper flakes or a dash of hot sauce powder.
This creates a ranch pretzel with a gentle heat that builds as you eat.
Garlic Parmesan Version
Keep all the other seasonings but add 1/4 cup of grated Parmesan cheese to the oil mixture.
Parmesan adds richness and a different flavor dimension while still maintaining the ranch base.
Everything Bagel Pretzels
Use everything bagel seasoning instead of the individual spices.
Everything bagel seasoning has garlic, onion, sesame seeds, poppy seeds, and salt.
This creates a more interesting, sophisticated flavor profile.
Italian Herb Ranch
Add 1 teaspoon of Italian seasoning blend to the mixture along with the other spices.
This creates a more herbaceous, Mediterranean-inspired version.
Lemon Dill Dominant Version
Increase the dill to 2 teaspoons and the lemon pepper to 2 teaspoons for a more pronounced citrus and dill flavor.
This creates a lighter, brighter-tasting pretzel that’s less heavy on the ranch.
Smoky Bacon Version
Add 1 teaspoon of smoked paprika and 1/2 teaspoon of bacon powder (or finely crumbled cooked bacon if you have it).
This gives the pretzels a BBQ, smoky undertone while keeping the ranch base.
Onion and Garlic Heavy
Increase the garlic powder to 1.5 teaspoons and add 1 teaspoon of onion powder.
This creates a savory, garlic-forward version that’s less about the ranch and more about the aromatic spices.
Cream Dill Version
Increase the dill to 2 teaspoons and add 1/2 teaspoon of dried parsley and 1/2 teaspoon of dried chives.
This creates a fresh, herby version that tastes like a loaded baked potato.
Baking Tips And Tricks
Monitor Closely
Every oven is different, so watch your pretzels starting at the 15-minute mark.
The goal is crispy and dry, not brown or burnt.
If your oven runs hot, check at 12-13 minutes instead.
Shake the Pan Midway
Halfway through baking, shake the baking sheet or stir the pretzels to ensure even cooking.
This helps prevent some from getting overdone while others are still slightly soft.
Don’t Overcrowd
Use two baking sheets if needed. Overcrowding means uneven baking.
The pretzels should be in a relatively single layer with some space between pieces.
Cool Completely Before Storing
Let the pretzels cool completely before putting them in an airtight container.
If they go into storage while still warm, they’ll release steam and get soft.
Cool, then store is the key.
Storage And Shelf Life
Airtight Container Storage
Stored in an airtight container in a cool, dry place, these pretzels will stay fresh and crispy for 1-2 weeks.
The key is keeping them in an airtight container. Exposure to air will make them go stale.
If They Get Soft
If your pretzels start to lose their crispness after a few days, you can recrisp them.
Spread them on a baking sheet and bake at 250 degrees for 5-10 minutes until they’re crispy again.
Let them cool before storing again.
Freezer Storage
You can freeze these for up to 2 months in a freezer-safe container.
Thaw at room temperature for about 15 minutes before eating, or just eat them straight from the freezer if you prefer them very crispy.
Travel and Transport
These are great for travel because they’re lightweight, shelf-stable, and portable.
Pack them in an airtight container and they’ll stay good in a bag or backpack for days.
Perfect For Gifting
These pretzels make fantastic homemade gifts because they look and taste special but require minimal effort to make.
Package them in a pretty jar or container, tie a ribbon on it, and add a gift tag listing the ingredients.
People always ask for the recipe and are amazed at how simple it is.
For holiday gifting, make a batch a few days before and store in pretty containers.
These feel luxurious and homemade without being difficult to prepare.
Party And Gathering Friendly
Ranch pretzels are perfect for parties, game day, or casual gatherings.
They’re the kind of snack that disappears quickly. People keep reaching for more.
Make ahead and store in airtight containers until serving time.
Serve in bowls or on a snack board alongside other appetizers.
These are less heavy than chips, more sophisticated than plain pretzels, and way more flavorful than store-bought versions.
Why People Love This Recipe
There are several reasons this recipe has become so popular and why people keep making it.
First, it’s legitimately easy. Five minutes of prep, 12 hours of passive waiting, 15-20 minutes of baking. That’s it.
Second, the flavor is complex and interesting without being weird or off-putting.
Ranch is familiar and comforting. The lemon pepper, dill, and garlic add sophistication.
Third, the results taste expensive and homemade in the best way possible.
Fourth, you can make a large batch all at once, so you have snacks on hand for days.
Fifth, the recipe is so flexible that you can customize it to your taste preferences.
Finally, it’s shelf-stable, portable, and perfect for multiple different occasions.
How To Make This A Regular Recipe
Once you make these ranch pretzels once, you’ll probably want to make them again.
They’re the kind of recipe that becomes a regular in your rotation.
Keep the ingredients on hand so you can whip up a batch whenever you want.
Make them weekly if you like snacking, or monthly for parties and gatherings.
The beauty is that you can make them on a schedule that works for you.
Make them on Sunday night to have snacks all week. Make them Friday before a party. Make them whenever the mood strikes.
Final Thoughts
Ranch pretzels are one of those recipes that seems almost too simple to be worth making.
But once you taste them, you realize why so many people make them regularly and why people ask for the recipe constantly.
The combination of flavors is genuinely perfect. The method is foolproof. The results are consistently delicious.
Make a batch this week. Store them in an airtight container. Watch how quickly they disappear.
Then make another batch because you’ll want more.
This is the kind of recipe that earns a permanent spot in your cooking arsenal.