I’ll be honest: I didn’t think good gluten-free scones were possible until I made these.
For years, I assumed gluten-free baking meant accepting less-than-ideal results.
Dense, gritty, falling-apart-in-your-hands kind of results.
Then I tried this recipe, and my entire understanding of gluten-free scones changed.
These are actually tender. Actually fluffy. Actually taste like proper scones.
The secret is the combination of rice flour and tapioca flour, which gives you structure without the grittiness of some gluten-free flours.
The xanthan gum replaces the binding that gluten would normally provide.
And the eggs and yoghurt create a tender crumb that’s moist and delicious.
The sultanas add sweetness and texture.
The end result? Scones that taste like regular scones but happen to be gluten-free.
Not “gluten-free scones that are pretty good for gluten-free.” Actual good scones that happen to be gluten-free.
Now whenever someone mentions they’re gluten-free, I make these.
And they’re always amazed that these taste this good.
Understanding Gluten-Free Baking: It’S Not As Scary As It Seems
Okay, let me be real: gluten-free baking can feel intimidating.
So many flour options. Xanthan gum. Psyllium husks. It seems complicated.
But this recipe breaks it down to something manageable.
Rice flour provides structure. Tapioca flour adds lightness and elasticity.
Xanthan gum is the key ingredient that replaces the binding gluten would provide.
Together, these create a dough that behaves almost like regular scone dough.
The eggs and yoghurt add moisture and richness that keeps everything tender.
You don’t need to understand the science of why these work together.
You just need to follow the recipe and trust that it works.
Because it does. Really well, actually.
Also read: Strawberry Pretzel Salad Recipe: The Perfect Three-Layer Dessert
Why This Combination Of Flours Works
Rice flour on its own can be gritty. Tapioca flour on its own is too delicate.
But together? They create something that mimics regular flour surprisingly well.
The rice flour provides structure and substance.
The tapioca flour adds lightness and a slight elasticity that helps the scones hold together.
The ratio is important: 275g rice flour to 50g tapioca flour.
Don’t swap those amounts or guess at them. The ratio is what makes this work.
This is one of those recipes where the exact measurements matter.
Xanthan Gum: The Magic Ingredient You Actually Need
Xanthan gum might sound scary, but it’s actually just a thickening agent.
It’s what replaces the binding power that gluten provides.
In this recipe, you’re using 4 teaspoons, which is a significant amount.
That’s intentional. You need enough to create proper binding in the dough.
Xanthan gum is available in most grocery stores now, usually in the baking or health foods section.
If you can’t find it, some people use psyllium husk powder as a substitute, though the texture will be slightly different.
Don’t skip the xanthan gum. Your scones won’t hold together properly without it.
The Importance Of Yoghurt In Gluten-Free Baking
The natural yoghurt in this recipe serves multiple purposes.
It adds moisture that gluten-free doughs need to prevent being too dry.
It adds acidity that reacts with the baking powder to create lift.
It adds tanginess that makes the scones taste more interesting.
The recipe calls for 125-175ml of yoghurt, and you add it gradually as needed.
This is because different yoghurts have different moisture levels.
You want a soft dough that’s moist but not sticky.
Start with 125ml and add more if your dough is too dry.
Ingredient Breakdown
Rice Flour (275g)
This is the main flour providing structure. Use white rice flour, not brown.
The measurements in this recipe are in grams, which is important for accuracy.
Tapioca Flour (50g)
This adds lightness and a slight elasticity that helps the texture.
Don’t use tapioca starch in place of tapioca flour—they’re different.
Baking Powder (2 teaspoons)
This is your leavening agent. Make sure it’s gluten-free if you’re strictly avoiding gluten.
Most modern baking powders are gluten-free, but check the label to be sure.
Xanthan Gum (4 teaspoons)
This is the binding agent that replaces gluten. It’s crucial.
Make sure you’re using actual xanthan gum, not a gluten-free flour blend that contains it.
Salt (1 teaspoon)
Salt enhances all the other flavors.
Caster Sugar (4 tablespoons)
This provides sweetness. Caster sugar is fine and dissolves evenly.
Butter (110g)
Cold butter is important for creating the right texture.
You’ll rub it into the dry ingredients, so cold butter works best.
Sultanas (110g)
These are dried grapes (similar to raisins but slightly sweeter).
They add sweetness and texture to the scones.
Eggs (2, preferably free-range)
Eggs provide binding and richness.
Free-range eggs often have better flavor, though it’s not essential.
Natural Yoghurt (125-175ml)
Natural (plain) yoghurt is what you want. Not vanilla or flavored.
The amount varies depending on the moisture level of your yoghurt.
Gluten Free Scones Recipe
Ingredients
- 275g rice flour
- 50g tapioca flour
- 2 teaspoons baking powder
- 4 teaspoons xanthan gum
- 1 teaspoon salt
- 4 tablespoons caster sugar
- 110g cold butter, cut into small pieces
- 110g sultanas
- 2 eggs
- 125-175ml natural yoghurt
- 1 egg, beaten, for egg wash
Instructions
Step 1: Preheat Oven
Preheat the oven to 250°C/475°F/Gas 9. Yes, that’s hot.
The high temperature is important for getting the scones to bake quickly and get golden on top.
Step 2: Sift and Mix Dry Ingredients
Sift all the dry ingredients (rice flour, tapioca flour, baking powder, xanthan gum, and salt) into a large bowl.
Yes, sift them. This incorporates air and helps everything combine evenly.
Mix them together well after sifting.
Step 3: Rub in Butter
Add the cold butter pieces to the dry ingredients.
Using your fingertips, rub the butter into the flour mixture until it resembles breadcrumbs.
This step is important because those little butter pieces create the texture when baking.
Step 4: Add Sultanas
Add the sultanas and gently mix them through.
Make sure they’re evenly distributed.
Step 5: Prepare Wet Ingredients
Lightly whisk the eggs and natural yoghurt together in a separate bowl.
You want them combined but not overly frothy.
Step 6: Combine Wet and Dry
Make a well in the centre of the dry ingredients.
Add the egg and yoghurt mixture to the well.
Mix to soft dough, adding a little more natural yoghurt if necessary.
You want a soft dough that’s moist but not sticky.
Start with the 125ml and add more if your dough is too dry.
Step 7: Knead and Shape
Turn the dough onto a rice-floured board.
Knead lightly, just enough to shape it into a round.
You’re not trying to develop gluten (there isn’t any), just bring the dough together.
Step 8: Roll Out
Roll out to about 2.5cm/1 inch thick.
Use a rolling pin and aim for consistent thickness so they bake evenly.
Step 9: Cut Out Rounds
Using a 5.5cm/2¼ inch cutter, cut out rounds.
Don’t twist the cutter. Press straight down and pull straight up.
Twisting seals the edges and prevents rising.
Step 10: Place on Baking Sheet
Place the scones on a rice-floured baking sheet.
Leave space between them so they don’t bake together.
Step 11: Egg Wash
Brush each scone with a little beaten egg wash.
This creates that pretty golden-brown color when baking.
Step 12: Bake
Bake for approximately 10 minutes until golden brown on top.
Gluten-free scones bake faster than regular scones, so watch them.
You’re looking for golden brown, not dark brown.
Step 13: Cool and Serve
Leave to cool on a wire rack.
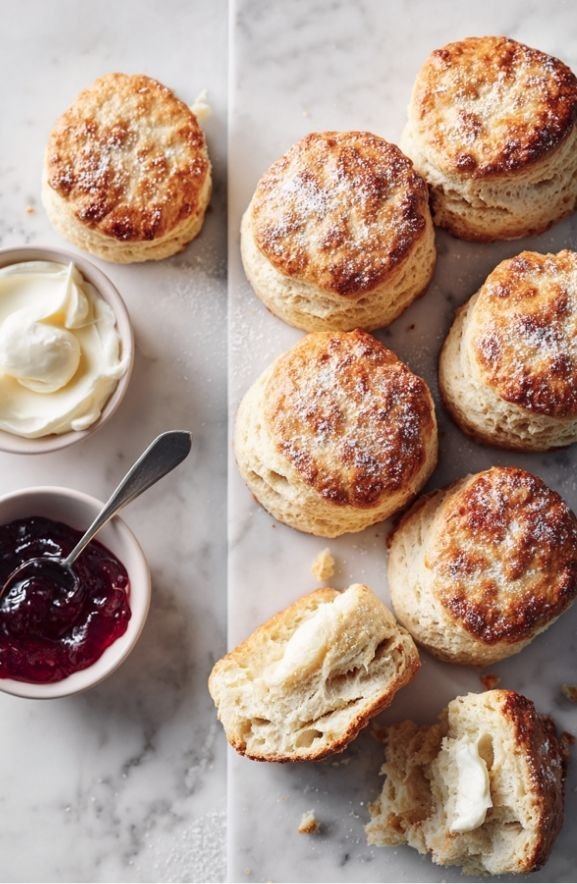
Serve split in half with butter and jam.
Gluten Free Scones Recipe
Method
- Preheat the oven to 250°C/475°F/Gas 9. Yes, this is a hot temperature, but it’s essential for getting the scones to bake quickly and achieve that beautiful golden-brown top. Make sure your oven rack is positioned in the center for even heat distribution.
- Sift all the dry ingredients (rice flour, tapioca flour, baking powder, xanthan gum, and salt) into a large bowl. Yes, sift them. This important step incorporates air and helps everything combine evenly. After sifting, mix them together well to ensure the baking powder and xanthan gum are evenly distributed throughout the flour mixture.
- Add the cold butter pieces to the dry ingredients. Using your fingertips, rub the butter into the flour mixture until it resembles fine breadcrumbs. This step is crucial because those little butter pieces create the light, tender texture when baking. Take your time and work gently to avoid warming the butter.
- Add the sultanas and gently mix them through the dry ingredients. Make sure they’re evenly distributed throughout so each scone will have a good distribution of dried fruit. This ensures consistent flavor and texture in every bite.
- Lightly whisk the eggs and natural yoghurt together in a separate bowl. You want them combined but not overly frothy. This wet mixture will bring all your dry ingredients together and add moisture and richness to your scones.
- Make a well in the centre of the dry ingredients and add the egg and yoghurt mixture to the well. Mix gently to form a soft dough, adding a little more natural yoghurt if necessary. You want a soft dough that’s moist but not sticky. Start with the 125ml of yoghurt and add more gradually if your dough is too dry.
- Turn the dough onto a rice-floured board and knead it lightly, just enough to shape it into a round. You’re not trying to develop gluten (there isn’t any), but simply bringing the dough together. Keep your touch gentle and avoid overworking the dough.
- Roll out the dough to about 2.5cm/1 inch thick using a rolling pin. Aim for consistent thickness across the entire surface so the scones bake evenly. Take your time with this step to ensure all scones are the same height for uniform baking.
- Using a 5.5cm/2¼ inch cutter, cut out rounds from the rolled dough. Don’t twist the cutter, as this seals the edges and prevents rising. Instead, press straight down and pull straight up to keep the edges open for proper expansion during baking.
- Place the cut scones on a rice-floured baking sheet, leaving space between them so they don’t bake together and merge. Proper spacing ensures each scone can rise independently and develop a nice shape with a crispy exterior.
- Brush each scone with a little beaten egg wash. This creates that pretty golden-brown color when baking and adds a shiny, professional appearance to your finished scones. Use a pastry brush and apply the egg wash gently to avoid deflating the dough.
- Bake for approximately 10 minutes until golden brown on top. Gluten-free scones bake faster than regular scones, so watch them carefully. You’re looking for golden brown, not dark brown, which indicates they’re perfectly done.
- Leave the baked scones to cool on a wire rack. Serve them split in half with butter and jam while still slightly warm for the best flavor and texture. The warm scones will absorb the butter beautifully and the jam will complement the tender crumb perfectly.
Notes
Baking Tips And Tricks
Measure in Grams If Possible This recipe is given in grams for a reason. Weight measurements are more accurate than volume, especially for gluten-free baking. If you don’t have a scale, that’s okay, but be aware that conversions are approximate. Use Rice Flour on Your Surface Use rice flour, not regular flour, to dust your work surface and rolling pin. Regular flour will incorporate into your dough and change the texture. Don’t Overknead Unlike regular dough, gluten-free dough can become tough if you overwork it. Knead just enough to shape it, then stop. Watch the Baking Time Carefully These bake faster than regular scones. Check at 8 minutes. 10 minutes is approximate. Your oven might bake them faster. Press Don’t Twist With the Cutter Press straight down with your cutter and pull straight up. Twisting seals the edges and prevents rising. Make Sure Your Ingredients Are Gluten-Free If you’re baking for someone who’s celiac or has gluten sensitivity, double-check that your baking powder is gluten-free. Most modern products are, but it’s worth verifying. Cold Butter Matters Keep your butter cold until you use it. Warm butter won’t create the right texture.Why Rice Flour Instead Of Other Gluten-Free Flours
There are lots of gluten-free flour options out there, but rice flour is the best choice for scones.
Almond flour is too oily. Coconut flour is too absorbent. Buckwheat has a strong flavor.
Rice flour is neutral-flavored and creates a good structure when combined with tapioca flour.
It also doesn’t have that gritty texture that some gluten-free flours have.
This combination really is special for creating scones that taste like regular scones.
Understanding The Yoghurt Variable
The recipe calls for 125-175ml of yoghurt, and you add it gradually.
This is because different brands of yoghurt have different moisture levels.
Some yoghurts are quite thick. Others are quite runny.
Start with 125ml and add more slowly if your dough is too dry.
You want soft dough that holds together but isn’t sticky.
If you add too much yoghurt and the dough becomes too wet, you can add a little more rice flour to balance it.
This flexibility is actually a feature, not a bug, because it helps you create the perfect consistency.
Why The High Temperature Matters
The oven temperature of 250°C/475°F/Gas 9 is much higher than regular scone temperatures.
This higher temperature is important for gluten-free scones because they need to bake quickly.
Gluten-free dough can dry out if it bakes slowly.
The quick bake at high temperature creates golden scones before they have a chance to dry out.
Don’t lower the temperature. Trust the recipe here.
Flavor Variations And Customizations
With Dried Blueberries
Use 110g of dried blueberries instead of sultanas for a different fruit flavor.
With Dried Cranberries
Use dried cranberries for a tart version.
With Lemon Zest
Add the zest of 1 lemon to the dry ingredients for brightness.
With Cinnamon
Add 1 teaspoon of ground cinnamon to the dry ingredients.
Chocolate Chip Version
Use 110g of dairy-free chocolate chips instead of sultanas (or along with some of them).
With Orange Zest
Add the zest of 1 orange to the dry ingredients for citrus flavor.
Ginger Scones
Add 1 teaspoon of ground ginger to the dry ingredients.
Nutmeg Variation
Add 1/4 teaspoon of ground nutmeg to the dry ingredients.
Vegan Version
Replace the eggs with flax eggs (1 tablespoon ground flax mixed with 3 tablespoons water, per egg) and use dairy-free butter.
With Mixed Dried Fruit
Use a combination of sultanas, raisins, and dried currants instead of just sultanas.
Baking Tips And Tricks
Measure in Grams If Possible
This recipe is given in grams for a reason. Weight measurements are more accurate than volume, especially for gluten-free baking.
If you don’t have a scale, that’s okay, but be aware that conversions are approximate.
Use Rice Flour on Your Surface
Use rice flour, not regular flour, to dust your work surface and rolling pin.
Regular flour will incorporate into your dough and change the texture.
Don’t Overknead
Unlike regular dough, gluten-free dough can become tough if you overwork it.
Knead just enough to shape it, then stop.
Watch the Baking Time Carefully
These bake faster than regular scones. Check at 8 minutes.
10 minutes is approximate. Your oven might bake them faster.
Press Don’t Twist With the Cutter
Press straight down with your cutter and pull straight up.
Twisting seals the edges and prevents rising.
Make Sure Your Ingredients Are Gluten-Free
If you’re baking for someone who’s celiac or has gluten sensitivity, double-check that your baking powder is gluten-free.
Most modern products are, but it’s worth verifying.
Cold Butter Matters
Keep your butter cold until you use it. Warm butter won’t create the right texture.
Serving Suggestions
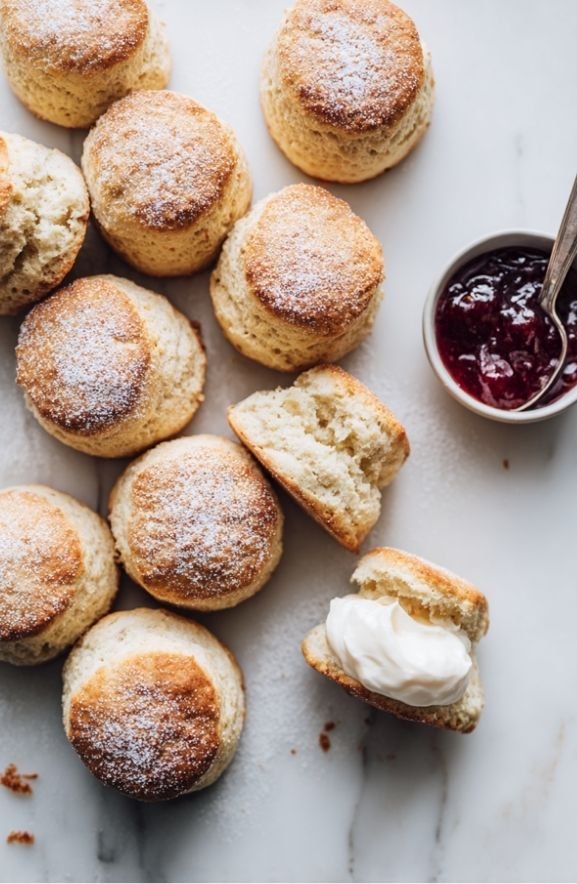
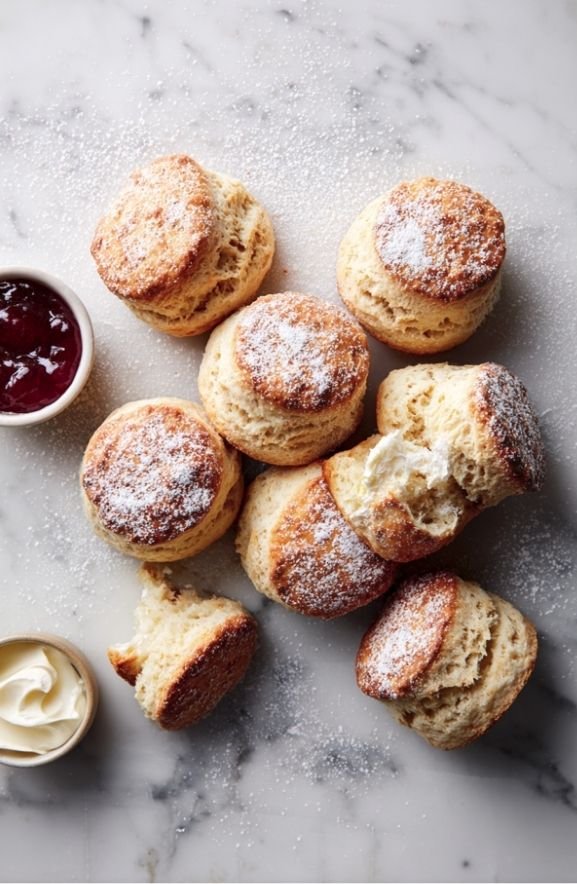
With Butter and Jam
This is the classic serving method. Fresh from the oven with butter and jam is perfect.
With Clotted Cream
For a more indulgent version, add clotted cream.
With Lemon Curd
Lemon curd is delicious on warm gluten-free scones.
With Whipped Cream
A dollop of whipped cream adds richness.
Plain With Tea or Coffee
These are delicious on their own with a hot beverage.
With Honey and Butter
Honey and butter is another delicious combination.
Storage And Make-Ahead
Room Temperature Storage
Store in an airtight container at room temperature for up to 2 days.
Gluten-free scones can dry out quickly, so airtight is important.
Refrigerator Storage
Store in an airtight container in the refrigerator for up to 4 days.
Reheat gently before serving.
Freezing Baked Scones
Freeze baked scones for up to 1 month in a freezer-safe container.
Thaw at room temperature or warm in a 300-degree oven for 10 minutes.
Make-Ahead Strategy
Make these the morning of serving. They’re best fresh.
You can prepare the dough the day before and refrigerate it, then bake in the morning.
Why These Work So Well Gluten-Free
This recipe has been carefully formulated to create gluten-free scones that actually work.
The combination of rice flour, tapioca flour, and xanthan gum creates a dough that behaves almost like regular scone dough.
The eggs and yoghurt add moisture and binding that keeps everything tender.
The sultanas add sweetness and texture that make you forget these are gluten-free.
The high baking temperature ensures quick baking before they have a chance to dry out.
Everything is balanced to create actual good scones.
Perfect For Different Occasions
For Gluten-Free Friends or Family
Serve these to someone who’s gluten-free and watch their surprised reaction.
Most people don’t expect homemade gluten-free scones to taste this good.
Breakfast or Brunch
These are perfect for breakfast or brunch with butter and jam.
Afternoon Tea
Serve warm at afternoon tea with clotted cream and jam.
Gift for Someone Gluten-Free
Homemade gluten-free baked goods are an incredibly thoughtful gift.
Just Because You Want Good Scones
You don’t have to be gluten-free to enjoy these. They’re just good scones.
Final Thoughts
I’ll be honest: I didn’t think good gluten-free scones were possible.
But this recipe completely changed my mind.
These are actually tender. Actually fluffy. Actually delicious.
The key is the careful combination of rice flour, tapioca flour, and xanthan gum, plus eggs and yoghurt for moisture.
Following the recipe exactly is important because gluten-free baking is more precise than regular baking.
But when you get it right, you end up with scones that taste like regular scones but happen to be gluten-free.
Make these for yourself or for someone you know who’s gluten-free.
Serve warm with butter and jam and watch people absolutely love them.
These are the scones that prove gluten-free baking can be really delicious.