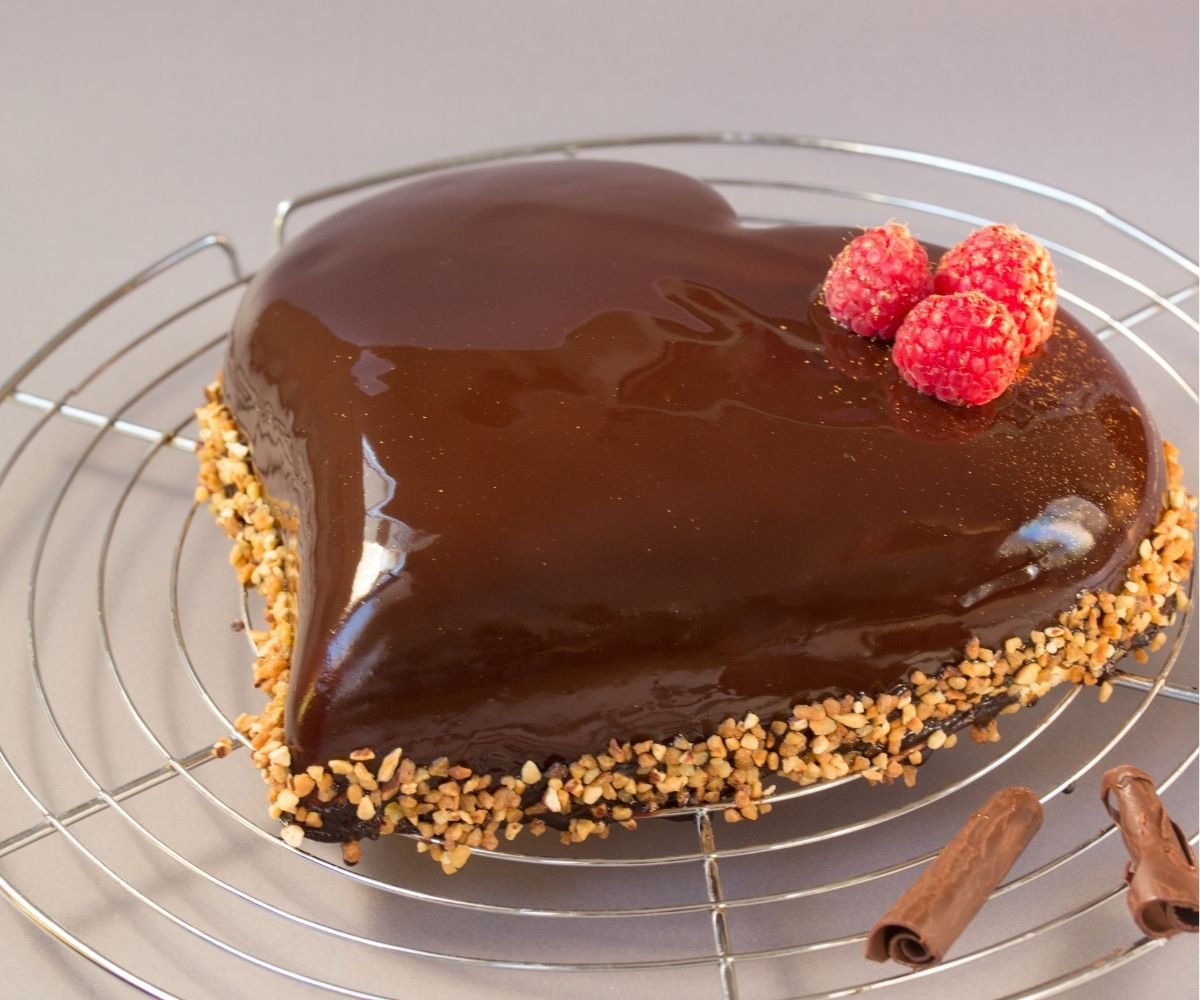
This cake is a showstopper! With its glossy, reflective chocolate glaze, it’s perfect for special occasions or when you want to wow your guests with something truly stunning.
Introduction
You won’t believe how easy it is to create this stunning Chocolate Mirror Cake! I was totally surprised the first time I made it—what looked like a fancy, complicated dessert turned out to be a simple yet impressive treat. If you’re looking for a cake that wows without a ton of effort, this one’s for you. Get ready to surprise yourself with how amazing it turns out!
Ingredients
For the cake:
- 4 large eggs
- 1 cup (125g) all-purpose flour, sifted
- ⅔ cup (125g) sugar
- ¼ tsp salt
- 1½ tsp baking powder
- ¼ cup (55g) salted butter, melted and cooled
For the icing:
- 2 envelopes (¼-ounce/7g) powdered gelatin
- ¾ cup (75g) cocoa powder
- 1 cup + 2 tbsp (225g) sugar
- 1 cup (240ml) warm water
- ⅓ cup (75ml) heavy cream
- 2 oz (55g) dark chocolate, broken into pieces
Instructions
- Preheat the Oven: Start by preheating your oven to 350°F (175°C). Grease and line an 8-inch round cake pan with parchment paper to make sure the cake doesn’t stick.
- Prepare the Cake Batter: In a large bowl, whisk together the eggs and sugar until it’s light and fluffy. This should take about 4-5 minutes. I love using an electric mixer for this, but you can always do it by hand if you’re feeling strong!
- Add Dry Ingredients: In a separate bowl, sift together the flour, baking powder, and salt. Gradually add this dry mixture into the egg-sugar mixture, folding it gently until well combined.
- Incorporate the Butter: Pour in the melted butter and mix it into the batter. It’ll help the cake stay moist and add a nice richness.
- Bake the Cake: Pour the batter into the prepared pan and smooth the top. Bake for 25-30 minutes or until a toothpick inserted into the center comes out clean. Let the cake cool in the pan for about 10 minutes, then transfer it to a wire rack to cool completely.
- Prepare the Icing: While the cake is cooling, prepare the glossy chocolate mirror icing. In a small bowl, sprinkle the powdered gelatin over ¼ cup of the warm water. Let it bloom for about 5 minutes.
- Cook the Icing: In a saucepan, combine the sugar, cocoa powder, and remaining water. Heat over medium heat, stirring until the sugar and cocoa dissolve completely. Add the heavy cream and bring the mixture to a gentle boil.
- Add Gelatin and Chocolate: Once the mixture is boiling, remove it from the heat. Stir in the bloomed gelatin until it dissolves completely, then add the dark chocolate pieces. Stir until the chocolate melts smoothly and the icing is glossy.
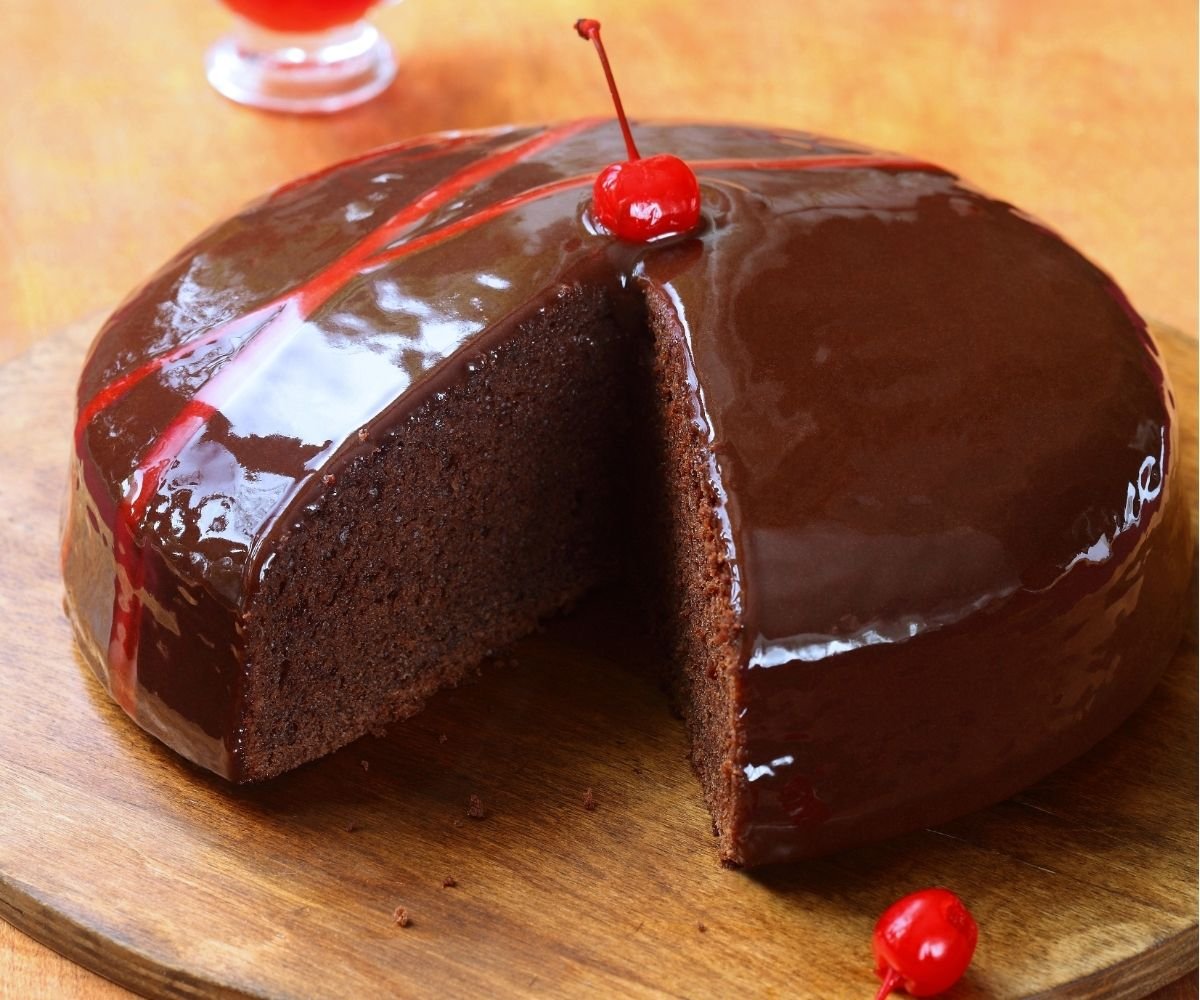
- Glaze the Cake: Let the icing cool for a few minutes, then pour it over the cooled cake. Use a spatula to spread it evenly, allowing the glaze to drip down the sides. For a perfect finish, make sure the glaze is poured gently and evenly to create that beautiful mirror effect.
- Chill the Cake: Refrigerate the cake for at least 1 hour to allow the icing to set properly. When you slice into it, you’ll see that gorgeous glossy layer on top!
Storage And Freezing
To keep your Chocolate Mirror Cake fresh, store it in an airtight container at room temperature for up to 3 days. If you need to store it longer, you can refrigerate it, but be sure to let the cake come to room temperature before serving to maintain its flavor and texture.
For longer storage, you can freeze the cake. Simply wrap it tightly in plastic wrap or aluminum foil, and then place it in a freezer-safe bag or container. It will stay fresh in the freezer for up to 2-3 months. To enjoy it again, let the cake thaw in the fridge overnight, then bring it to room temperature before glazing or serving. This way, you can enjoy a piece of this delicious cake whenever you crave it!
Chocolate Mirror Cake
Ingredients
Method
- Start by preheating your oven to 350°F (175°C). Grease and line an 8-inch round cake pan with parchment paper to make sure the cake doesn’t stick.
- In a large bowl, whisk together the eggs and sugar until it’s light and fluffy. This should take about 4-5 minutes. I love using an electric mixer for this, but you can always do it by hand if you’re feeling strong!
- In a separate bowl, sift together the flour, baking powder, and salt. Gradually add this dry mixture into the egg-sugar mixture, folding it gently until well combined.
- Pour in the melted butter and mix it into the batter. It’ll help the cake stay moist and add a nice richness.
- Pour the batter into the prepared pan and smooth the top. Bake for 25-30 minutes or until a toothpick inserted into the center comes out clean. Let the cake cool in the pan for about 10 minutes, then transfer it to a wire rack to cool completely.
- While the cake is cooling, prepare the glossy chocolate mirror icing. In a small bowl, sprinkle the powdered gelatin over ¼ cup of the warm water. Let it bloom for about 5 minutes.
- In a saucepan, combine the sugar, cocoa powder, and remaining water. Heat over medium heat, stirring until the sugar and cocoa dissolve completely. Add the heavy cream and bring the mixture to a gentle boil.
- Once the mixture is boiling, remove it from the heat. Stir in the bloomed gelatin until it dissolves completely, then add the dark chocolate pieces. Stir until the chocolate melts smoothly and the icing is glossy.
- Let the icing cool for a few minutes, then pour it over the cooled cake. Use a spatula to spread it evenly, allowing the glaze to drip down the sides. For a perfect finish, make sure the glaze is poured gently and evenly to create that beautiful mirror effect.
- Refrigerate the cake for at least 1 hour to allow the icing to set properly. When you slice into it, you’ll see that gorgeous glossy layer on top!
Notes
Nutritional Value (Per Serving)
- Calories: 380
- Fat: 22g
- Carbs: 44g
- Protein: 5g
- Fiber: 3g
- Sugar: 29g
If you love our Chocolate Mirror Cake Recipe, you’ll want to try Mary Berry’s Battenberg Cake next. It’s a treat that’s just as flavorful and fun!
Conclusion
This Chocolate Mirror Cake is a true showstopper. The cake is light and fluffy, while the glossy chocolate icing adds a touch of elegance. It may look like an advanced recipe, but once you get the hang of it, you’ll feel like a cake artist every time you make it. Perfect for celebrations or just when you want to enjoy a beautiful slice of chocolate heaven!