I remember the first time I tried Mary Berry’s no-bake cheesecake on a sweltering summer day when turning on the oven felt impossible. The way this simple recipe came together in minutes, just mixing and chilling, seemed almost too easy to produce something truly delicious.
But when I pulled it from the fridge hours later, that perfectly set filling on its buttery biscuit base looked absolutely stunning. One taste of that creamy, velvety texture convinced me this would become my go-to dessert for every warm weather gathering. If you want a famous Mary Berry cheesecake no-bake that delivers impressive results without any baking stress, this is the one you need.
Why You’Ll Love This No-Bake Cheesecake
Because there’s no oven involved, this cheesecake comes together in about 15 minutes of actual work, which means you can make it in the morning and have it ready by dinner without breaking a sweat. The lemon filling tastes incredibly fresh and tangy, cutting through the richness in that perfect way where you somehow convince yourself it’s almost healthy.
The crust stays crunchy, the cream stays fluffy, and honestly, the whole thing just works. Plus, when someone asks how you made it and you casually mention “no baking required,” you’ll feel like an absolute genius.
What Ingredients Are In No-Bake Cheesecake?
This no-bake lemon cheesecake requires just a handful of straightforward ingredients that you can probably find at any grocery store. The recipe is divided into three simple components: the biscuit base, the creamy lemon filling, and the fruit topping. Nothing fancy or hard to track down—just quality basics that come together to create something genuinely impressive.
For the crust:
- 1¼ cups (175g) graham crackers
- ⅓ cup (75g) salted butter
- 3 tablespoons (40g) demerara sugar
For the cheesecake:
- 1 cup (225g) full-fat cream cheese
- 3 tablespoons (30g) granulated sugar
- ⅔ cup (150ml) heavy cream
- ½ cup (150g) full-fat Greek yogurt
- Juice of 1½ lemons
For the topping:
- 1½ cups (175g) raspberries or other soft fruits
- 1–2 tablespoons red currant jelly
Make sure your cream cheese is at room temperature before you start—it’ll blend much more smoothly and prevent lumps in your filling. Don’t be tempted to use low-fat alternatives for the cream cheese, heavy cream, or Greek yogurt; the full-fat versions are essential for achieving that luxurious, stable texture that sets properly without gelatin. Fresh lemon juice makes all the difference here, so skip the bottled stuff if you can. As for the fruit topping, feel free to swap raspberries for strawberries, blueberries, or whatever looks good at the market.
Looking for more from-scratch baking? Our Zucchini Loaves is wonderfully satisfying to make.
How To Make This No-Bake Cheesecake
- Begin by preparing the crust, which forms the foundation of this elegant dessert. Crush 1¼ cups (175g) of graham crackers into fine crumbs and combine them with ⅓ cup (75g) of melted salted butter and 3 tbsps (40g) of demerara sugar.
- Mix until the texture resembles wet sand, then press the mixture firmly over the bottom and sides of a 9-inch springform pan, creating an even, compact layer. This crust provides structural support and a pleasant textural contrast to the creamy filling.
- For the cheesecake filling, start by beating 1 cup (225g) of full-fat cream cheese with 3 tbsps (30g) of granulated sugar until smooth and combined. Gently fold in ⅔ cup (150ml) of heavy cream and ½ cup (150g) of full-fat Greek yogurt, blending until no streaks remain.
- Gradually whisk in the juice of 1½ lemons, adding it slowly to guarantee the mixture doesn’t curdle and to allow you to adjust the tartness to your preference. Pour the smooth filling into the prepared crust and refrigerate overnight, allowing the cheesecake to set completely without any baking required.
- Once the cheesecake has chilled thoroughly, loosen the edges with a thin knife and carefully remove it from the springform pan. Arrange 1½ cups (175g) of fresh raspberries or other soft fruits over the top in an attractive pattern.
- Warm 1–2 tbsps of red currant jelly and brush it gently over the fruit to create a glossy, jewel-like finish that seals in freshness and adds visual appeal. Allow the glaze to set briefly before serving the cheesecake chilled.
Mary Berry Cheesecake No-Bake
Ingredients
Method
- Begin by preparing the crust, which forms the foundation of this elegant dessert. Crush 1¼ cups (175g) of graham crackers into fine crumbs and combine them with ⅓ cup (75g) of melted salted butter and 3 tbsps (40g) of demerara sugar.
- Mix until the texture resembles wet sand, then press the mixture firmly over the bottom and sides of a 9-inch springform pan, creating an even, compact layer. This crust provides structural support and a pleasant textural contrast to the creamy filling.
- For the cheesecake filling, start by beating 1 cup (225g) of full-fat cream cheese with 3 tbsps (30g) of granulated sugar until smooth and combined. Gently fold in ⅔ cup (150ml) of heavy cream and ½ cup (150g) of full-fat Greek yogurt, blending until no streaks remain.
- Gradually whisk in the juice of 1½ lemons, adding it slowly to guarantee the mixture doesn’t curdle and to allow you to adjust the tartness to your preference. Pour the smooth filling into the prepared crust and refrigerate overnight, allowing the cheesecake to set completely without any baking required.
- Once the cheesecake has chilled thoroughly, loosen the edges with a thin knife and carefully remove it from the springform pan. Arrange 1½ cups (175g) of fresh raspberries or other soft fruits over the top in an attractive pattern.
- Warm 1–2 tbsps of red currant jelly and brush it gently over the fruit to create a glossy, jewel-like finish that seals in freshness and adds visual appeal. Allow the glaze to set briefly before serving the cheesecake chilled.
Notes
How Long Does Mary Berry No-Bake Cheesecake Take To Set?
Mary Berry’s no-bake cheesecake requires a minimum of 4 to 6 hours in the refrigerator to set properly. However, for the best results and cleanest slices, overnight chilling is highly recommended. This extended time allows the cream cheese mixture to firm up completely and develop its full flavor. The setting time depends on several factors, including your refrigerator temperature and the depth of your cheesecake tin. Deeper cheesecakes naturally take longer to set than shallow ones. Always check the center is firm to the touch before serving. Avoid the temptation to freeze your cheesecake to speed up the process. While freezing works for storage, rapid temperature changes can affect the texture. Room temperature ingredients and proper chilling time are the secrets to achieving that perfect, sliceable consistency Mary Berry is famous for.How Long Does Mary Berry No-Bake Cheesecake Take To Set?
Mary Berry’s no-bake cheesecake requires a minimum of 4 to 6 hours in the refrigerator to set properly. However, for the best results and cleanest slices, overnight chilling is highly recommended. This extended time allows the cream cheese mixture to firm up completely and develop its full flavor.
The setting time depends on several factors, including your refrigerator temperature and the depth of your cheesecake tin. Deeper cheesecakes naturally take longer to set than shallow ones. Always check the center is firm to the touch before serving.
Avoid the temptation to freeze your cheesecake to speed up the process. While freezing works for storage, rapid temperature changes can affect the texture. Room temperature ingredients and proper chilling time are the secrets to achieving that perfect, sliceable consistency Mary Berry is famous for.
No-Bake Cheesecake Substitutions And Variations
One of the best things about this cheesecake, honestly, is how forgiving it is when you need to swap ingredients or change things up. Out of Greek yogurt? Use sour cream instead, same amount. Want a different crust? Try digestive biscuits, gingersnaps, or even Oreos if you’re feeling wild. The lemon can become lime, orange, or even passion fruit if you want something tropical. For the topping, literally any berry works, or go with a chocolate drizzle situation. No red currant jelly? Warm some raspberry jam with a splash of water and brush it on.
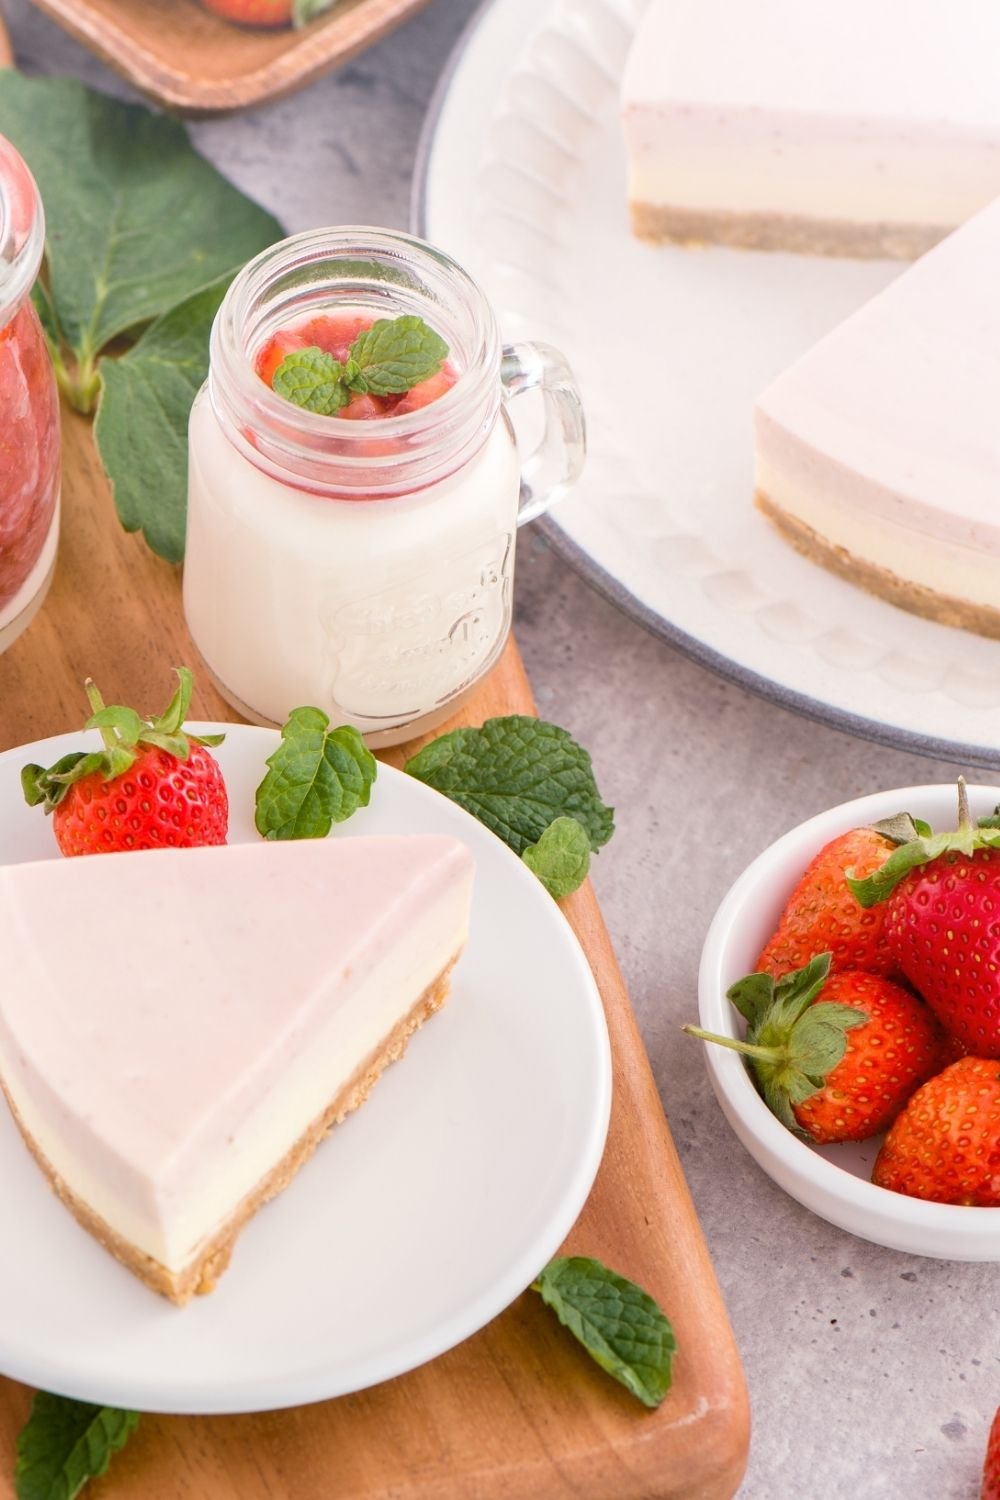
What To Serve With No-Bake Cheesecake
What goes with a no-bake lemon cheesecake, you ask? I’d keep it simple, honestly. Fresh berries are already on top, so you don’t need much else. Maybe a cup of strong coffee or tea to cut through that rich, creamy filling. If you’re feeling fancy, a light fruit salad on the side works beautifully, something with melon and mint. Or serve it after a light meal, like grilled chicken and salad, since this dessert is pretty decadent. The lemon brightness means it pairs well with just about anything, though I wouldn’t follow up a heavy lasagna with this.
Final Thoughts
This cheesecake, honestly, it’s the kind of recipe I wish I’d discovered years ago when I was terrified of water baths and cracked tops. No oven drama, no stress, just mix and chill. The lemon keeps it bright, the cream cheese makes it lush, and that crunchy biscuit base, well, it grounds everything. You don’t need fancy skills or special equipment. Just a bowl, a spoon, and patience while it sets. If you’re looking for a dessert that looks impressive but won’t make you want to throw your whisk across the kitchen, this is it.