My kitchen was a disaster when I first attempted homemade chocolate covered pretzels. I was hosting a last-minute dinner party, realized I’d forgotten to buy dessert, and suddenly remembered my grandmother used to make these in her kitchen in about half an hour. I had pretzels left over from my kid’s lunchbox, some chocolate chips in the pantry, and nothing to lose. The pretzels turned out perfect. My guests absolutely demolished them. And yeah, someone asked for the recipe on the way out the door.
That was about eight years ago. I’ve made them hundreds of times since—sometimes intentionally, sometimes last-minute, sometimes because I was procrastinating on actual work and just needed something to do with my hands. They’ve become my go-to move when I need a dessert that doesn’t feel like I’m trying too hard but is impressive anyway.
The thing about chocolate covered pretzels is they feel deceptively simple. Three ingredients. Twenty minutes of actual work. But somehow they manage to impress people in a way that homemade brownies or cookies sometimes don’t. Maybe it’s because people don’t expect homemade versions to exist. Or maybe it’s just that the sweet-salty combination legitimately works at a neurological level. Either way, this is the recipe I keep coming back to when I want people to think I spent hours in the kitchen but I actually just stood in front of my stove with a bowl of melted chocolate.
Also read: Strawberry Pretzel Salad Recipe: The Perfect Three-Layer Dessert
Why Make Homemade Chocolate Covered Pretzels?
I get asked this question pretty often, especially by people who figure it’s easier to just buy them. And sure, you could do that. But there are so many reasons why making them at home is worth the minimal effort involved.
You control the quality of ingredients. When you make them yourself, you get to choose exactly what chocolate goes into them. Want to use a premium brand? Go ahead. Prefer a specific type of milk chocolate? You’ve got it. This level of control over ingredients is something you simply don’t get with store-bought versions, which often contain additives and preservatives you might want to avoid.
They’re more cost-effective. Homemade chocolate covered pretzels cost a fraction of what you’d pay at a specialty store or even a regular grocery store. We’re talking about three ingredients, most of which you probably already have in your pantry. For the price of a small box of store-bought pretzels, you can make two or three times as many homemade versions.
The flavor is incomparable. Fresh homemade chocolate covered pretzels have a taste and texture that’s just different from anything you can buy. The chocolate is smooth and melts beautifully, the pretzels stay crispy, and the ratio of chocolate to pretzel is exactly what you want it to be.
They make impressive gifts. There’s something about giving someone a homemade treat that feels so much more thoughtful than a store-bought gift. Package these up in a nice box or jar with some tissue paper, and you’ve got a gift that looks fancy but cost you minimal time and money. People absolutely love them, and they often ask for the recipe afterward.
Perfect for any occasion. Whether you’re hosting a party, attending a potluck, need a quick dessert for a gathering, or just want to have some on hand for snacking, chocolate covered pretzels fit the bill perfectly. They’re not too heavy, not too rich, and that sweet-salty combination appeals to almost everyone.
They’re beginner-friendly. If you’re nervous about your cooking or baking skills, this is the recipe that will boost your confidence. There’s no complicated technique, no special equipment needed, and literally no way to fail. If you can melt chocolate and dip a pretzel, you can make these.
The Perfect Chocolate Covered Pretzel Ratio
One thing I’ve learned from making these hundreds of times is that the ratio of chocolate to pretzel matters. Too much chocolate and your pretzel becomes more of a chocolate treat with a pretzel inside. Too little and you lose that beautiful chocolate coating effect. This recipe hits the sweet spot perfectly, giving you that satisfying chocolate-to-pretzel balance that makes you want to reach for another one immediately.
The 6 ounces of chocolate to 24 pretzels means each pretzel gets a generous but not overwhelming coating. When you bite through, you get that crispy pretzel center with the chocolate shell, and that contrast is exactly what makes these so addictive.
Chocolate Covered Pretzels Recipe
Ingredients
- 6 ounces milk chocolate chips (about 1 cup)
- 2 tablespoons shortening (or 1/8 block paraffin wax)
- 24 pretzels, 3 inches in size
A note about the chocolate chips: Quality matters here. While you don’t need to use expensive artisan chocolate, avoid the absolute cheapest options. Mid-range chocolate chips like Ghirardelli or Nestle work beautifully and will give you better results than the bargain brands. If you want to splurge, premium chocolate chips will make these taste even more special.
About the shortening: This is what makes your chocolate dippable and prevents it from becoming thick and stiff. Vegetable shortening is the easier option and more commonly found in kitchens. Paraffin wax is traditional for candy making and creates a thinner, crispier chocolate shell, but it’s less common and harder to find. Either option works beautifully, so use what you can find.
Pretzel selection: Look for traditional twisted pretzels that are about 3 inches in size. These are the classic pretzel rods, not the tiny snack pretzels or the jumbo kinds. Size matters because 3-inch pretzels are perfect for one-bite treats and are the ideal size for dipping.
Instructions
Step 1: Prepare Your Workspace
Before you start melting anything, take a few minutes to set up. Line a cookie sheet with wax paper. This is non-negotiable. The wax paper prevents sticking and makes cleanup a breeze. If you don’t have wax paper, parchment paper works in a pinch, though wax paper is superior for this application because chocolate doesn’t stick to it as readily as it does to parchment.
Having your workspace prepped before you melt the chocolate is important because once you start dipping, you’ll want to work efficiently. Chocolate can thicken up quickly, especially if you’re using a microwave, so having everything ready means you won’t scramble trying to find wax paper while your chocolate sits there getting thick.
I also recommend having all 24 pretzels laid out and ready to grab. Some people like to arrange them in a line near their work station so they can just pick them up and dip without fumbling around looking for them.
Step 2: Melt the Chocolate and Shortening
You have two methods for melting: the double boiler method and the microwave method. Both work equally well, so choose based on what you’re most comfortable with.
Double boiler method: Fill a pot with about 2 inches of water. Bring the water to a gentle simmer (not a rolling boil). Place a heat-safe bowl on top of the pot, making sure the bottom of the bowl doesn’t touch the water. Add your chocolate chips and shortening to the bowl. The gentle heat from the steam will melt them slowly and evenly, which is actually ideal for chocolate. Stir occasionally with a rubber spatula.
The advantage of the double boiler is that it’s harder to overheat the chocolate, which can cause it to become grainy or separate. It’s the gentler method, and honestly, it’s my preferred technique when I have the time.
Microwave method: Place your chocolate chips and shortening in a microwave-safe bowl. Heat on 50% power (medium power) for 30 seconds, then stir. Continue heating in 30-second intervals, stirring between each interval, until everything is melted and smooth. The key here is to use medium power and short intervals. Microwaves are unpredictable, and high power can overheat chocolate. By using medium power and checking frequently, you maintain better control over the temperature.
Most of the time, the microwave method takes about 1 to 2 minutes total, so it’s faster than the double boiler if you’re in a hurry.
Why do we add shortening? Pure chocolate, when melted, becomes quite thick and viscous. Adding shortening thins it out to the perfect consistency for dipping. It makes the chocolate flow smoothly off your pretzels and creates a silky coating rather than a thick, clumpy one. The shortening also helps the chocolate set more smoothly once it cools, giving you that beautiful, glossy finish.
Step 3: Achieve the Perfect Consistency
Once your chocolate is melted, stir it really well until it’s completely smooth. Make sure there are no lumps or unmelted bits. This is important because lumpy chocolate will coat unevenly.
If you’re using a double boiler, keep the bowl over the hot water. The heat from below will keep the chocolate at a perfect dipping temperature without getting too thick. If you used the microwave, your chocolate will start to thicken as it sits, which is normal. You’ll likely need to reheat it briefly as you work. Have the microwave ready and be prepared to give it 10 to 15 seconds of heat if the chocolate becomes too thick to dip easily.
The ideal consistency is similar to heavy cream. It should flow smoothly but coat your pretzel evenly. If it’s too thick, it becomes hard to dip and creates a clumpy coating. If it’s too thin, the chocolate won’t stick well and will drip off. The shortening helps get you to that perfect middle ground.
Step 4: Dip Each Pretzel
Now comes the fun part. Pick up a pretzel and gently dip it into the chocolate. You want the chocolate to coat the pretzel completely or almost completely, depending on your preference. Some people like to leave just the very tip uncovered so they have something to hold without getting chocolate on their hands. Others go for almost full coverage.
The key to success here is not leaving the pretzel in the chocolate too long. A quick dip, about 1 to 2 seconds, is all you need. If you leave it in longer, the chocolate will be overly thick on the pretzel, and you’ll have pools of chocolate that drip off and waste product.
As you lift the pretzel out, let the excess chocolate drip back into the bowl. Tilt the pretzel slightly and hold it over the bowl for just a second or two, letting gravity do the work. This ensures you get a nice, even coating without too much excess.
Step 5: Place on Prepared Surface
Carefully place each chocolate-covered pretzel on your prepared wax paper. If you’re working quickly enough that the chocolate is still warm, the pretzels will stay in place easily. If they’re setting too quickly, just be gentle and make sure they’re fully on the paper.
Space them out so they’re not touching each other. If they touch while the chocolate is still soft, they might stick together, which defeats the purpose. Give each pretzel a little room to set undisturbed.
Step 6: Chill Until Firm
Transfer your cookie sheet to the refrigerator. The pretzels need to stay in the fridge for at least 15 minutes, but honestly, giving them 20 to 30 minutes is even better. This allows the chocolate coating to set completely and become firm. Once they’re fully set, the chocolate won’t stick to your fingers, and the pretzels will have that satisfying snap when you bite into them.
After they’re firm, you can transfer them to an airtight container for storage, or keep them on the cookie sheet until you’re ready to serve them.
Chocolate Covered Pretzels Recipe
Ingredients
Method
- Before you start melting anything, take a few minutes to set up. Line a cookie sheet with wax paper. This is non-negotiable. The wax paper prevents sticking and makes cleanup a breeze. If you don’t have wax paper, parchment paper works in a pinch, though wax paper is superior for this application because chocolate doesn’t stick to it as readily as it does to parchment. Having your workspace prepped before you melt the chocolate is important because once you start dipping, you’ll want to work efficiently. Chocolate can thicken up quickly, especially if you’re using a microwave, so having everything ready means you won’t scramble trying to find wax paper while your chocolate sits there getting thick. I also recommend having all 24 pretzels laid out and ready to grab. Some people like to arrange them in a line near their work station so they can just pick them up and dip without fumbling around looking for them.
- You have two methods for melting: the double boiler method and the microwave method. Both work equally well, so choose based on what you’re most comfortable with. Double boiler method: Fill a pot with about 2 inches of water. Bring the water to a gentle simmer (not a rolling boil). Place a heat-safe bowl on top of the pot, making sure the bottom of the bowl doesn’t touch the water. Add your chocolate chips and shortening to the bowl. The gentle heat from the steam will melt them slowly and evenly, which is actually ideal for chocolate. Stir occasionally with a rubber spatula. The advantage of the double boiler is that it’s harder to overheat the chocolate, which can cause it to become grainy or separate. It’s the gentler method, and honestly, it’s my preferred technique when I have the time. Microwave method: Place your chocolate chips and shortening in a microwave-safe bowl. Heat on 50% power (medium power) for 30 seconds, then stir. Continue heating in 30-second intervals, stirring between each interval, until everything is melted and smooth. The key here is to use medium power and short intervals. Microwaves are unpredictable, and high power can overheat chocolate. By using medium power and checking frequently, you maintain better control over the temperature. Most of the time, the microwave method takes about 1 to 2 minutes total, so it’s faster than the double boiler if you’re in a hurry. Why do we add shortening? Pure chocolate, when melted, becomes quite thick and viscous. Adding shortening thins it out to the perfect consistency for dipping. It makes the chocolate flow smoothly off your pretzels and creates a silky coating rather than a thick, clumpy one. The shortening also helps the chocolate set more smoothly once it cools, giving you that beautiful, glossy finish.
- Once your chocolate is melted, stir it really well until it’s completely smooth. Make sure there are no lumps or unmelted bits. This is important because lumpy chocolate will coat unevenly. If you’re using a double boiler, keep the bowl over the hot water. The heat from below will keep the chocolate at a perfect dipping temperature without getting too thick. If you used the microwave, your chocolate will start to thicken as it sits, which is normal. You’ll likely need to reheat it briefly as you work. Have the microwave ready and be prepared to give it 10 to 15 seconds of heat if the chocolate becomes too thick to dip easily. The ideal consistency is similar to heavy cream. It should flow smoothly but coat your pretzel evenly. If it’s too thick, it becomes hard to dip and creates a clumpy coating. If it’s too thin, the chocolate won’t stick well and will drip off. The shortening helps get you to that perfect middle ground.
- Now comes the fun part. Pick up a pretzel and gently dip it into the chocolate. You want the chocolate to coat the pretzel completely or almost completely, depending on your preference. Some people like to leave just the very tip uncovered so they have something to hold without getting chocolate on their hands. Others go for almost full coverage. The key to success here is not leaving the pretzel in the chocolate too long. A quick dip, about 1 to 2 seconds, is all you need. If you leave it in longer, the chocolate will be overly thick on the pretzel, and you’ll have pools of chocolate that drip off and waste product. As you lift the pretzel out, let the excess chocolate drip back into the bowl. Tilt the pretzel slightly and hold it over the bowl for just a second or two, letting gravity do the work. This ensures you get a nice, even coating without too much excess.
- Carefully place each chocolate-covered pretzel on your prepared wax paper. If you’re working quickly enough that the chocolate is still warm, the pretzels will stay in place easily. If they’re setting too quickly, just be gentle and make sure they’re fully on the paper. Space them out so they’re not touching each other. If they touch while the chocolate is still soft, they might stick together, which defeats the purpose. Give each pretzel a little room to set undisturbed.
- Transfer your cookie sheet to the refrigerator. The pretzels need to stay in the fridge for at least 15 minutes, but honestly, giving them 20 to 30 minutes is even better. This allows the chocolate coating to set completely and become firm. Once they’re fully set, the chocolate won’t stick to your fingers, and the pretzels will have that satisfying snap when you bite into them. After they’re firm, you can transfer them to an airtight container for storage, or keep them on the cookie sheet until you’re ready to serve them.
Notes
Storage Tips And Shelf Life
Room Temperature Storage Chocolate covered pretzels keep beautifully at room temperature, especially if you live in a cool climate. Store them in an airtight container in a cool, dry place. They’ll stay fresh and maintain their crispy texture for up to one week. If your kitchen is particularly warm, room temperature storage might not be ideal, and you’d be better off refrigerating them. Refrigerator Storage I actually prefer storing these in the refrigerator. They keep for up to two weeks in an airtight container, and the cold helps preserve the texture and prevent any softening of the chocolate. The chocolate also stays firmer and more snappy in the fridge, which adds to the eating experience. Just make sure to let them come to room temperature for a minute or two before serving if you want the chocolate to be a bit less rigid. Freezer Storage These freeze beautifully for up to three months. Layer them in a freezer-safe container with parchment paper between the layers so they don’t stick together. When you’re ready to enjoy them, remove them from the freezer and let them come to room temperature before opening the container. This prevents condensation from forming on the chocolate, which would make them wet and ruin the texture. Gift Giving These make amazing homemade gifts. Package them in a pretty box or jar, add some tissue paper or decorative paper, and you’ve got a gift that looks fancy and impressive but cost you minimal time and money. People genuinely love receiving homemade treats, and these are impressive enough that they feel special without being overly difficult to make. Travel and Transport If you’re bringing these to a party or potluck, keep them cool during transport. Use an insulated bag with an ice pack if the weather is warm. You want to prevent any melting before serving. Once you arrive, store them in the coolest available location until serving time.Variations And Flavor Combinations
Dark Chocolate Pretzels
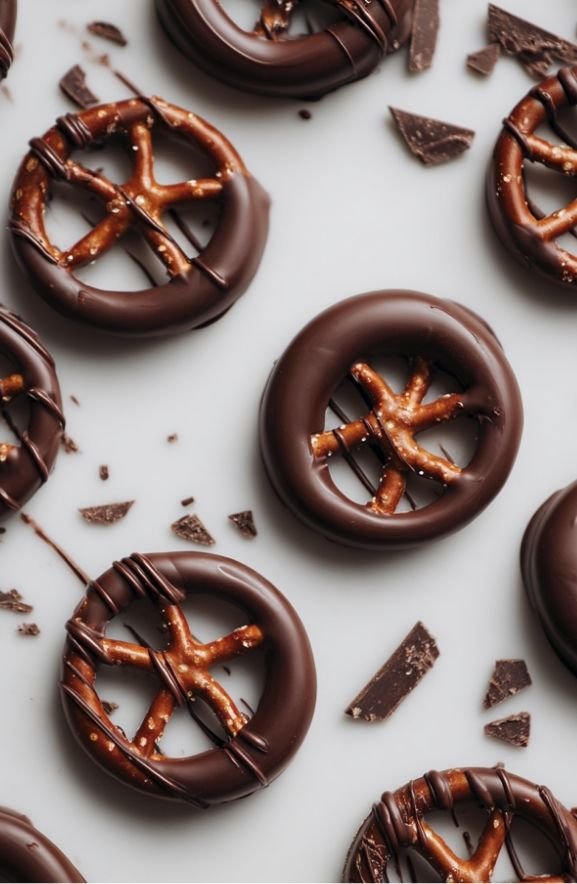
If you prefer a more sophisticated, less sweet treat, swap the milk chocolate for dark chocolate chips. Dark chocolate (70% cacao is a good starting point) creates a more grown-up flavor and balances beautifully with the salty pretzel. The slight bitterness of dark chocolate makes the salty pretzel taste even saltier by contrast, which creates a really interesting flavor profile. Dark chocolate fans absolutely love this version.
White Chocolate Pretzels
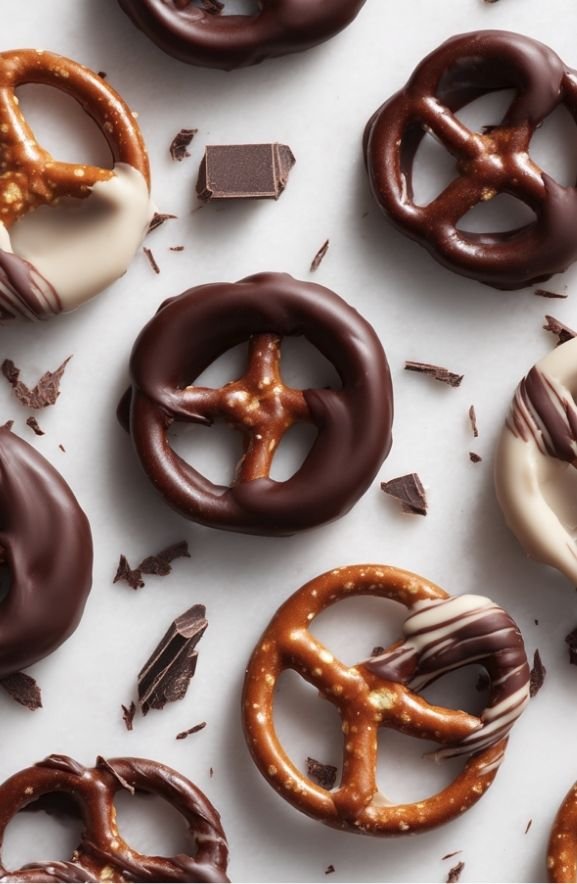
White chocolate creates a creamier, more luxurious version of this treat. The sweetness of white chocolate combined with the salty pretzel is absolutely delicious. One thing to note: white chocolate is already quite soft, so you might want to reduce the shortening by about half a tablespoon. White chocolate also tends to be more finicky about temperature, so if you’re using the microwave method, be extra careful with short intervals.
Chocolate Peanut Pretzels
Dip your pretzels in chocolate as usual, but immediately after placing them on the wax paper (while the chocolate is still soft), sprinkle finely chopped peanuts, peanut pieces, or even crushed peanut butter cups on top. The combination of chocolate, peanuts, and salty pretzels is absolutely divine. You’re adding protein and making these feel a bit more substantial, which is nice.
Sprinkle-Top Variations
The moment after you place a chocolate-covered pretzel on the wax paper, before the chocolate sets, you can add any toppings you like. Consider rainbow sprinkles for a fun, colorful look. Crushed candy canes create a festive holiday treat. Mini chocolate chips add extra chocolate flavor. Toasted coconut creates a tropical version. Sea salt flakes emphasize the sweet-salty contrast. The possibilities are endless, and this is a great way to customize them for different occasions or holidays.
Flavor-Infused Chocolate
You can add interesting flavors directly to your melted chocolate. A pinch of cinnamon creates a warm spice note. A teaspoon of instant espresso powder (dissolved in a tiny bit of warm water first) adds depth to the chocolate flavor. A touch of peppermint extract creates a festive holiday version. Vanilla extract adds warmth. These small additions totally transform the flavor profile and make your pretzels feel more sophisticated.
Drizzled Pretzels
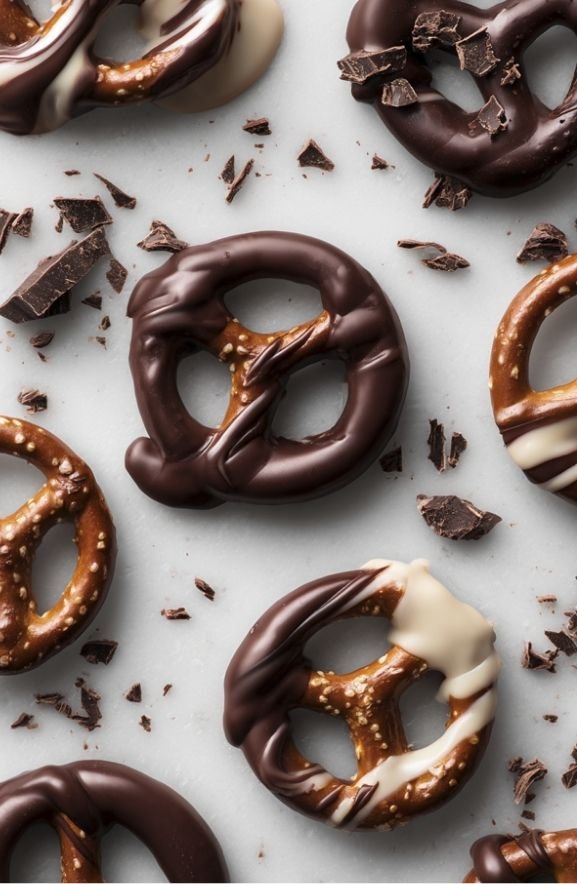
Instead of fully dipping, try drizzling chocolate over pretzels. Use a fork or whisk to drizzle thin lines of melted chocolate across each pretzel. This creates a more elegant look and uses less chocolate. It’s also a nice variation that appeals to people who want a lighter chocolate-to-pretzel ratio.
Coconut Chocolate Pretzels
Dip your pretzels in chocolate, then immediately top with toasted shredded coconut. The tropical flavor of coconut with the sweet chocolate and salty pretzel is a combination that works better than you’d expect.
Almond Joy Inspired
Combine dark chocolate with toasted coconut and maybe a few pieces of dark chocolate on top to create something reminiscent of an Almond Joy bar. You could even add chopped almonds if you want to commit to the theme.
Storage Tips And Shelf Life
Room Temperature Storage
Chocolate covered pretzels keep beautifully at room temperature, especially if you live in a cool climate. Store them in an airtight container in a cool, dry place. They’ll stay fresh and maintain their crispy texture for up to one week. If your kitchen is particularly warm, room temperature storage might not be ideal, and you’d be better off refrigerating them.
Refrigerator Storage
I actually prefer storing these in the refrigerator. They keep for up to two weeks in an airtight container, and the cold helps preserve the texture and prevent any softening of the chocolate. The chocolate also stays firmer and more snappy in the fridge, which adds to the eating experience. Just make sure to let them come to room temperature for a minute or two before serving if you want the chocolate to be a bit less rigid.
Freezer Storage
These freeze beautifully for up to three months. Layer them in a freezer-safe container with parchment paper between the layers so they don’t stick together. When you’re ready to enjoy them, remove them from the freezer and let them come to room temperature before opening the container. This prevents condensation from forming on the chocolate, which would make them wet and ruin the texture.
Gift Giving
These make amazing homemade gifts. Package them in a pretty box or jar, add some tissue paper or decorative paper, and you’ve got a gift that looks fancy and impressive but cost you minimal time and money. People genuinely love receiving homemade treats, and these are impressive enough that they feel special without being overly difficult to make.
Travel and Transport
If you’re bringing these to a party or potluck, keep them cool during transport. Use an insulated bag with an ice pack if the weather is warm. You want to prevent any melting before serving. Once you arrive, store them in the coolest available location until serving time.
Make-Ahead Strategy For Parties
One of the best things about this recipe is how far in advance you can make them. For a party next weekend, you could make these today and store them in the fridge. They’ll be perfect by the time you need them.
If you’re hosting a large party and want to offer a variety, you could make a batch of milk chocolate, a batch of dark chocolate, and a batch with sprinkles. Since each batch only takes about 30 minutes total, you could easily make three different varieties in an afternoon.
For holiday gatherings, you could make a big batch a week or two in advance and store them in the freezer. Then, a few days before the party, move them to the fridge. This spreads out the work and means you’re not scrambling to make treats the day of your event.
Why This Recipe Works So Well
I’ve tried a lot of chocolate covered pretzel recipes, and this one is honestly the best. It works because of the balance of simplicity and technique. The three-ingredient base means there’s very little that can go wrong. At the same time, the method is straightforward enough that even someone with minimal cooking experience can execute it successfully.
The ratio of chocolate to pretzel is perfected in this version. You get a generous coating without wasting chocolate or creating an overly chocolate-forward treat. The shortening is the secret ingredient that most people don’t think about, but it makes all the difference in creating a silky, smooth chocolate coating that’s pleasant to eat.
The chilling time is also perfectly calibrated. Fifteen minutes is enough time for the chocolate to set completely without you having to wait forever. If you’re in a rush, fifteen minutes is totally doable. If you want to be more patient and let them set for thirty minutes, they’ll be even more perfect.
Final Thoughts
Chocolate covered pretzels are one of those treats that bridges the gap between indulgence and everyday snacking. They’re fancy enough to serve at a party, simple enough to make for yourself on a random Tuesday, and special enough to give as a gift. This recipe delivers perfect results every single time, with minimal effort and maximum flavor.
Once you make these homemade, you’ll never go back to store-bought. Your friends and family will be amazed that you made them, and you’ll love knowing exactly what went into them. Plus, the cost savings alone make this recipe worth adding to your regular rotation.
So grab your chocolate chips, your shortening, your pretzels, and make a batch today. Trust me, you won’t regret it. These are the kind of treats that bring people joy, and there’s something really special about making something delicious with your own two hands.