You know that moment when fall hits and you can practically smell pumpkin spice in the air? This is the recipe that brings that feeling to life.
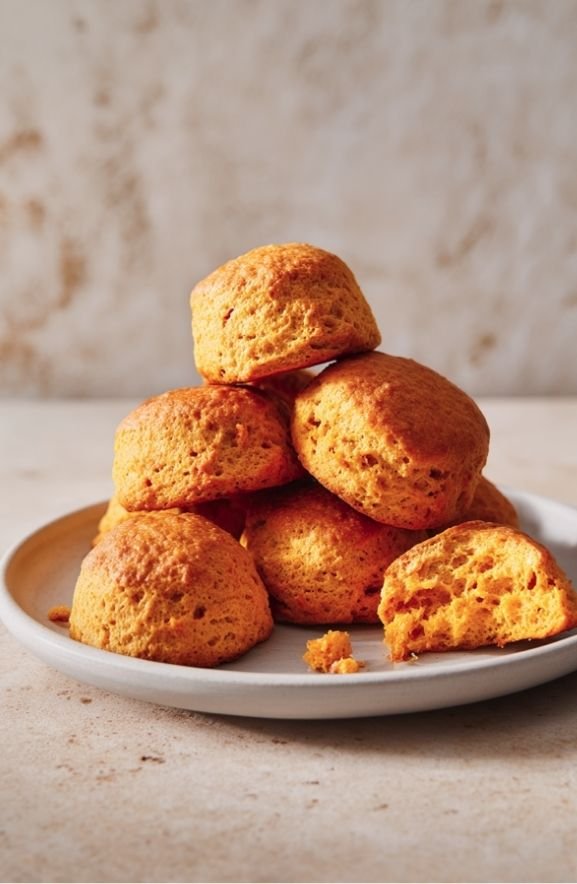
When these pumpkin scones come out of the oven, the aroma alone—ginger, cinnamon, pumpkin—fills your entire kitchen with that unmistakable autumn magic. It’s the kind of smell that makes everyone wonder what you’ve been baking.
Here’s what makes these different from every other pumpkin scone recipe out there: they don’t rely on basic pumpkin pie spice. Instead, they get their spice from a ginger triple-threat system, and trust me, this is genius.
You’ve got ground ginger powder creating the warm, familiar base. Then candied ginger adds sweetness and a little chew. And fresh ginger root brings brightness and a subtle heat that ties everything together.
The pumpkin puree keeps everything moist and tender (not dry like some scones can be). The combo of margarine and coconut oil creates this tender crumb that’s absolutely addictive.
The end result? Something that tastes like you bought it from a fancy bakery but you actually made it in your kitchen in less than 30 minutes.
Honestly, once fall hits, you’ll be making these multiple times a week. Fair warning.
Why These Pumpkin Scones Stand Out
Look, most pumpkin scones are pretty one-dimensional. You bite into them and all you taste is pumpkin pie spice mixed with pumpkin puree. Yawn.
These? These are different. And it’s all because of the ginger focus.
The genius move is the three-ginger system. Each form of ginger brings something totally different to the table, and together they create something magic.
Ground ginger powder gives you that warm, familiar spice taste. It’s what your brain recognizes as “comforting autumn spice.”
Candied ginger adds texture and sweetness. You actually get little chewy pieces in your scone, which breaks up the tender crumb in the best way.
Fresh ginger root brings the brightness that prevents everything from tasting flat or boring. It adds a subtle heat that makes you think “what IS that flavor?” when you eat it.
Put all three together, and you’ve got a spice profile that’s balanced, interesting, and honestly? Kind of addictive.
But here’s what really keeps you making these over and over: the texture. They’re moist because of the pumpkin but not heavy. Tender crumb but substantial enough to feel like actual food, not just air.
That margarine and coconut oil combo creates this perfect balance where the scones are tender enough to practically melt in your mouth but sturdy enough to actually hold together when you pick them up.
Also read: Strawberry Pretzel Salad Recipe: The Perfect Three-Layer Dessert
Understanding The Pumpkin And Ginger Components
Pumpkin Puree (2 cups)
The pumpkin is the star ingredient here, providing moisture, subtle sweetness, and that autumn flavor.
Two cups of pumpkin puree creates scones that are genuinely moist and tender.
The pumpkin also adds structure and helps bind the scones together without requiring eggs.
The moisture from the pumpkin means these scones won’t dry out as quickly as traditional scones.
Ground Ginger Powder (2 teaspoons)
This is your foundational ginger. It creates that warm, cozy spice that makes you think of fall.
Two teaspoons gives you noticeable ginger flavor without going overboard.
Quick tip: make sure your ground ginger is actually fresh. Older spices lose their punch, and you want maximum ginger flavor here.
Candied Ginger (2 tablespoons, finely minced)
This is where things get interesting. The candied ginger adds both sweetness and texture.
Those little chewy pieces break up the tender crumb and give you something to chew on.
The mincing is important—you want small pieces that distribute throughout the dough. Big chunks will make some scones overly gingery while others barely have any.
Fresh Ginger Root (1 tablespoon, finely shredded)
This is the star that brings everything together. Fresh ginger adds brightness and that subtle kick of heat.
Finely shredded (basically like a paste) is what you want. You don’t want visible chunks.
This is what prevents the scones from tasting flat. Trust me, don’t skip it.
Cinnamon (1/4 teaspoon)
Just a tiny amount here. Cinnamon is supporting the ginger, not taking over.
This small amount adds warmth but lets the ginger be the star.
Understanding The Fats: Margarine And Coconut Oil
The combination of margarine and coconut oil is unconventional but creates a unique texture.
Margarine alone would create a tender scone but might feel artificial.
Coconut oil alone might overpower with coconut flavor.
Together, they create a balance where the coconut oil adds subtle richness without being obvious.
Margarine (1/4 cup) provides structure and helps create the tender crumb.
Coconut oil (2 tablespoons) adds moisture and a subtle tropical undertone that complements ginger and pumpkin.
The combination is about 3/4 cup of fat total, which is appropriate for the amount of flour.
If you don’t want to use margarine, you could substitute butter, though the flavor will be slightly different.
If you don’t want coconut oil, use more margarine or butter, but you’ll lose the subtle complexity.
Ingredient Breakdown
Sugar (1/2 cup)
This provides sweetness without making the scones overly sweet.
The pumpkin puree adds inherent sweetness, so you don’t need excess sugar.
White granulated sugar works fine.
Flour (3 1/2 cups, using 1/2 white)
The recipe calls for 3 1/2 cups flour, with the recommendation to use 1/2 white flour (so 1 3/4 cups white and 1 3/4 cups other).
Using whole wheat or other specialty flours creates a denser, more interesting texture.
White bread flour adds structure and lift. All-purpose flour also works.
Whole wheat flour adds nuttiness and texture.
The combination creates a more complex flour profile than using all white flour.
Measure flour by spooning into cups and leveling off, not by scooping.
Baking Powder (2 teaspoons)
Baking powder creates lift and helps the scones rise.
Two teaspoons provides enough leavening for 3 1/2 cups of flour.
Baking Soda (1/2 teaspoon)
Baking soda adds additional lift and helps the scones rise even more.
The combination of baking powder and baking soda is what makes these scones light and airy.
Margarine (1/4 cup) and Coconut Oil (2 tablespoons)
These fats are cut into the dry ingredients to create a tender crumb.
The margarine should be cold or semi-cold. Warm fat won’t create the right texture.
The coconut oil adds moisture and subtle flavor.
Pumpkin Scones Recipe
Ingredients
- 1/2 cup sugar
- 3 1/2 cups flour (using 1/2 white flour recommended)
- 2 teaspoons baking powder
- 1/2 teaspoon baking soda
- 2 teaspoons ground ginger powder
- 2 tablespoons candied ginger, finely minced
- 1 tablespoon fresh ginger root, finely shredded
- 1/4 teaspoon cinnamon
- 1/4 cup margarine (cold or semi-cold)
- 2 tablespoons coconut oil
- 2 cups pumpkin puree
Instructions
Step 1: Preheat Oven
Get your oven to 425 degrees. Yeah, that’s a pretty hot oven, but that’s exactly what you want here.
Grab two baking sheets and line them with parchment paper. Trust me, parchment makes cleanup so much easier.
Why 425? Because this higher temperature helps the scones bake fast and get a slight crust on the outside while keeping the inside moist and tender.
Step 2: Combine Dry Ingredients
In a big bowl, throw together your dry ingredients: sugar, flour, baking powder, baking soda, ground ginger powder, and cinnamon.
Whisk these together really well. The goal is to make sure the leavening agents and spices are evenly spread throughout—no pockets of pure baking powder hiding in there.
This is important because you want every scone to taste the same and rise evenly.
Step 3: Cut In Fats
Cut your margarine and coconut oil into small pieces and add them to the dry mix a bit at a time.
Now here’s the key: you’re going to use a pastry cutter, two knives, or your fingertips to work the fats into the flour until it looks like breadcrumbs or coarse sand.
This is what creates those tender, flaky pockets when everything bakes. Don’t skip this step and don’t rush it. Take a few minutes and actually do the work.
Step 4: Add Pumpkin and Ginger
Pour in your pumpkin puree. Add your minced candied ginger and shredded fresh ginger.
Stir everything together until it’s all mixed. The dough will be thick and slightly sticky. This is exactly what you want.
Don’t go crazy with the mixing. Mix just until everything comes together. Overmixing makes tough scones, and you don’t want that.
Step 5: Knead Dough on Floured Surface
Turn the dough out onto a lightly floured surface. Give it a few gentle kneads—maybe 2-3 passes.
You’re just bringing it together, not developing gluten. Be gentle here.
Step 6: Shape Into Two Circles
Divide the dough in half. Press each half into a circle shape that’s a few inches thick—roughly 1/2 inch.
The thickness matters. Too thin and they’ll dry out. Too thick and they won’t bake through properly. That 1/2 inch is your sweet spot.
Don’t stress about perfect circles. Rustic is actually better.
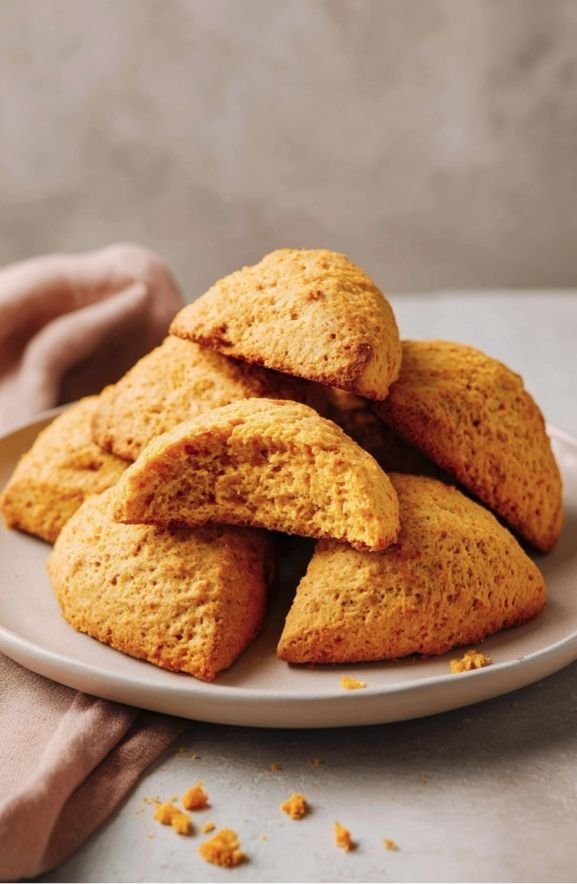
Step 7: Cut Into Triangular Wedges
Using a sharp knife, cut each circle into about 5 or 6 wedges. Think pizza, but with fewer, bigger slices.
You’ll end up with about 10-12 scones total. And here’s the thing: they don’t need to be perfectly even. Uneven actually looks more homemade and charming.
Step 8: Arrange on Baking Sheets
Place your wedges on the baking sheets with about 1-2 inches between them.
This spacing is important because they’ll expand a bit while baking and you don’t want them touching and baking together into one giant blob.
Step 9: Bake
Pop them into the oven at 425 degrees for 12-15 minutes.
You’re looking for them to be baked through but still moist inside. The outside should be set and just barely golden—not brown.
Here’s a tip: start checking at 12 minutes. Every oven is different, and overbaking is the enemy here. You want them tender, not dry.
They’re done when a toothpick in the center comes out with just a few moist crumbs—not wet batter, but not completely clean either.
Step 10: Cool Slightly Before Serving
Pull them out of the oven and let them sit on the baking sheet for a few minutes—3-5 minutes is perfect.
These are best served warm, so don’t wait forever. Serve them plain, with butter, with cream cheese spread, or with jam. You really can’t go wrong.
Pumpkin Scones Recipe
Ingredients
Method
- Get your oven to 425 degrees. Yeah, that’s a pretty hot oven, but that’s exactly what you want here. Grab two baking sheets and line them with parchment paper. Trust me, parchment makes cleanup so much easier. Why 425? Because this higher temperature helps the scones bake fast and get a slight crust on the outside while keeping the inside moist and tender.
- In a big bowl, throw together your dry ingredients: sugar, flour, baking powder, baking soda, ground ginger powder, and cinnamon. Whisk these together really well. The goal is to make sure the leavening agents and spices are evenly spread throughout, no pockets of pure baking powder hiding in there. This is important because you want every scone to taste the same and rise evenly.
- Cut your margarine and coconut oil into small pieces and add them to the dry mix a bit at a time. Now here’s the key: you’re going to use a pastry cutter, two knives, or your fingertips to work the fats into the flour until it looks like breadcrumbs or coarse sand. This is what creates those tender, flaky pockets when everything bakes. Don’t skip this step and don’t rush it. Take a few minutes and actually do the work.
- Pour in your pumpkin puree. Add your minced candied ginger and shredded fresh ginger. Stir everything together until it’s all mixed. The dough will be thick and slightly sticky. This is exactly what you want. Don’t go crazy with the mixing. Mix just until everything comes together. Overmixing makes tough scones, and you don’t want that.
- Turn the dough out onto a lightly floured surface. Give it a few gentle kneads, maybe 2-3 passes. You’re just bringing it together, not developing gluten. Be gentle here.
- Divide the dough in half. Press each half into a circle shape that’s a few inches thick, roughly 1/2 inch. The thickness matters. Too thin and they’ll dry out. Too thick and they won’t bake through properly. That 1/2 inch is your sweet spot. Don’t stress about perfect circles. Rustic is actually better.
- Using a sharp knife, cut each circle into about 5 or 6 wedges. Think pizza, but with fewer, bigger slices. You’ll end up with about 10-12 scones total. And here’s the thing: they don’t need to be perfectly even. Uneven actually looks more homemade and charming.
- Place your wedges on the baking sheets with about 1-2 inches between them. This spacing is important because they’ll expand a bit while baking and you don’t want them touching and baking together into one giant blob.
- Pop them into the oven at 425 degrees for 12-15 minutes. You’re looking for them to be baked through but still moist inside. The outside should be set and just barely golden, not brown. Here’s a tip: start checking at 12 minutes. Every oven is different, and overbaking is the enemy here. You want them tender, not dry. They’re done when a toothpick in the center comes out with just a few moist crumbs, not wet batter, but not completely clean either.
- Pull them out of the oven and let them sit on the baking sheet for a few minutes, 3-5 minutes is perfect. These are best served warm, so don’t wait forever. Serve them plain, with butter, with cream cheese spread, or with jam. You really can’t go wrong.
Notes
Flavor Variations And Customizations
Extra Spiced Version Add 1/4 teaspoon each of nutmeg and cloves for a more traditional pumpkin pie spice flavor. This creates a more classic pumpkin scone, though less unique than the original. Vanilla Pumpkin Scones Add 1 teaspoon of vanilla extract when adding the pumpkin. Vanilla adds warmth and depth to the pumpkin flavor. Maple Pumpkin Version Add 1/4 teaspoon of maple extract and substitute 1/4 cup of the pumpkin puree with pure maple syrup. This creates a more complex sweetness with maple undertones. Chai Spiced Pumpkin Add 1/2 teaspoon of cardamom and 1/4 teaspoon of black pepper to the dry ingredients. This creates a chai-pumpkin hybrid that’s sophisticated. Brown Sugar Version Replace the white sugar with packed brown sugar. This creates a deeper, more caramel-like sweetness. Coconut-Pumpkin Version Add 1/2 cup of shredded coconut to the dry ingredients. This emphasizes the coconut oil flavor and creates a more tropical vibe. Molasses Pumpkin Scones Add 1-2 tablespoons of molasses when adding the pumpkin. Molasses adds depth and a subtle earthiness. Orange Pumpkin Version Add 1 tablespoon of orange zest when adding the ginger. Orange and pumpkin pair beautifully, and orange adds brightness. Extra Ginger Version Increase each form of ginger: 2.5 teaspoons ground ginger, 3 tablespoons candied ginger, 1.5 tablespoons fresh ginger. This creates a more assertively spiced scone for ginger lovers. Apple Cider Pumpkin Reduce the pumpkin to 1.75 cups and add 1/4 cup of apple cider concentrate. This creates an apple-pumpkin hybrid that’s interesting and seasonal.The Three-Ginger System Explained
Using three forms of ginger is what makes these scones unique and interesting.
Ground ginger powder is the traditional form that bakers use. It’s convenient and provides consistent flavor.
Candied ginger is a processed form that’s been preserved in sugar. It provides sweetness and texture.
Fresh ginger root is raw and provides brightness and a little heat.
Together, these create a ginger flavor that’s complex and balanced.
If you reduce any form, the overall ginger impact is diminished and the scones become less interesting.
If you increase any form, that particular type of ginger becomes too dominant.
The recipe as written hits the perfect balance.
This three-ginger approach is what separates these scones from every other pumpkin recipe out there.
Why The Mixed Flour Approach
Using half white flour and half other flour creates a more interesting texture than using all-purpose flour alone.
White bread flour provides structure and helps the scones rise.
Whole wheat flour adds nuttiness, fiber, and a denser texture.
Using a combination creates a scone that’s light enough to be tender but substantial enough to feel hearty.
If you don’t want to mix flours, you can use all-purpose flour throughout. The texture will be slightly different but still good.
If you want to experiment, you could use other flours like spelt, einkorn, or ancient grains.
The half-and-half approach is the classic method that works best.
Flavor Variations And Customizations
Extra Spiced Version
Add 1/4 teaspoon each of nutmeg and cloves for a more traditional pumpkin pie spice flavor.
This creates a more classic pumpkin scone, though less unique than the original.
Vanilla Pumpkin Scones
Add 1 teaspoon of vanilla extract when adding the pumpkin.
Vanilla adds warmth and depth to the pumpkin flavor.
Maple Pumpkin Version
Add 1/4 teaspoon of maple extract and substitute 1/4 cup of the pumpkin puree with pure maple syrup.
This creates a more complex sweetness with maple undertones.
Chai Spiced Pumpkin
Add 1/2 teaspoon of cardamom and 1/4 teaspoon of black pepper to the dry ingredients.
This creates a chai-pumpkin hybrid that’s sophisticated.
Brown Sugar Version
Replace the white sugar with packed brown sugar.
This creates a deeper, more caramel-like sweetness.
Coconut-Pumpkin Version
Add 1/2 cup of shredded coconut to the dry ingredients.
This emphasizes the coconut oil flavor and creates a more tropical vibe.
Molasses Pumpkin Scones
Add 1-2 tablespoons of molasses when adding the pumpkin.
Molasses adds depth and a subtle earthiness.
Orange Pumpkin Version
Add 1 tablespoon of orange zest when adding the ginger.
Orange and pumpkin pair beautifully, and orange adds brightness.
Extra Ginger Version
Increase each form of ginger: 2.5 teaspoons ground ginger, 3 tablespoons candied ginger, 1.5 tablespoons fresh ginger.
This creates a more assertively spiced scone for ginger lovers.
Apple Cider Pumpkin
Reduce the pumpkin to 1.75 cups and add 1/4 cup of apple cider concentrate.
This creates an apple-pumpkin hybrid that’s interesting and seasonal.
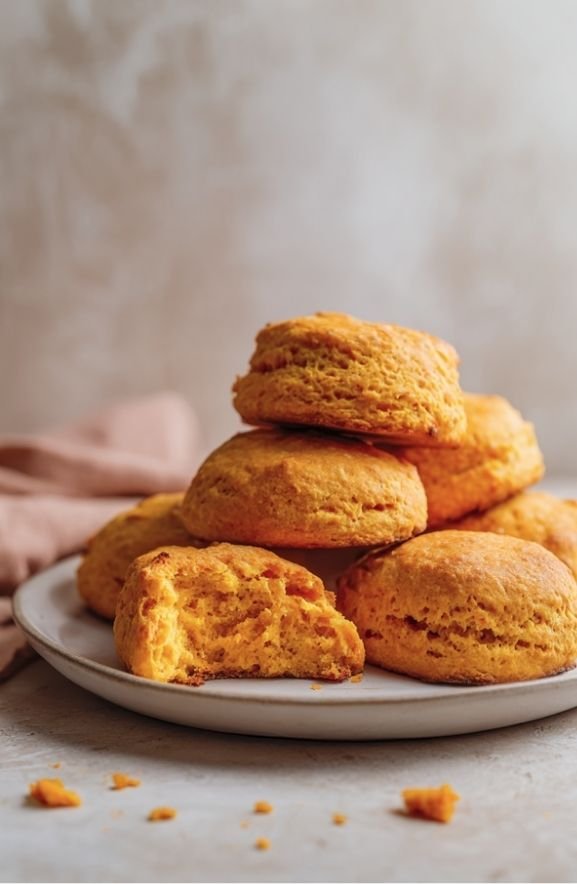
Texture And Crumb Structure
The texture of these scones is noticeably different from traditional scones because of the pumpkin.
Pumpkin puree adds moisture, which makes these scones more tender and less crumbly.
They won’t have the dramatic flakiness of scones made with just butter.
Instead, they have a tender, slightly dense crumb that’s very moist.
The candied and fresh ginger add texture variation within the soft crumb.
The overall effect is a scone that’s more like a spiced pumpkin bread than a traditional pastry scone.
This isn’t a flaw. It’s actually why many people prefer these to traditional scones.
They’re more forgiving about overbaking and stay moist longer than drier scone recipes.
Serving Suggestions
Warm with Butter
Fresh out of the oven with butter is the classic way to serve these.
The heat releases the ginger and spice flavors beautifully.
With Cream Cheese Spread
Cream cheese pairs beautifully with the pumpkin and ginger.
Use softened cream cheese spread on warm scones.
With Maple Butter
Mix butter with a little maple syrup for a gourmet accompaniment.
Plain with Coffee or Tea
These are flavorful enough to enjoy on their own with a hot beverage.
With Pumpkin Spice Cream Cheese
Soften cream cheese and mix with a little pumpkin puree and spice.
This creates a pumpkin-specific spread.
For Breakfast or Brunch
These are perfect for entertaining at breakfast or brunch gatherings.
They feel special but are casual enough for morning entertaining.
Baking Tips And Tricks
Cold Fats Are Important
Keep the margarine cold until you’re ready to use it.
Cold fats create a tender crumb. Warm fats make dense scones.
Don’t Overmix the Dough
Mix just until ingredients come together. Overmixing develops gluten, which makes tough scones.
Measure Flour Correctly
Spoon flour into measuring cups and level off. Scooping directly from the bag compacts the flour.
Check for Doneness Early
Start checking at 12 minutes, even though the recipe says 12-15.
Oven temperatures vary, and overbaking dries these out quickly.
Use Fresh Ginger Root
Fresh ginger should be firm and fragrant. Old ginger loses potency.
Shred it finely so it distributes evenly throughout the dough.
Mince Candied Ginger Small
Small pieces distribute more evenly than large chunks.
This creates more consistent flavor and texture in each scone.
Storage And Make-Ahead
Room Temperature Storage
Store in an airtight container at room temperature for up to 2 days.
These stay moist better than traditional scones because of the pumpkin puree.
Refrigerator Storage
Store in an airtight container in the refrigerator for up to 4 days.
These actually taste good even when cold or at room temperature.
Freezing Baked Scones
Baked scones can be frozen for up to 1 month in a freezer-safe container.
Thaw at room temperature or warm gently in a 300-degree oven for 10 minutes.
Freezing Dough
You can freeze the shaped dough (before baking) for up to 2 weeks.
Bake from frozen, adding 2-3 minutes to the baking time.
Make-Ahead Strategy
These are perfect for making ahead. Prepare the day before and reheat before serving.
The flavors actually meld and improve over a day or two.
Why Make Pumpkin Scones In Fall
When fall arrives, pumpkin becomes way more than just a seasonal trend. It’s actually a legitimate, delicious ingredient worth cooking with.
These scones capture the entire essence of autumn in one little pastry. It’s perfect for breakfast, brunch, or basically any time you want to feel cozy.
What sets them apart is that three-ginger system. It’s not just “pumpkin with basic pumpkin pie spice.” It’s actually interesting and complex.
They taste special and feel indulgent but they’re still totally appropriate for regular breakfast eating.
Honest warning: once fall hits and you make these once, you’ll be making them repeatedly throughout the season. You’ll probably start buying pumpkin puree in bulk just to have a steady supply.
Perfect For Fall Gatherings
These scones are ideal for fall brunches, coffee gatherings, or casual entertaining.
They feel seasonal and special without being complicated.
Make ahead and reheat before serving for stress-free hosting.
Package extras as gifts in pretty boxes for coworkers or friends.
These are the scones that people specifically ask you to make again next fall.
Final Thoughts
Okay, pumpkin scones with a three-ginger system might sound fancy and complicated. But honestly? They’re not.
The ginger adds that complexity that makes people taste these and go “wow, what IS in these?” It’s the secret that makes them special.
The pumpkin puree keeps everything moist so you don’t end up with dry, crumbly scones. It’s kind of genius, actually.
The texture is tender and soft, like nothing else you’ve made. Your friends and family will be asking for the recipe.
Do yourself a favor and make these when fall hits. Seriously, just do it.
Serve them warm with butter or cream cheese spread and watch people lose their minds.
Once you make them, they become an annual fall tradition that people start asking about in August. “Are you making those pumpkin scones this year?”
Start making these this season. You won’t regret it.