
The first time someone made sourdough scones, the idea seemed counterintuitive.
Sourdough starter in a scone? Scones are supposed to be buttery and delicate, not sour and tangy.
But then tasting them changed everything about that assumption.
The sourdough starter adds a subtle tang that elevates these beyond typical scones.
The apple pie spice creates a warm, cinnamon-forward flavor that feels like autumn in every bite.
The cream of tartar and baking soda work together to create lift and tenderness.
The coarse sugar topping adds a satisfying crunch and extra sweetness.
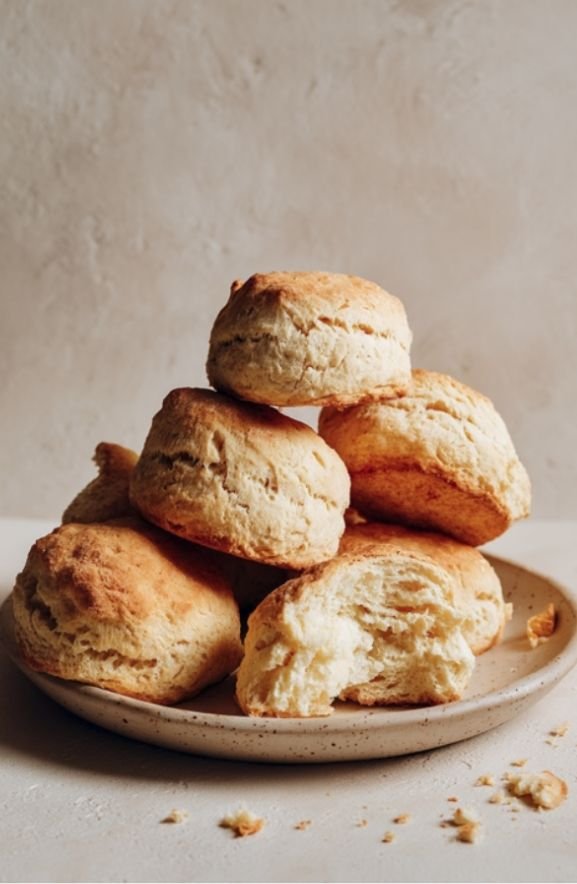
What emerges from the oven is something that tastes bakery-quality, like something purchased from a high-end coffee shop, but was made at home in about 30 minutes.
For anyone with sourdough starter sitting in the refrigerator, these scones are a revelation.
This recipe uses a full 1 1/4 cups of starter, which means batch-making becomes actually practical and worthwhile.
These scones have converted many people who didn’t realize they liked scones into scone lovers.
Why Sourdough Scones Are Special
Traditional scones are delicious, but they’re often just buttery and sweet without much personality.
Sourdough scones have personality. The starter adds complexity and tang that makes them interesting.
The sourdough starter also contributes to the tenderness. The fermentation in the starter breaks down the flour slightly, making the crumb more tender than regular scones.
The apple pie spice is the secret weapon. Most scone recipes are plain or vanilla-focused.
Apple pie spice (a blend of cinnamon, nutmeg, and other warm spices) transforms these into something cozy and special.
The tanginess from the sourdough balances the sweetness perfectly.
Too many scones are cloyingly sweet. These hit a balance where they’re sweet enough to be a treat but not so sweet that they’re overwhelming.
The texture is what keeps people making these repeatedly. They’re tender and crumbly, with just enough structure to hold together.
They’re not dense like some homemade scones. They’re light and pillowy.
Also read: Strawberry Pretzel Salad Recipe: The Perfect Three-Layer Dessert
Understanding Sourdough Starter In Baking
Sourdough starter is a living culture of wild yeast and bacteria that ferments over time.
In these scones, the starter serves multiple purposes beyond just adding flavor.
The acids in the starter interact with the baking soda to create lift and CO2 bubbles in the dough.
The cream of tartar adds additional acid, which creates even more leavening action.
This double-acid system is what makes these scones rise without relying on baking powder alone.
The starter also adds moisture to the dough, which contributes to tenderness.
The fermentation process in the starter breaks down the gluten slightly, making the crumb more tender and less chewy.
This recipe uses a fair amount of starter (1 1/4 cups), so if you’re looking for ways to use up your sourdough starter, this is an excellent solution.
Ingredient Breakdown
White Bread Flour (2 1/2 cups)
White bread flour has more protein than all-purpose flour, which contributes to structure and lift.
Don’t use whole wheat flour or other specialty flours unless you want to significantly change the texture and flavor.
Bread flour gives these scones their characteristic tender crumb and ability to hold shape.
Make sure to measure by spooning flour into the measuring cup and leveling off, not by scooping directly from the bag.
Scooping compacts the flour and you’ll end up with too much.
Salt (1/2 teaspoon)
Salt enhances all the other flavors and prevents the scones from tasting flat or one-dimensional.
Don’t skip it, even though it’s a small amount.
Cream of Tartar (1 teaspoon)
Cream of tartar is an acid that reacts with the baking soda to create leavening.
It’s essential to this recipe. Don’t substitute with anything else.
Make sure your cream of tartar is fresh. Old cream of tartar loses potency.
Baking Soda (1 teaspoon)
Baking soda reacts with the acids in the sourdough starter and the cream of tartar to create lift.
This is what makes the scones rise without yeast.
Sugar (1/2 cup)
This creates sweetness without making the scones cloying.
The combination of sugar with the spices creates a balanced flavor.
Apple Pie Spice (1 teaspoon)
Apple pie spice is a blend that typically includes cinnamon, nutmeg, allspice, and sometimes cardamom.
This spice blend is what makes these scones taste autumn-y and warm.
If you can’t find apple pie spice, you can make your own by combining 1/2 teaspoon cinnamon, 1/4 teaspoon nutmeg, and 1/4 teaspoon allspice.
The apple pie spice is crucial. Don’t skip it or reduce it.
Cold Butter (1/3 cup)
The butter needs to be cold. This is important because cold butter creates flaky layers in the scones.
Cut the butter into small pieces before adding to the flour mixture.
The goal is to distribute the butter throughout the flour so that when baked, it creates pockets of steam that make the scones light and flaky.
Sourdough Starter (1 1/4 cups)
Use sourdough starter at room temperature, not cold from the refrigerator.
Make sure your starter is active and bubbly, not dormant.
The amount of starter is substantial, which is great for people looking to use up starter.
Heavy Cream (2 tablespoons)
Heavy cream is brushed on top of the scones before baking to create richness and help the coarse sugar adhere.
This creates that bakery-shop appearance and adds a touch of luxury.
Coarse Sugar
Coarse sugar (also called sanding sugar or pearl sugar) creates a crunchy topping and pretty appearance.
This is optional but highly recommended. Regular sugar doesn’t create the same effect.
Sourdough Scones Recipe
Ingredients
- 2 1/2 cups white bread flour
- 1/2 teaspoon salt
- 1 teaspoon cream of tartar
- 1 teaspoon baking soda
- 1/2 cup sugar
- 1 teaspoon apple pie spice
- 1/3 cup cold butter, cut into small pieces
- 1 1/4 cups sourdough starter (room temperature)
- 2 tablespoons heavy cream
- Coarse sugar for topping
Instructions
Step 1: Preheat Oven
Preheat the oven to 400 degrees Fahrenheit.
Line a baking sheet with parchment paper. This prevents sticking and makes cleanup easy.
Step 2: Mix Dry Ingredients
In a large mixing bowl, combine the 2 1/2 cups of white bread flour, 1/2 teaspoon salt, 1 teaspoon cream of tartar, 1 teaspoon baking soda, 1/2 cup sugar, and 1 teaspoon apple pie spice.
Whisk these together until they’re well combined.
Making sure these dry ingredients are evenly mixed is important so the baking soda and cream of tartar are distributed throughout.
Step 3: Cut in Butter
Add the 1/3 cup of cold, cut-up butter to the dry ingredients.
Using a pastry cutter, two knives, or your fingertips, work the butter into the flour mixture until it resembles coarse breadcrumbs or sand.
The key is keeping the butter cold and separate. You want to see small pieces of butter, not a smooth dough.
This takes a few minutes of work. Don’t rush it or the scones won’t be as tender and flaky.
Step 4: Add Sourdough Starter
Pour the 1 1/4 cups of room-temperature sourdough starter into the flour and butter mixture.
Using your hands, mix the starter into the dry ingredients until everything clings together.
The dough will be somewhat sticky. This is normal and correct.
Don’t overmix. Mix just until everything comes together as a rough dough.
Step 5: Divide Dough Into 4 Pieces
Turn the sticky dough out onto a lightly floured surface.
Divide the dough into 4 equal pieces.
Don’t knead or work the dough too much. Scone dough should be handled gently.
Step 6: Shape Into Rounds
Take one piece of dough and press it into a round shape roughly 1/2 inch thick.
Repeat with the remaining 3 pieces.
The thickness is important. Too thin and they’ll dry out. Too thick and they won’t bake through properly.
Roughly 1/2 inch is the sweet spot.
Step 7: Cut Into Wedges
Using a sharp knife, cut each round into 4 wedges, like cutting a pizza.
This creates 16 scones total from the 4 rounds.
Make clean cuts so the edges are defined.
Step 8: Arrange on Baking Sheet
Place the cut wedges on the parchment paper-lined baking sheet, about 1 inch apart.
Spacing is important because the scones will expand slightly during baking and need room to do so.
If they’re too close together, they’ll bake into each other and create one large mass instead of individual scones.
Step 9: Brush with Cream and Top with Sugar
Brush the top of each scone lightly with the 2 tablespoons of heavy cream.
Sprinkle coarse sugar generously over the tops.
The cream helps the sugar adhere and also adds richness that creates a nice golden exterior.
This step is what makes these look bakery-quality.
Step 10: Bake
Bake for approximately 15 minutes, or until they just start to turn golden.
Don’t overbake. Golden just barely is the goal. Overbaked scones become dry and hard.
Start checking around 12 minutes to see how quickly your oven bakes them.
The scones should be cooked through but still tender and moist inside.
Step 11: Cool Slightly Before Serving
Remove from the oven and let cool on the baking sheet for a few minutes.
These are best served warm or at room temperature.
Serve with jam, clotted cream, butter, or just on their own.
Sourdough Scones Recipe
Ingredients
Method
- Preheat the oven to 400 degrees Fahrenheit. Line a baking sheet with parchment paper. This prevents sticking and makes cleanup easy.
- In a large mixing bowl, combine the 2 1/2 cups of white bread flour, 1/2 teaspoon salt, 1 teaspoon cream of tartar, 1 teaspoon baking soda, 1/2 cup sugar, and 1 teaspoon apple pie spice. Whisk these together until they’re well combined. Making sure these dry ingredients are evenly mixed is important so the baking soda and cream of tartar are distributed throughout.
- Add the 1/3 cup of cold, cut-up butter to the dry ingredients. Using a pastry cutter, two knives, or your fingertips, work the butter into the flour mixture until it resembles coarse breadcrumbs or sand. The key is keeping the butter cold and separate. You want to see small pieces of butter, not a smooth dough. This takes a few minutes of work. Don’t rush it or the scones won’t be as tender and flaky.
- Pour the 1 1/4 cups of room-temperature sourdough starter into the flour and butter mixture. Using your hands, mix the starter into the dry ingredients until everything clings together. The dough will be somewhat sticky. This is normal and correct. Don’t overmix. Mix just until everything comes together as a rough dough.
- Turn the sticky dough out onto a lightly floured surface. Divide the dough into 4 equal pieces. Don’t knead or work the dough too much. Scone dough should be handled gently.
- Take one piece of dough and press it into a round shape roughly 1/2 inch thick. Repeat with the remaining 3 pieces. The thickness is important. Too thin and they’ll dry out. Too thick and they won’t bake through properly. Roughly 1/2 inch is the sweet spot.
- Using a sharp knife, cut each round into 4 wedges, like cutting a pizza. This creates 16 scones total from the 4 rounds. Make clean cuts so the edges are defined.
- Place the cut wedges on the parchment paper-lined baking sheet, about 1 inch apart. Spacing is important because the scones will expand slightly during baking and need room to do so. If they’re too close together, they’ll bake into each other and create one large mass instead of individual scones.
- Brush the top of each scone lightly with the 2 tablespoons of heavy cream. Sprinkle coarse sugar generously over the tops. The cream helps the sugar adhere and also adds richness that creates a nice golden exterior. This step is what makes these look bakery-quality.
- Bake for approximately 15 minutes, or until they just start to turn golden. Don’t overbake. Golden just barely is the goal. Overbaked scones become dry and hard. Start checking around 12 minutes to see how quickly your oven bakes them. The scones should be cooked through but still tender and moist inside.
- Remove from the oven and let cool on the baking sheet for a few minutes. These are best served warm or at room temperature. Serve with jam, clotted cream, butter, or just on their own.
Notes
The Science Behind These Scones
These scones use a double-acid leavening system that’s different from typical scones. Most scones use baking powder, which is a pre-mixed combination of baking soda and an acid. These scones use cream of tartar (an acid) and baking soda (a base) separately, plus the acids already present in the sourdough starter. This creates multiple sources of CO2 bubbles and lift, which results in very tender, fluffy scones. The sourdough starter also ferments the dough slightly during mixing and resting, which develops flavor and contributes to tenderness. The cold butter creates distinct layers that become flaky pockets when baked, similar to pie crust. The combination of all these factors creates scones that are lighter and more interesting than standard recipes.The Science Behind These Scones
These scones use a double-acid leavening system that’s different from typical scones.
Most scones use baking powder, which is a pre-mixed combination of baking soda and an acid.
These scones use cream of tartar (an acid) and baking soda (a base) separately, plus the acids already present in the sourdough starter.
This creates multiple sources of CO2 bubbles and lift, which results in very tender, fluffy scones.
The sourdough starter also ferments the dough slightly during mixing and resting, which develops flavor and contributes to tenderness.
The cold butter creates distinct layers that become flaky pockets when baked, similar to pie crust.
The combination of all these factors creates scones that are lighter and more interesting than standard recipes.
Texture And Why It Matters
The texture of these scones is what separates them from disappointing homemade attempts.
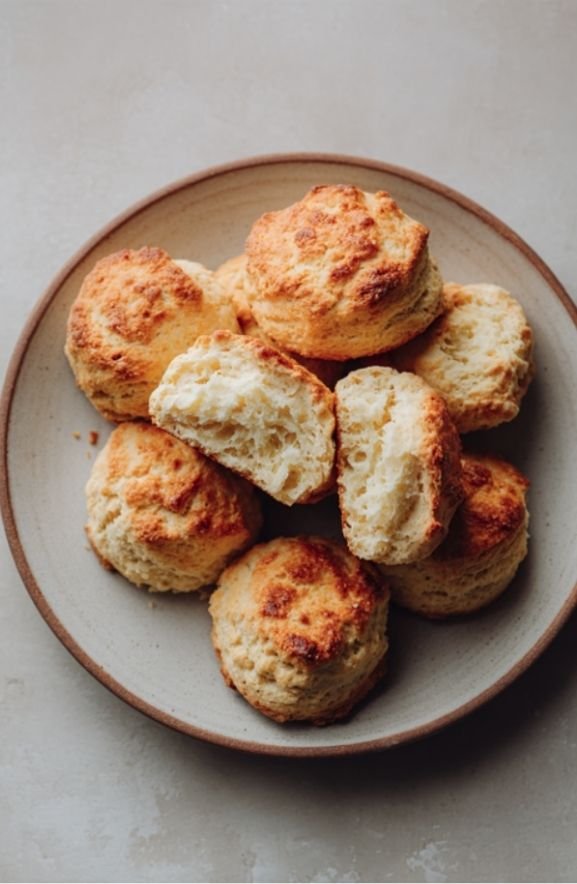
They should be tender and slightly crumbly, not dense or tough.
They should have a light crumb with some flakiness, not be uniform throughout.
The exterior should be slightly crispy from the coarse sugar, while the interior should be tender and moist.
If your scones come out dense, you probably overmixed the dough or didn’t keep the butter cold enough.
If they’re dry, they were probably overbaked or your oven runs hot.
Getting the texture right is worth paying attention to because it’s what makes these special.
Flavor Variations And Customizations
Cinnamon Sugar Scones
Reduce the apple pie spice to 1/2 teaspoon and add 1/2 teaspoon extra cinnamon.
This creates a more cinnamon-forward version that pairs beautifully with coffee.
Vanilla Bean Version
Add 1 teaspoon of vanilla extract to the sourdough starter mixture.
This adds warmth and depth to the flavor.
Maple Sourdough Scones
Add 1/4 teaspoon of maple extract to the mixture and use 1/4 cup maple syrup in place of 1/4 cup of the sugar.
This creates a more complex flavor with maple undertones.
Lemon Scones
Add 1 tablespoon of lemon zest and 1/2 teaspoon of lemon extract to the dry ingredients.
Reduce the apple pie spice to 1/2 teaspoon.
Lemon and sourdough is an interesting flavor combination.
Orange Spiced Version
Add 1 tablespoon of orange zest to the dry ingredients along with the apple pie spice.
This creates a citrus-spiced version that’s refreshing.
Brown Sugar Version
Replace the white sugar with packed brown sugar.
This creates a deeper, more caramel-like sweetness.
Ginger Scones
Keep the apple pie spice and add 1/2 teaspoon of ground ginger.
This creates a more assertive spice blend.
Chai Spiced Sourdough
Use chai spice blend instead of apple pie spice for a more complex spiced flavor.
Chai includes cardamom, ginger, clove, and black pepper.
Vanilla Extract Addition
Add 1 teaspoon of vanilla extract when adding the sourdough starter for vanilla warmth.
Nutmeg Heavy Version
Increase the nutmeg component by adding an extra 1/4 teaspoon of ground nutmeg.
This creates a more pronounced warm spice flavor.
Serving Suggestions
These scones are delicious on their own but are even better with accompaniments.
With Jam and Clotted Cream
This is the traditional scone serving. The tartness of the sourdough pairs beautifully with sweet jam.
Clotted cream adds richness.
With Butter and Honey
Simple butter and honey lets the scone flavor shine.
The honey sweetness complements the tangy sourdough.
With Lemon Curd
Lemon curd adds brightness and pairs well with the warm spices.
With Whipped Cream and Fresh Berries
A dollop of whipped cream and fresh strawberries or raspberries creates a more dessert-like presentation.
Plain with Coffee
These are great with just a cup of coffee. The flavor is interesting enough to stand on its own.
For Breakfast or Brunch
Serve warm at a breakfast or brunch gathering. These feel special but are casual enough for morning entertaining.
Baking Tips And Tricks
Cold Butter Is Crucial
Keep the butter in the freezer until you’re ready to use it, then cut it up immediately.
Warm butter won’t create the flaky texture these scones need.
Don’t Overmix
Mix the dough just until everything comes together. Overmixing develops gluten, which makes scones tough.
Measure Flour Correctly
Spoon flour into measuring cups and level off, rather than scooping directly from the bag.
Scooping compacts the flour and results in too much flour, which makes dry scones.
Room Temperature Starter
Don’t use cold starter straight from the fridge. Let it come to room temperature first.
Cold starter won’t mix evenly and the dough will be harder to work with.
Don’t Overbake
Golden just barely is the goal. Check at 12-13 minutes even though the recipe says 15.
Ovenbaking dries out the scones quickly.
Oven Temperature Matters
Use an oven thermometer to verify your oven is actually at 400 degrees.
Many home ovens run hot or cold, which affects baking time.
Storage And Make-Ahead
Room Temperature Storage
Store in an airtight container at room temperature for up to 2 days.
They’re best eaten fresh or within 24 hours.
Refrigerator Storage
Store in an airtight container in the refrigerator for up to 4 days.
Freezing Baked Scones
Baked scones can be frozen for up to 1 month in a freezer-safe container.
Thaw at room temperature for about 30 minutes before serving, or warm in a 300-degree oven for 10 minutes.
Freezing Dough
You can freeze the shaped dough (before baking) for up to 2 weeks.
Bake directly from frozen, adding 2-3 minutes to the baking time.
This is convenient for having fresh-baked scones whenever you want.
Why Make Sourdough Scones
If you have sourdough starter, these scones are a legitimate reason to keep feeding it regularly.
This recipe uses a substantial amount of starter, so batch-making becomes practical.
The tang from the sourdough adds complexity that regular scones don’t have.
The warm spices create a cozy, autumn-y flavor that people love.
These taste bakery-quality but are made at home in 30 minutes.
They’re impressive enough to serve to guests but casual enough for weekday breakfast.
These are the kind of scones that make people ask for the recipe.
Perfect For Different Occasions
Weekday Breakfast
Make a batch and store them. Warm one up with coffee in the morning.
Weekend Brunch
Serve warm with jam and clotted cream. These feel special for entertaining.
Gift Giving
Package in a pretty container with jam or a lemon curd for a thoughtful homemade gift.
Afternoon Tea
Serve with tea for a cozy afternoon snack.
Holiday Entertaining
The warm spices make these feel festive during the holiday season.
Final Thoughts
Sourdough scones might seem like an unusual combination, but they’re genuinely delicious.
The sourdough starter adds tang and depth that takes these beyond typical scones.
The apple pie spice creates a warm, comforting flavor.
The texture is light and flaky, not dense.
For anyone with sourdough starter on hand, these are worth making.
Once made, they become a regular in the recipe rotation.
Make these this week. Serve warm. Enjoy the compliments and recipe requests that follow.