When fresh strawberries show up at the farmers market in spring, I know exactly what I’m making.
These strawberry scones have become my “first taste of spring” recipe.
There’s something about fresh strawberries—just picked, at their peak sweetness—that makes you want to bake them into something special.
The first time I made these, I followed the recipe exactly because it seemed really thoughtful and detailed.
And honestly? Every single step is there for a reason.
The paper towels to absorb strawberry juice? Not unnecessary fussing. That’s what keeps the dough from getting too wet and sticky.
The lemon zest? It brings out the strawberry flavor and adds brightness.
The nutmeg? Just a tiny pinch that you can’t identify but makes everything taste more delicious.
The careful handling of the dough? That’s what keeps these scones tender and light instead of tough.
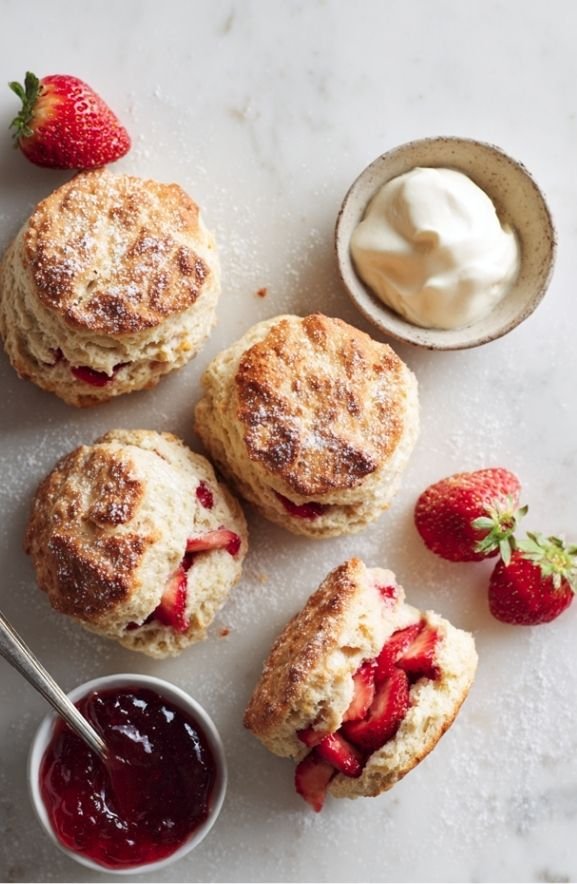
When people taste these warm strawberry scones, they immediately understand why strawberries deserve to be baked into something special.
These are the kind of scones that feel elegant and fancy but are actually totally doable at home.
Why Fresh Strawberries Matter So Much
Okay, I’m going to be really honest here: these scones are only worth making when strawberries are fresh and in season.
Using frozen or off-season strawberries that have been shipped from far away just isn’t the same.
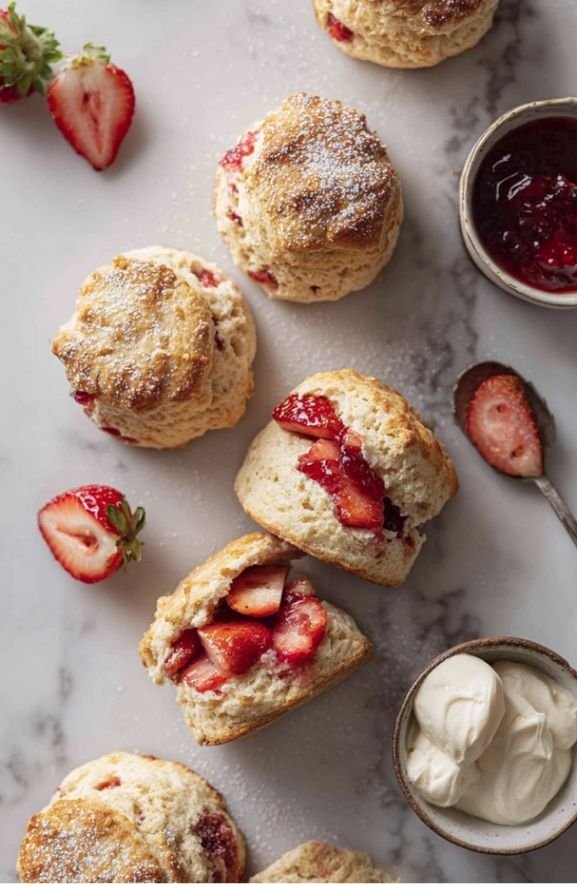
Fresh strawberries—the kind that smell incredible and taste like concentrated strawberry flavor—are what make these special.
The dicing and draining step is important because fresh strawberries release a lot of juice.
That juice is delicious in jam or in a smoothie, but in scone dough, it makes things too wet.
By putting the diced strawberries on paper towels, you’re removing excess moisture before they go into the dough.
This is what prevents your scones from being soggy or too moist.
The strawberries still bring flavor and beautiful color, but without making the dough impossible to work with.
Also read: Strawberry Pretzel Salad Recipe: The Perfect Three-Layer Dessert
The Nutmeg Secret
You might notice this recipe includes a tiny pinch of ground nutmeg.
Just 1/4 teaspoon. So small that you won’t taste “nutmeg flavor” explicitly.
But it’s there, and it makes a real difference.
Nutmeg brings out the flavor of strawberries and makes them taste more strawberry-like, if that makes sense.
It also adds a subtle warmth that complements the tartness of the strawberries.
Don’t skip this ingredient. It’s small but mighty.
Lemon Zest: The Flavor Amplifier
The lemon zest is another small addition that makes a big difference.
You’re using lemon zest, not lemon juice, which means you get the bright citrus oils without any liquid.
The recipe specifies using only half a lemon and being careful to get just the outermost yellow skin, not the bitter white pith.
This detail matters because the pith is bitter and would taste wrong.
The lemon zest brightens the strawberry flavor and prevents these from tasting one-dimensional.
It’s the thing that makes people taste these and go “wow, what IS that flavor?” because they can’t quite place it.
The Multiple Cream Situation
This recipe uses light cream twice: 1/2 cup in the dough and 1 tablespoon for brushing on top.
The cream in the dough creates a tender, moist scone.
The cream brushed on top creates that beautiful golden crust and helps the sugar stick.
You could technically substitute with milk, but cream really does create a richer, more tender result.
If you’re using cream, make sure it’s light cream, not heavy cream.
Heavy cream would make these too rich.
The Careful Dough Handling
This recipe emphasizes using “as few strokes as possible” when mixing the dough.
That’s not just flowery language. That’s actual instruction that affects your results.
Every time you mix, you develop gluten, which makes tough scones.
By mixing minimally, you keep gluten development to a minimum, which keeps scones tender.
This is why the recipe says to let the dough sit for one minute before handling it more.
This rest allows the flour to fully hydrate without requiring more mixing.
Then you only knead it three or four times—that’s it.
Gentle handling throughout is what creates scones that are tender and delicate, not tough and dense.
Ingredient Breakdown
Fresh Strawberries (1 cup, hulled and finely diced)
Use only fresh, in-season strawberries. Small dice means they distribute evenly and don’t overpower individual bites.
The paper towel draining step is crucial to remove excess moisture.
Flour (2 cups)
All-purpose flour is what you want. Measure by spooning and leveling, not scooping.
Sugar (1/3 cup, plus more for sprinkling)
This provides sweetness that balances the tartness of strawberries.
Extra sugar is sprinkled on top for a crunchy, pretty finish.
Baking Powder (1 tablespoon)
This is your leavening agent. Make sure it’s fresh.
Salt (1/2 teaspoon)
Salt enhances all the other flavors.
Ground Nutmeg (1/4 teaspoon)
This small amount brings out the strawberry flavor and adds subtle warmth.
Lemon Zest (from half a lemon)
Fresh lemon zest brightens the strawberry flavor. Just the yellow outer skin, not the white pith.
Unsalted Butter (6 tablespoons, cold, cut into small pieces)
Cold butter is crucial for creating the right texture. Cut into 1/4-inch pieces.
Light Cream (1/2 cup, plus 1 tablespoon for brushing)
Light cream creates a tender, moist scone. Not heavy cream.
Vanilla Extract (1 teaspoon)
Vanilla adds warmth that complements strawberries beautifully.
Strawberry Scones Recipe
Ingredients
- 1 cup fresh strawberries, hulled and finely diced
- 2 cups all-purpose flour
- 1/3 cup sugar, plus more for sprinkling
- 1 tablespoon baking powder
- 1/2 teaspoon salt
- 1/4 teaspoon ground nutmeg
- Zest of 1/2 lemon
- 6 tablespoons unsalted butter, cold, cut into 1/4-inch pieces
- 1/2 cup light cream
- 1 tablespoon light cream (for brushing)
- 1 teaspoon vanilla extract
Instructions
Step 1: Preheat and Prepare Pan
Heat your oven to 425 degrees Fahrenheit.
Line a large baking sheet with parchment paper using a few spots of butter or cooking oil to stick it in place.
Set the baking sheet aside.
Step 2: Prepare Strawberries
Hull your strawberries and dice them finely.
Place the diced strawberries on several sheets of paper towel to absorb their juice.
This step is really important. Those paper towels are drawing out excess moisture that would otherwise make your dough too wet.
Let them sit here for a few minutes while you do the next step.
Step 3: Combine Dry Ingredients
Combine the flour, 1/3 cup sugar, baking powder, salt, and nutmeg in a large bowl.
Zest half of the lemon into the ingredients, being careful to remove just the outermost yellow skin and not the white pith.
Whisk these together so everything is evenly distributed.
Step 4: Cut in Butter
Add the cold butter pieces to the dry ingredients.
Using two butter knives or a pastry blender, cut the butter in until the flour-coated pieces are about the size of peas.
This is the step that creates texture in your scones. Don’t skip it or rush it.
Step 5: Add Strawberries
Remove the strawberries from the paper towels (they should have released a lot of moisture by now).
Add them to the flour mixture and toss them gently with a fork to coat them.
Be gentle so you don’t crush them.
Step 6: Add Wet Ingredients
Make a well in the center of the mixture.
Blend the 1/2 cup of light cream and the vanilla extract in a measuring cup.
Pour them into the well.
Using as few strokes as possible, gently stir the dough until it forms a ball.
This is where minimal mixing is crucial. You want to combine everything without overworking the dough.
Once it forms a ball, stop mixing.
Step 7: Rest the Dough
Let the dough sit for 1 minute. This allows the flour to fully hydrate without requiring more mixing.
Step 8: Knead and Shape
Clean and flour your hands and dust your work surface with flour.
Place the dough on the floured surface and knead it gently three or four times.
That’s it. Three or four gentle kneads. You’re not trying to develop gluten.
Transfer it to the prepared baking sheet and pat it into an 8-inch circle.
Step 9: Cut Into Wedges
Using a lightly oiled pizza cutter or a serrated knife, cut the dough into 8 wedges, as you would a pizza.
The oil on the cutter prevents sticking.
Step 10: Separate Wedges
Use a small spatula or pie server to carefully separate the pieces.
Leave at least an inch between them so they can bake evenly without touching.
Step 11: Brush and Sprinkle
Brush the tops of the scones with the remaining 1 tablespoon of light cream.
Sprinkle the surfaces generously with sugar.
Step 12: Bake
Bake the scones until the outsides are crusty and starting to brown, about 18 minutes.
You’re looking for golden brown, not dark brown.
Step 13: Cool Properly
Let them cool on the baking sheet for 2 minutes.
Then slide the parchment and the scones onto a wire rack to cool for another 20 minutes before serving.
This cooling time is important. It allows them to set properly so they’re tender but hold their structure.
Strawberry Scones Recipe
Ingredients
Method
- Heat your oven to 425 degrees Fahrenheit. Line a large baking sheet with parchment paper using a few spots of butter or cooking oil to stick it in place. Set the prepared baking sheet aside while you prepare the other ingredients.
- Hull your fresh strawberries and dice them finely into small, uniform pieces. Place the diced strawberries on several sheets of paper towel to absorb their excess juice. This step is crucial because those paper towels draw out moisture that would otherwise make your dough too wet and difficult to work with. Let them sit for a few minutes while you prepare the dry ingredients.
- Combine the all-purpose flour, 1/3 cup sugar, baking powder, salt, and ground nutmeg in a large bowl. Zest half of a lemon into the ingredients, being careful to remove only the outermost yellow skin and not the white pith underneath. Whisk these dry ingredients together thoroughly so everything is evenly distributed and the leavening agent is well incorporated.
- Add the cold butter pieces to the dry ingredients. Using two butter knives or a pastry blender, cut the butter in until the flour-coated pieces are about the size of peas. This is the crucial step that creates the delicate texture in your scones. Don’t skip it or rush it, as proper butter incorporation is essential for achieving the desired light and flaky crumb.
- Remove the strawberries from the paper towels, as they should have released a significant amount of moisture by now. Add the drained strawberries to the flour mixture and toss them gently with a fork to coat them evenly. Be very gentle during this step so you don’t crush the delicate fruit pieces and release more juice.
- Make a well in the center of the flour and strawberry mixture. In a measuring cup, blend together the 1/2 cup of light cream and the vanilla extract. Pour this wet mixture into the well you’ve created. Using as few strokes as possible, gently stir the dough until it forms a ball. This is where minimal mixing is absolutely crucial, as you want to combine everything without overworking the dough. Once it forms a ball, stop mixing immediately.
- Let the dough rest for 1 minute on the counter. This brief resting period allows the flour to fully hydrate without requiring additional mixing, which would toughen the scones. This simple step makes a significant difference in the final texture.
- Clean and flour your hands and dust your work surface generously with flour. Place the dough on the floured surface and knead it very gently just three or four times. That’s all you need. You’re not trying to develop gluten; you’re simply bringing the dough together into a cohesive mass. Transfer it to the prepared baking sheet and gently pat it into an 8-inch circle of even thickness.
- Using a lightly oiled pizza cutter or a serrated knife, cut the dough into 8 equal wedges, as you would slice a pizza. The oil on the cutter prevents the dough from sticking and ensures clean cuts. Make sure your cuts go all the way through to create distinct wedges.
- Use a small spatula or pie server to carefully separate the wedge pieces from each other. Leave at least an inch of space between them so they can bake evenly without touching or merging together during baking. This spacing ensures each scone develops its own crispy exterior.
- Brush the tops of all the scones with the remaining 1 tablespoon of light cream using a pastry brush. This creates a beautiful, shiny finish. Sprinkle the surfaces generously with additional sugar, creating a crunchy, pretty finish that adds texture and visual appeal to the baked scones.
- Bake the scones in the preheated oven until the outsides are crusty and starting to brown, approximately 18 minutes. You’re looking for a golden brown color, not dark brown, which indicates perfect doneness. Watch them carefully near the end of baking to avoid overbaking.
- Let the baked scones cool on the baking sheet for 2 minutes. Then carefully slide the parchment paper and the scones onto a wire rack to cool for another 20 minutes before serving. This cooling time is important because it allows them to set properly so they’re tender but still hold their structure. Serve warm with whipped cream and jam for an authentic afternoon tea experience.
Notes
Flavor Variations And Customizations
Strawberry Vanilla Cream Version Add an extra 1/2 teaspoon of vanilla extract for more pronounced vanilla flavor. Strawberry Rhubarb Scones Use 1/2 cup strawberries and 1/2 cup finely diced rhubarb for a tartness balance. Strawberry With Cardamom Replace the nutmeg with 1/4 teaspoon of ground cardamom for a more delicate spice. Strawberry Lavender Version Add 1/4 teaspoon of dried lavender (finely ground) to the dry ingredients. Lavender and strawberry create a floral, elegant combination. Strawberry Orange Scones Use 1/4 teaspoon of orange zest in addition to the lemon zest. Orange and strawberry pair beautifully. Strawberry With White Chocolate Add 1/2 cup of white chocolate chips when you add the strawberries. White chocolate and strawberry is a classic combination. Strawberry Buttermilk Scones Replace the light cream with buttermilk for a slightly tangier flavor. Strawberry Rose Water Version Add 1/4 teaspoon of rose water to the cream and vanilla mixture. Rose water adds a subtle floral note that’s elegant with strawberry. Strawberry With Almond Extract Add 1/4 teaspoon of almond extract to the cream mixture. Almond and strawberry pair beautifully. Brown Sugar Strawberry Scones Use 1/4 cup brown sugar and 1 tablespoon white sugar for a deeper sweetness.Why The Detailed Instructions Matter
This recipe is longer and more detailed than some other scone recipes, and there’s a reason for that.
Every step is there because it affects the final result.
The paper towels remove moisture. The minimal mixing keeps them tender. The careful cooling allows them to set properly.
Following these instructions exactly is what creates scones that are elegant and delicate instead of dense and heavy.
This is one of those recipes where taking the time to follow each step carefully really does matter.
Flavor Variations And Customizations
Strawberry Vanilla Cream Version
Add an extra 1/2 teaspoon of vanilla extract for more pronounced vanilla flavor.
Strawberry Rhubarb Scones
Use 1/2 cup strawberries and 1/2 cup finely diced rhubarb for a tartness balance.
Strawberry With Cardamom
Replace the nutmeg with 1/4 teaspoon of ground cardamom for a more delicate spice.
Strawberry Lavender Version
Add 1/4 teaspoon of dried lavender (finely ground) to the dry ingredients.
Lavender and strawberry create a floral, elegant combination.
Strawberry Orange Scones
Use 1/4 teaspoon of orange zest in addition to the lemon zest.
Orange and strawberry pair beautifully.
Strawberry With White Chocolate
Add 1/2 cup of white chocolate chips when you add the strawberries.
White chocolate and strawberry is a classic combination.
Strawberry Buttermilk Scones
Replace the light cream with buttermilk for a slightly tangier flavor.
Strawberry Rose Water Version
Add 1/4 teaspoon of rose water to the cream and vanilla mixture.
Rose water adds a subtle floral note that’s elegant with strawberry.
Strawberry With Almond Extract
Add 1/4 teaspoon of almond extract to the cream mixture.
Almond and strawberry pair beautifully.
Brown Sugar Strawberry Scones
Use 1/4 cup brown sugar and 1 tablespoon white sugar for a deeper sweetness.
Baking Tips And Tricks
Cold Butter Is Critical
Keep your butter in the freezer until you’re ready to use it, then cut it immediately.
Warm butter won’t create the flaky texture these scones need.
The Paper Towel Step Is Not Optional
Those paper towels remove crucial moisture. Don’t skip this step.
Minimal Mixing Creates Tender Scones
Mix as little as possible. Every stroke develops gluten and makes them tougher.
Fresh Strawberries Are Essential
Only make these when strawberries are in season and smell amazing.
Off-season strawberries just won’t taste as good.
Don’t Over-Knead
Three or four gentle kneads. That’s all you need.
Use Light Cream, Not Heavy
Light cream creates the perfect texture. Heavy cream would make them too rich.
The Oil on the Pizza Cutter Matters
A lightly oiled pizza cutter prevents sticking and creates clean cuts.
Cool on a Wire Rack
A wire rack allows air to circulate under the scones, preventing them from becoming soggy.
Serving Suggestions
Warm With Light Butter
Fresh out of the oven with a small pat of butter is absolutely the best way to eat these.
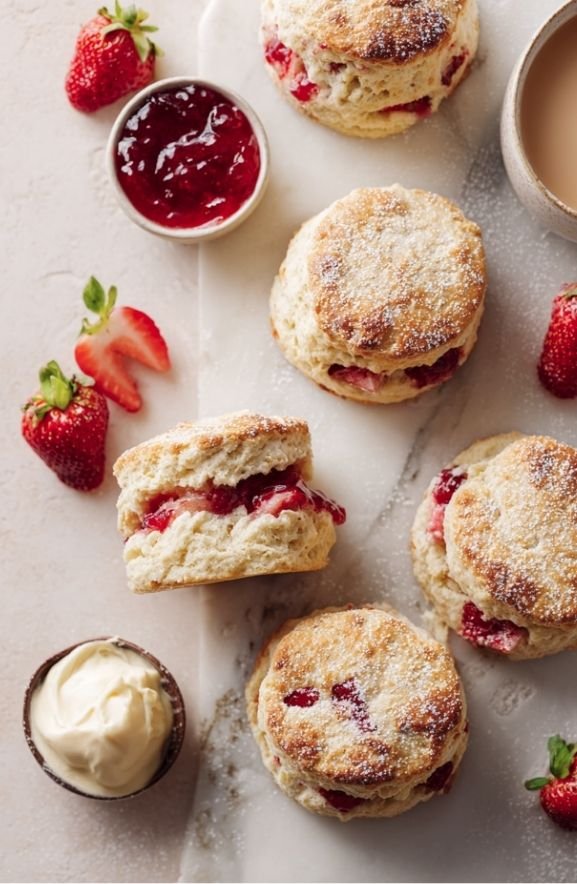
With Clotted Cream
A dollop of clotted cream makes them feel extra fancy and indulgent.
With Strawberry Jam
Strawberry jam on a strawberry scone doubles down on the strawberry flavor.
Plain With Coffee or Tea
The fresh strawberry flavor is delicate enough to enjoy on its own with a hot beverage.
With Whipped Cream
A dollop of whipped cream adds richness and elegance.
At Brunch
Serve warm at a spring or summer brunch gathering and watch them disappear.
Storage And Make-Ahead
Room Temperature Storage
Store in an airtight container at room temperature for up to 1 day.
Strawberry scones are best eaten fresh.
Refrigerator Storage
Store in an airtight container in the refrigerator for up to 3 days.
Reheat gently before serving.
Freezing Baked Scones
Freeze baked scones for up to 2 weeks in a freezer-safe container.
Thaw at room temperature and serve.
Make-Ahead Strategy
Make these the morning of serving. They’re best eaten fresh and warm.
The dough can be prepared the day before and refrigerated, then baked in the morning.
Why These Feel Like Spring
Fresh strawberry scones are the taste of spring on a plate.
There’s something about fresh strawberries that just screams spring.
Paired with delicate scones, light cream, and a little lemon zest, they create something elegant and seasonal.
These are the scones that you make once a year when strawberries are at their peak.
And every year, you remember why you were so excited to make them the year before.
Perfect For Different Occasions
Spring Brunch
These are perfect for a spring brunch when strawberries are fresh.
Easter Breakfast
Serve at Easter breakfast for something special and seasonal.
Mother’s Day
Make these for Mother’s Day brunch. They feel elegant and special.
Garden Party
Serve at a garden party with tea or champagne.
Just Because Spring Arrived
Make these the first time fresh strawberries show up at the farmers market, just to celebrate spring.
Final Thoughts
Strawberry scones are one of those recipes that’s worth making only when strawberries are fresh and in season.
The attention to detail in the recipe—the paper towels, the minimal mixing, the careful cooling—is what creates scones that are elegant and delicate.
Following each step carefully is what transforms simple ingredients into something special.
When you bite into a warm strawberry scone and taste the fresh fruit, the subtle spices, and the tender crumb, you understand why this recipe deserves all that detail.
Make these when spring strawberries arrive. Serve warm with light butter or clotted cream.
Watch people absolutely fall in love with how fresh and delicate they are.
These are the scones that become an annual spring tradition once you’ve made them.
Try them this spring. You won’t regret it.