I have a confession: I’m the kind of person who will put chocolate chips in basically anything given the opportunity.
Pancakes? Chocolate chips. Muffins? Definitely chocolate chips. Oatmeal? Okay, that’s weird, but I’d probably try it.
So when I discovered you could make chocolate chip scones, I was like “wait, this has been possible the whole time and nobody told me?”
These are the scones that changed how I think about breakfast. They’re sweet enough to feel like a treat, tender enough to eat for breakfast, and loaded with chocolate chips because why not.
The first time I made these, my family devoured them so fast I barely got one before they were gone.
Now whenever I mention making scones, everyone immediately asks “are they chocolate chip scones?”
If the answer is no, they seem genuinely disappointed.
That’s when I knew I’d found something special. These are the gateway drug to scone eating.
Even people who swear they don’t like scones will eat these. I’ve tested this theory multiple times, and it holds up.
Why Chocolate Chip Scones Are Actually Genius
Here’s the thing about regular scones: some people think they’re boring.
They’ll eat a blueberry scone or a cranberry scone, but a plain vanilla scone? They pass.
But chocolate chip scones? Everyone wants those.
It’s because chocolate makes everything better, obviously.
But there’s more to it than that. The chocolate chips add richness, sweetness, and texture to what would otherwise be a pretty straightforward pastry.
The dark chocolate specifically (not milk chocolate, dark chocolate) adds a subtle complexity. It’s sweet but also a little bit sophisticated.
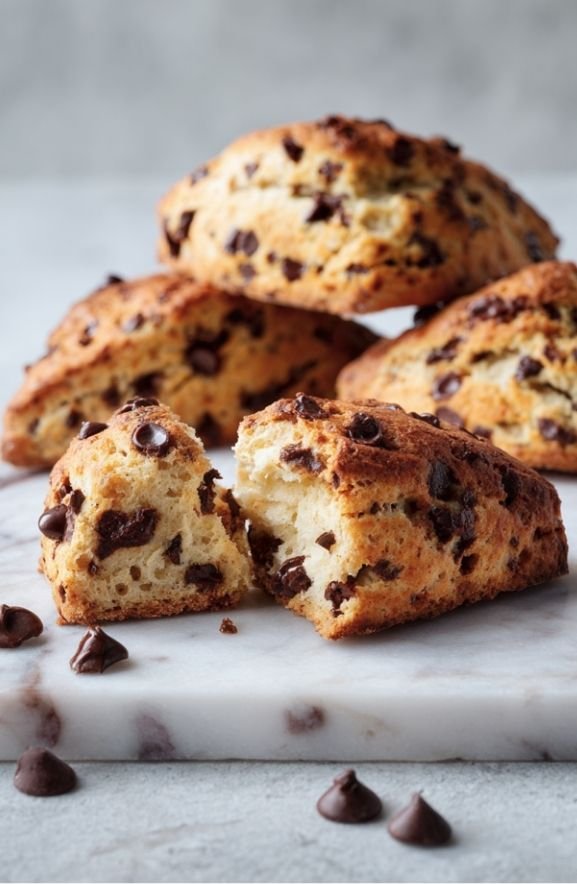
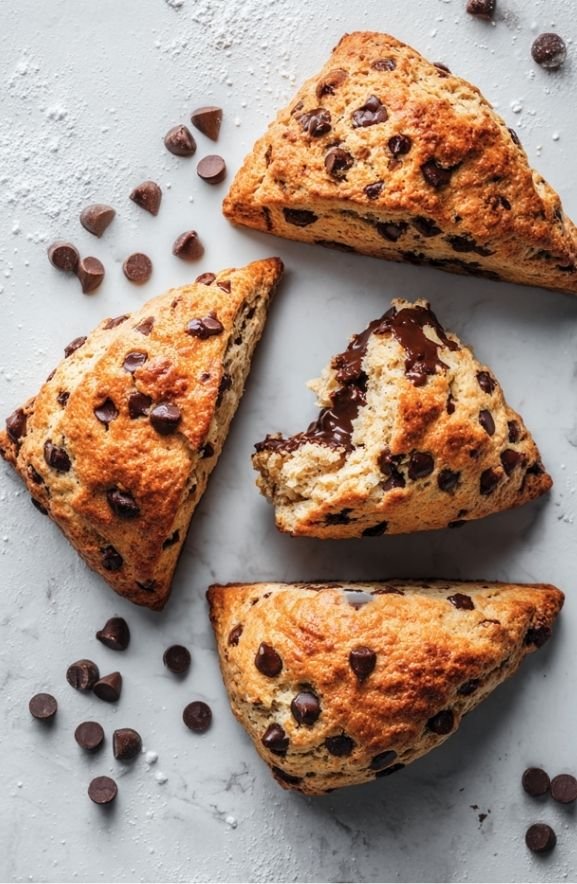
When you bite into these warm, the chocolate chips are still slightly melty and delicious.
The scone base is tender and crumbly but substantial enough to hold together.
The combination of buttermilk in the dough creates this amazing tender crumb that’s slightly tangy in the best way.
You get this situation where you’re eating something that tastes indulgent (because hello, chocolate) but is actually appropriate for breakfast.
These are the scones that make people understand why scones are worth making.
Also read: Strawberry Pretzel Salad Recipe: The Perfect Three-Layer Dessert
Buttermilk: The Secret Ingredient
You might notice this recipe uses buttermilk instead of heavy cream like a lot of scone recipes.
This is actually a big deal and makes a real difference.
Buttermilk is tangy and acidic, which reacts with the baking powder to create extra lift.
That acidity also reacts with the baking soda… wait, there’s no baking soda in this recipe. But the buttermilk still creates this amazing tender, slightly tangy crumb.
The buttermilk makes these scones more moist than you’d expect. They don’t dry out as quickly as some scone recipes.
If you don’t have buttermilk on hand, you can make a substitute by mixing milk with a little lemon juice or vinegar and letting it sit for five minutes.
But honestly, buttermilk is worth having in your fridge. It’s great for so many things.
Dark Chocolate Chips: Why They Matter
This recipe specifically calls for dark chocolate chips, and I’m here to tell you that matters.
Dark chocolate is less sweet than milk chocolate. It’s more sophisticated and complex.
Mini chocolate chips are also important. Regular-sized chocolate chips would be too big and would dominate the scone.
Mini chocolate chips distribute throughout evenly, so you get chocolate in every bite without any bite being all chocolate.
The dark chocolate softens slightly when it bakes, creating these little pockets of melty chocolate goodness.
When the scones are warm, the chocolate is still slightly soft. When they cool down, it firms up again. Either way, they’re delicious.
The Buttermilk Scone Base
The base of these scones is what makes them special compared to other chocolate chip scone recipes.
You’ve got sugar, flour, baking powder, salt (your dry ingredients), cold butter, and then buttermilk, egg, and vanilla (your wet ingredients).
The ratio of ingredients is really balanced. Not too much sugar so you’re not eating candy. Not too much butter so they’re not greasy.
The egg adds richness and helps bind everything. When you brush milk on top before baking, the egg also helps that milk create a pretty golden crust.
The vanilla adds warmth that complements the chocolate beautifully.
Everything together creates this really well-balanced scone that tastes like someone who actually knows what they’re doing made them.
Ingredient Breakdown
Sugar (2/3 cup)
This is a fairly generous amount of sugar, which makes sense because you want these to taste like a treat.
The sugar is balanced with the dark chocolate, so you get sweetness but not cloying sweetness.
Flour (2 cups)
All-purpose flour is what you want. It creates the right structure for tender scones.
Measure by spooning flour into your measuring cup and leveling it off, not by scooping.
Baking Powder (1 tablespoon)
This is your leavening agent. It’s what makes these rise and become light and fluffy.
Make sure yours is fresh. Old baking powder loses its effectiveness and your scones won’t rise properly.
Salt (1/4 teaspoon)
Just a small amount to enhance all the flavors. It prevents everything from tasting flat.
Cold Butter (3 tablespoons)
Cold butter is crucial. It creates flaky, tender scones.
Don’t use warm or softened butter. Cut it into small pieces and keep it cold until you cut it into the flour.
Mini Dark Chocolate Chips (1 cup)
Dark chocolate chips are important. They add sophistication and complexity.
Mini chips are also important because they distribute evenly throughout the scone.
One cup gives you plenty of chocolate without overpowering the scone itself.
Buttermilk (1/2 cup)
Buttermilk brings tartness and creates a tender crumb.
It also contributes moisture, making these scones less likely to dry out.
Egg (1)
The egg acts as a binder and adds richness.
When you brush it on top mixed with a little milk, it creates that pretty golden-brown crust.
Vanilla (1/2 tablespoon)
Vanilla adds warmth and complements the chocolate beautifully.
Make sure you’re using actual vanilla extract, not imitation.
Chocolate Chip Scones Recipe
Ingredients
- 2/3 cup sugar
- 2 cups all-purpose flour
- 1 tablespoon baking powder
- 1/4 teaspoon salt
- 3 tablespoons cold butter, cut into small pieces
- 1 cup mini dark chocolate chips
- 1/2 cup buttermilk
- 1 egg
- 1/2 tablespoon vanilla extract
- Milk for brushing on top
Instructions
Step 1: Preheat and Prepare
Get your oven to 400 degrees Fahrenheit.
Grease a cookie tray. You can use cooking spray, a little butter, or line it with parchment paper. Whatever works for you.
Step 2: Mix Dry Ingredients
In a large bowl, combine the sugar, flour, baking powder, mini dark chocolate chips, and salt.
Whisk this together really well so the baking powder is distributed evenly and the chocolate chips are separated.
Step 3: Cut in the Butter
Add your cold butter pieces to the dry mix.
Using a pastry blender, two forks, or your fingertips, cut the butter into the flour mixture until it looks like coarse crumbs.
This is the step that creates texture. Those little butter pieces create pockets that steam up when baking, giving you that tender crumb.
Don’t skip this step or rush it. Take a few minutes and actually do the work.
Step 4: Prepare Wet Ingredients
In a separate bowl, whisk together the egg, vanilla, and buttermilk.
Whisk until combined. It doesn’t need to be super frothy, just combined.
Step 5: Combine Wet and Dry
Slowly add the wet mixture to the dry mixture and stir to combine until even.
The key word here is “slowly.” You’re folding everything together gently, not mixing vigorously.
You want to combine everything without overworking the dough. Overworking develops gluten, which makes tough scones.
Step 6: Knead Into a Ball
Knead the dough together a few times until it becomes one solid ball.
We’re talking maybe 3-5 gentle kneads. You’re just bringing everything together, not developing gluten.
Step 7: Roll Out the Dough
Roll the dough into a circle about an inch thick or less.
If you don’t have a rolling pin, you can just pat it with your hands. It doesn’t need to be perfectly even.
Slightly less than an inch is actually better because it ensures your scones will bake all the way through without the edges getting too dark.
Step 8: Cut Out Scones
Use a cookie cutter to cut out small circles.
A 2-3 inch cutter is about right. You should get 8-12 scones depending on your cutter size.
Don’t twist the cutter. Press straight down and pull straight up. Twisting seals the edges and prevents rising.
Step 9: Place on Tray and Brush
Place the scone circles on your greased cookie tray.
Brush the tops with a little milk. This creates a pretty golden-brown crust when they bake.
If you want to be fancy, you could sprinkle a little coarse sugar on top too. It’s optional but pretty.
Step 10: Bake
Bake for 15-17 minutes until golden brown.
Start checking around 15 minutes because oven temperatures vary.
You’re looking for the tops to be golden brown and a toothpick inserted in the center to come out with just a few moist crumbs.
Step 11: Serve Warm
These are absolutely best served warm.
Fresh out of the oven is peak chocolate chip scone experience. The chocolate is slightly melty, the scone is still warm and tender.
Serve plain, with butter, with cream cheese spread, or just by themselves.
Chocolate Chip Scones Recipe
Ingredients
Method
- Get your oven to 400 degrees Fahrenheit. Grease a cookie tray. You can use cooking spray, a little butter, or line it with parchment paper. Whatever works for you.
- In a large bowl, combine the sugar, flour, baking powder, mini dark chocolate chips, and salt. Whisk this together really well so the baking powder is distributed evenly and the chocolate chips are separated.
- Add your cold butter pieces to the dry mix. Using a pastry blender, two forks, or your fingertips, cut the butter into the flour mixture until it looks like coarse crumbs. This is the step that creates texture. Those little butter pieces create pockets that steam up when baking, giving you that tender crumb. Don’t skip this step or rush it. Take a few minutes and actually do the work.
- In a separate bowl, whisk together the egg, vanilla, and buttermilk. Whisk until combined. It doesn’t need to be super frothy, just combined.
- Slowly add the wet mixture to the dry mixture and stir to combine until even. The key word here is “slowly.” You’re folding everything together gently, not mixing vigorously. You want to combine everything without overworking the dough. Overworking develops gluten, which makes tough scones.
- Knead the dough together a few times until it becomes one solid ball. We’re talking maybe 3-5 gentle kneads. You’re just bringing everything together, not developing gluten.
- Roll the dough into a circle about an inch thick or less. If you don’t have a rolling pin, you can just pat it with your hands. It doesn’t need to be perfectly even. Slightly less than an inch is actually better because it ensures your scones will bake all the way through without the edges getting too dark.
- Use a cookie cutter to cut out small circles. A 2-3 inch cutter is about right. You should get 8-12 scones depending on your cutter size. Don’t twist the cutter. Press straight down and pull straight up. Twisting seals the edges and prevents rising.
- Place the scone circles on your greased cookie tray. Brush the tops with a little milk. This creates a pretty golden-brown crust when they bake. If you want to be fancy, you could sprinkle a little coarse sugar on top too. It’s optional but pretty.
- Bake for 15-17 minutes until golden brown. Start checking around 15 minutes because oven temperatures vary. You’re looking for the tops to be golden brown and a toothpick inserted in the center to come out with just a few moist crumbs.
- These are absolutely best served warm. Fresh out of the oven is peak chocolate chip scone experience. The chocolate is slightly melty, the scone is still warm and tender. Serve plain, with butter, with cream cheese spread, or just by themselves.
Notes
Storage And Make-Ahead
Room Temperature Storage Store in an airtight container at room temperature for up to 2 days. They stay pretty fresh and tender. Refrigerator Storage Store in an airtight container in the refrigerator for up to 4 days. These actually taste pretty good cold or warmed up. Freezing Baked Scones You can freeze baked scones for up to a month in a freezer-safe container. Thaw at room temperature or warm gently in a 300-degree oven for 10 minutes. Freezing Unbaked Scones You can shape the scones and freeze them (before baking) for up to 2 weeks. Bake from frozen, adding 2-3 minutes to the baking time. Having frozen scone dough ready to bake is actually pretty convenient. Make-Ahead for Breakfast Make these the evening before and reheat in the morning for fresh-tasting scones without the morning work.Why People Lose Their Minds Over These
Okay, so I’m not exaggerating when I say people go crazy for these scones.
They’re sweet, chocolatey, tender, and feel indulgent without being over-the-top.
They’re appropriate for breakfast but taste like dessert.
They’re simple enough that anyone can make them, but good enough that people think you’re some amazing baker.
The combination of dark chocolate with the tender buttermilk scone base is just perfect.
If someone says they don’t like scones, I make these and watch them change their mind.
It happens almost every time.
The Cookie Cutter Advantage
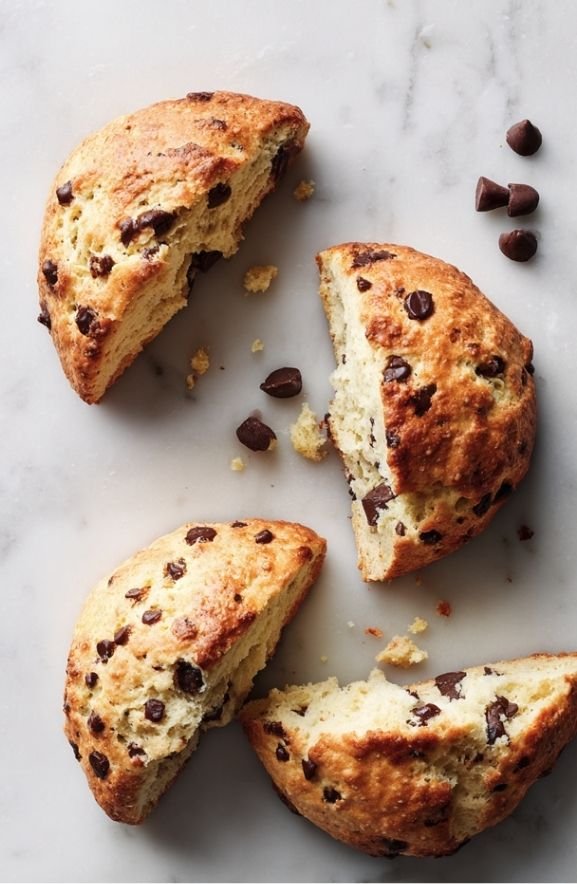
This recipe uses cookie cutters instead of the triangular wedges you cut with most scone recipes.
This is actually a really smart move because it makes uniform, pretty scones.
You could also divide the dough into portions and shape them by hand into rounds.
The cookie cutter method is faster and creates more uniform scones, which is nice for even baking.
Make sure your cookie cutter is clean and dry before cutting so the dough doesn’t stick to it.
Flavor Variations And Customizations
White Chocolate Chip Scones
Use white chocolate chips instead of dark. White chocolate is sweeter and creamier.
White chocolate and chocolate chip lovers will fight over these.
Milk Chocolate Version
Use milk chocolate chips if you or your family prefers them.
They’ll be sweeter than dark chocolate, so they might feel a bit more dessert-like.
Chocolate Chip Cookie Dough Scones
Add 1/4 teaspoon of vanilla extract to give them more of a cookie dough flavor.
Wait, the recipe already has vanilla. So maybe add an extra 1/4 teaspoon for more cookie dough vibes.
Mocha Chocolate Chip Scones
Add 1 tablespoon of instant coffee powder to the dry ingredients.
The coffee brings out the chocolate flavor and adds depth.
Brown Butter Chocolate Chip
Brown the butter on the stove before cutting it in. Let it cool before using.
Brown butter adds a nutty depth that’s delicious with chocolate.
Orange Chocolate Chip Scones
Add 1 teaspoon of orange zest to the dry ingredients.
Orange and chocolate is a classic combination for a reason.
Cinnamon Chocolate Chip
Add 1/2 teaspoon of cinnamon to the dry ingredients.
Cinnamon and chocolate pair beautifully.
Peppermint Chocolate Chip
Add 1/4 teaspoon of peppermint extract and maybe some mini chocolate chips that are peppermint-flavored.
Perfect for the holidays.
Salted Chocolate Chip
Use salted dark chocolate chips instead of regular.
The salt brings out the chocolate flavor and creates a more sophisticated taste.
Double Chocolate Version
Add 2 tablespoons of cocoa powder to the dry ingredients.
This makes chocolate chip scones that are actually chocolate scones with even more chocolate.
Baking Tips And Tricks
Cold Butter Is Key
Keep your butter cold. Like, straight from the fridge cold.
Cold butter creates flaky, tender scones. Warm butter makes dense scones. You want tender.
Don’t Overmix
Fold gently. Stir slowly. You’re not trying to knead bread here.
Overmixing develops gluten, which makes tough scones. We want tender scones.
Use Fresh Baking Powder
Old baking powder won’t work properly and your scones won’t rise.
If you can’t remember when you opened yours, it’s probably time to replace it.
Roll Evenly
Try to roll your dough to an even thickness so all your scones bake evenly.
If some are thicker than others, they’ll bake at different rates.
Press Don’t Twist With the Cookie Cutter
Press straight down with your cookie cutter and pull straight up.
Twisting seals the edges and prevents the scones from rising properly.
Don’t Skip the Milk Brush
Brushing with milk creates that pretty golden-brown color and helps create a nice crust.
It’s a small step that makes a big difference in how pretty they look.
Check Early
Start checking at 15 minutes, even though the recipe says 15-17.
Every oven is different. You want them golden brown but not overbaked.
Serving Suggestions
Warm With Butter
Fresh out of the oven with a pat of butter is absolutely the best way to eat these.
The chocolate is still slightly melty. The scone is warm and tender. Pure bliss.
With Cream Cheese Spread
Slightly softened cream cheese on a warm scone is delicious.
With Coffee
These pair beautifully with a good cup of coffee.
With Hot Chocolate
A chocolate chip scone with hot chocolate is peak chocolate indulgence.
As a Snack Cake
These are sturdy enough to pack in a lunch box or take on a picnic.
For Weekend Breakfast
These make weekend breakfast feel special and indulgent.
At Brunches
Serve at a brunch gathering and watch them disappear.
Storage And Make-Ahead
Room Temperature Storage
Store in an airtight container at room temperature for up to 2 days.
They stay pretty fresh and tender.
Refrigerator Storage
Store in an airtight container in the refrigerator for up to 4 days.
These actually taste pretty good cold or warmed up.
Freezing Baked Scones
You can freeze baked scones for up to a month in a freezer-safe container.
Thaw at room temperature or warm gently in a 300-degree oven for 10 minutes.
Freezing Unbaked Scones
You can shape the scones and freeze them (before baking) for up to 2 weeks.
Bake from frozen, adding 2-3 minutes to the baking time.
Having frozen scone dough ready to bake is actually pretty convenient.
Make-Ahead for Breakfast
Make these the evening before and reheat in the morning for fresh-tasting scones without the morning work.
Why These Scones Changed My Breakfast Game
Honestly, before these scones, I didn’t think much about scones.
They seemed like this fancy British thing that required special knowledge to make.
But this recipe made me realize that scones are actually pretty simple and can be made to fit any preference.
Chocolate chip scones specifically changed how I think about breakfast.
Breakfast doesn’t have to be healthy green smoothies and overnight oats.
Sometimes breakfast can be warm, chocolatey, indulgent scones with your coffee.
And honestly? That’s a pretty great way to start your day.
Perfect For Different Occasions
Weekend Breakfast
Make these on Saturday or Sunday morning and you’ll have the best breakfast.
Brunch Entertaining
Serve at a brunch gathering and watch people absolutely love you for it.
Lunchbox Addition
Pack a scone in a lunch box for a special midday treat.
Coffee Shop Vibes
Serve warm with good coffee to create a coffee shop experience at home.
Gift for Friends
Wrap some up as a gift. People always appreciate homemade baked goods.
After School Snack
Serve to kids after school and watch their faces light up.
Final Thoughts
Chocolate chip scones might sound fancy, but they’re actually pretty straightforward to make.
You mix some dry stuff, cut in cold butter, add some wet stuff, shape, and bake.
The result is something that tastes indulgent and fancy but is actually super approachable to make.
The buttermilk creates this amazing tender crumb, and the dark chocolate adds sophistication.
I can promise you, once you make these, your family is going to ask for them again and again.
Make these this weekend. Serve warm. Let people lose their minds over how good they are.
These are the scones that convert scone skeptics into scone lovers. I’ve tested this theory many times, and it holds up.
Try them. You won’t regret it.