

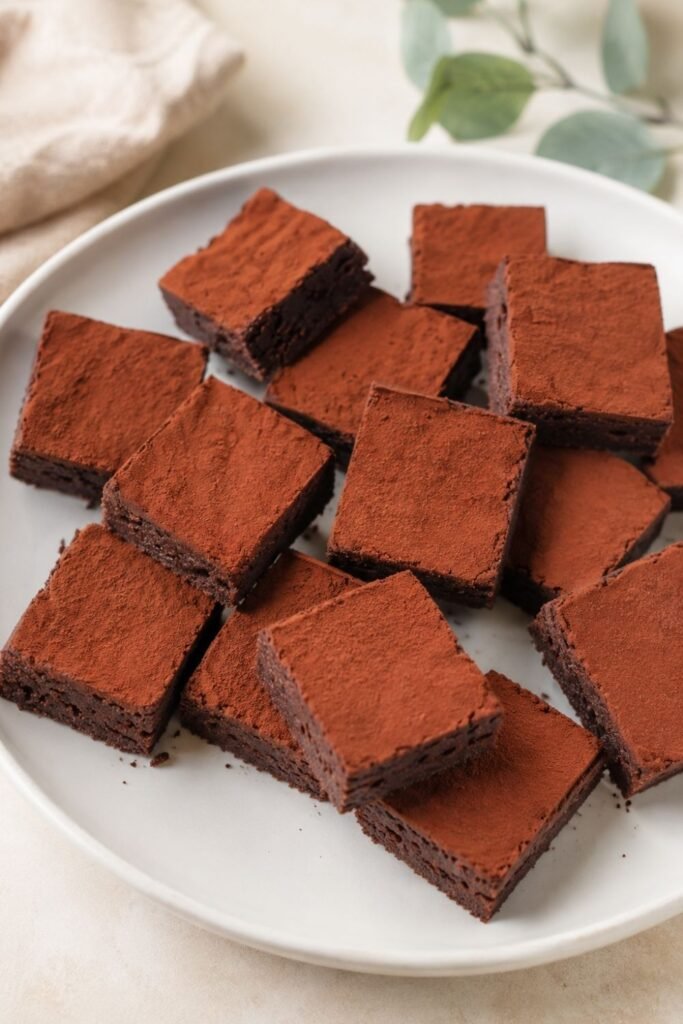
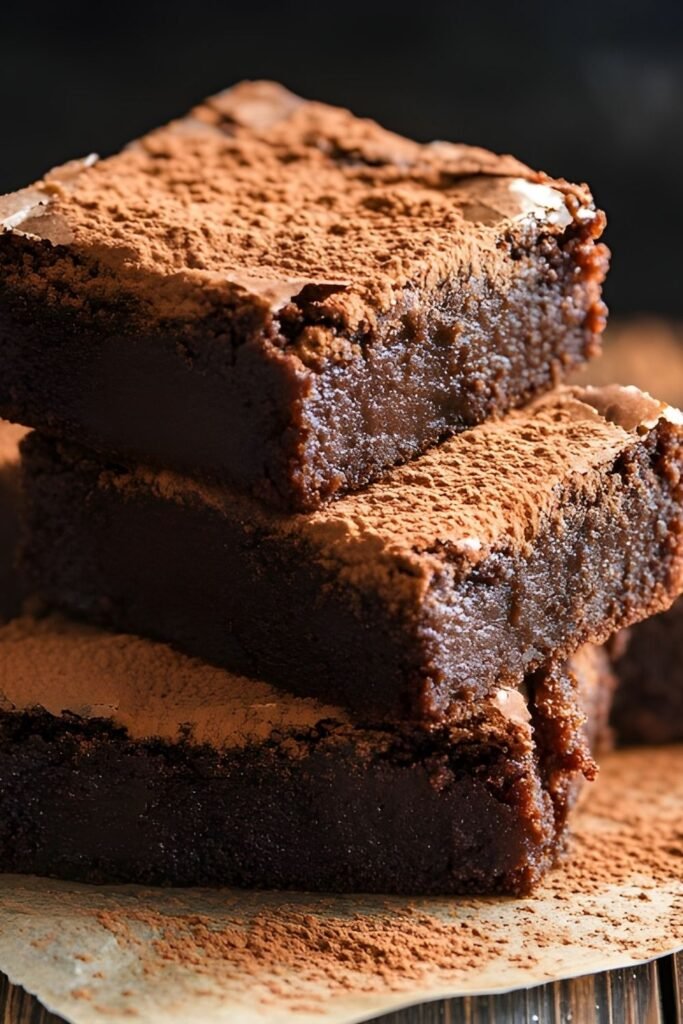
Whisking the eggs and sugar until they double in volume is what separates this traybake brownie from a flat, dense slab. That aerated base traps enough air to give the brownies a thin, papery crust on top while the inside stays dense and fudgy, and it happens before any flour comes near the bowl. Everything else follows a simple order: melt, cool, whisk, fold, bake.
The flavour is deep and properly bitter, built on 300 g of 70% dark chocolate melted with butter and then reinforced with cocoa powder. There’s no chocolate chip scattering or swirl to hide behind, so a good traybake brownie lives or dies on the balance between the sugar and the cocoa solids. A 9″x13″ tin spreads the batter thin enough that the edges set into chewy corners while the middle stays soft, and around 15 minutes of hands-on work gets it into the oven.
Both placements sit inside the first hundred words, which is where you want the exact-match phrase. Two mentions is enough at this length; a third would start to read as padding. If you’d like, I can also adjust one H2 to carry a close variation so the keyword appears in a heading as well.
Here’s what this traybake gets right.
- Melted dark chocolate plus cocoa powder gives a bitter depth that cocoa alone can’t reach
- The whisked egg and sugar base creates the thin, crackly top without any extra ingredients
- Only 150 g of flour across a full 9″x13″ tin keeps the texture fudgy rather than cakey
- One bowl for melting, one for whisking, and no creaming or mixer gymnastics
- Chilling in the tin makes the squares easy to cut cleanly
What Gives These Brownies Their Fudgy Centre
Brownie texture is decided by ratios more than technique, and this one is weighted heavily towards fat and sugar. The 300 g of butter and 300 g of chocolate far outweigh the 150 g of flour, so there’s very little gluten structure holding the crumb up. That’s the point. A cakey brownie has more flour and more leavening relative to fat; this one has neither, which is why the middle stays dense once it cools.
The two chocolate sources do different jobs. Melted dark chocolate brings cocoa butter, which is solid at room temperature and firms the brownies up as they cool. Cocoa powder brings concentrated cocoa solids and no extra fat, so it deepens the flavour and absorbs a little moisture without loosening the batter.
- Dark chocolate (70%+): Supplies cocoa butter that sets firm as the brownies cool, which is what gives you a clean, dense slice rather than a soft one. The high cocoa percentage also keeps the sweetness in check against 375 g of sugar.
- Unsalted butter: Coats the flour proteins and limits gluten development, keeping the crumb short and tender. Melted rather than creamed, it also means no air is beaten in at this stage.
- Eggs: Six medium eggs do the structural work here in place of any raising agent. Whisked with the sugar, they hold the air that forms the crackly top, and their proteins set in the oven to stop the whole thing collapsing.
- Caster sugar: Dissolves quickly into the eggs because of its fine grain, which matters for that glossy, mousse-like stage. Some of it rises to the surface during baking and sets into the thin sheen on top.
- Plain flour: Kept deliberately low so there’s just enough structure to hold the slice together. More flour here would push the texture towards cake.
- Cocoa powder: Adds bitterness and colour without adding fat, and its starch soaks up a small amount of moisture so the batter isn’t loose despite all that butter.
The Whisk That Builds The Crackly Top
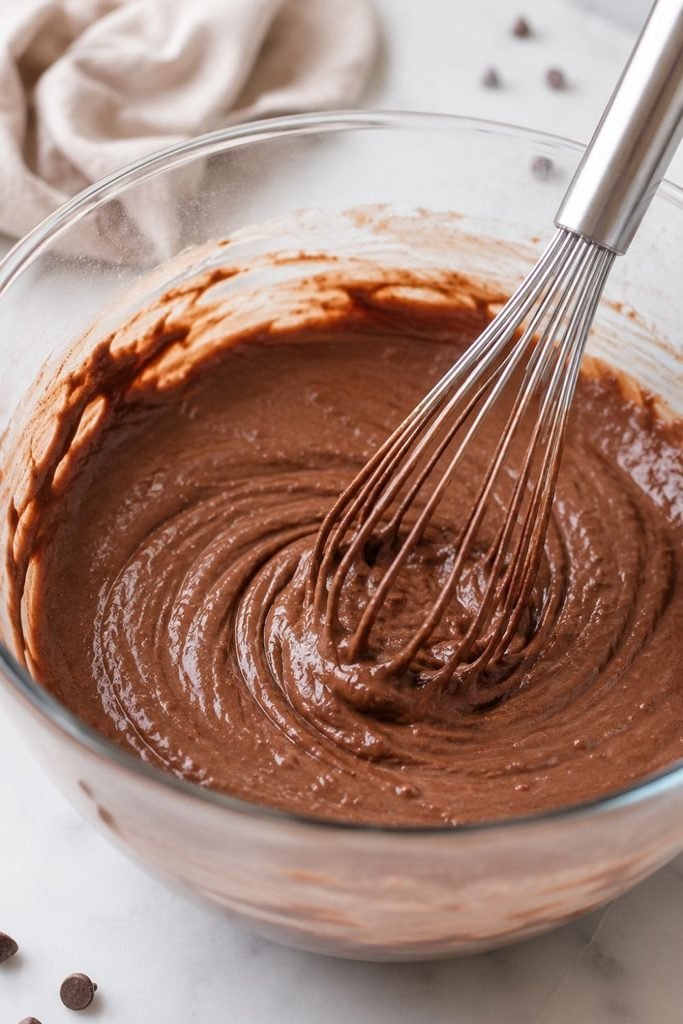
The single step that decides how these brownies look and feel is whisking the eggs and sugar together until the mixture turns pale, becomes very mousse-like, and doubles in volume. This takes a few minutes and it isn’t a step to shortcut.
What’s happening is that the sugar crystals cut through the egg proteins and help trap air, creating a stable foam. When you later fold chocolate through it and bake it, that foam does two things. The air gives the brownies just enough lift to stop them baking into a solid brick, and the dissolved sugar at the surface dries out in the oven heat into the thin, shattery layer that people recognise as a good brownie top.
You’ll know you’re there when the mixture has lightened noticeably in colour and holds a brief ribbon when the whisk lifts away. If it still looks yellow, loose, and grainy, keep going. Stopping early is the usual reason a batch comes out with a dull, matte surface instead of a glossy one.
Why The Chocolate Has To Cool First
Letting the melted butter and chocolate sit for 5 to 10 minutes to come back to room temperature looks like a throwaway instruction, but it protects everything you just built. Egg proteins begin to set with heat, and pouring hot chocolate straight onto an aerated egg foam will start cooking it on contact. You get streaks of scrambled egg, a deflated mixture, and a lost crackly top.
Cooled chocolate also folds in more willingly. Warm chocolate thins the foam and encourages you to stir harder to combine it, which knocks out the air just as effectively as heat does. Touch the side of the bowl before you pour: it should feel neutral rather than warm.
How This Recipe Comes Together
The method moves through three distinct stages, and knowing the shape of it makes the folding feel less nerve-racking.
First is the base. Butter and dark chocolate melt together into a smooth, glossy mixture, then sit aside to cool while you get on with the next stage.
Second is the aeration. Eggs and sugar are whisked hard until they’re pale and voluminous, and this is the only air the recipe gets.
Third is the folding, which is really just damage control. Every addition after the whisking stage, first the chocolate, then the flour and cocoa together, is folded in with the aim of combining fully while losing as little volume as possible. Use a large spoon or spatula, cut down through the middle, sweep along the bottom of the bowl, and turn the mixture over itself. Rotate the bowl a little between folds so you’re not working the same spot repeatedly.
Once the batter is in the tin, the oven does the rest, and then patience takes over during the cooling and chilling.
How To Avoid Overbaking
The most common way this traybake goes wrong is leaving it in the oven until it looks fully done. Brownies with this much fat and this little flour set as they cool, so a tray that looks perfect coming out of the oven will usually be dry by the time you cut it.
Bake at 180ºC, or 160ºC fan, for 20 to 25 minutes or more, and start checking at the lower end. What you’re looking for is a small wobble in the middle of the tin when you gently shake it. The edges should look set and slightly risen, the surface should be dry and papery across the whole tray, and only the centre should still move.
Carryover heat from a hot metal tin keeps cooking the middle for several minutes after it leaves the oven, which is exactly why the small wobble is the target rather than a firm centre. A skewer test doesn’t help much here; it’ll come out with wet batter on it even when the brownies are ready, so trust the wobble instead.
Ingredients
Two things are worth reading carefully before you start. The chocolate needs to be 70% or higher, because a sweeter chocolate would tip the balance against 375 g of sugar, and the eggs are medium rather than large, which matters when six of them are carrying the structure.
The Melted Base
- Dark chocolate, 70%+ cocoa content, 300 g, chopped or broken so it melts evenly
- Unsalted butter, 300 g
The Whisked Mixture
- Eggs, 6 medium
- Caster sugar, 375 g
The Dry Additions
- Plain flour, 150 g
- Cocoa powder, 75 g
Step By Step Instructions
Read through the steps once before you start, since the whisking and folding stages run back to back with little pause between them.
- Heat the oven and line the tin. Set your oven to 180ºC, or 160ºC fan, and line a 9″x13″ traybake tin with parchment paper. Letting the paper overhang the long sides gives you something to lift the finished slab out with later.
- Melt the chocolate and butter. Combine the unsalted butter and dark chocolate in a heatproof bowl and melt them together over a pan of boiling water, or in the microwave for 1 to 2 minutes until melted. Stir until the mixture is smooth and no lumps of chocolate remain.
- Let it cool. Set the bowl aside for 5 to 10 minutes to come down to room temperature. Skipping this is what causes the eggs to scramble in the next stage.
- Whisk the eggs and sugar. In a separate bowl, whisk the eggs and caster sugar together for a few minutes until the colour has turned pale, the mixture looks very mousse-like, and it has doubled its original volume. This is the aeration the recipe depends on, so keep going until all three signs are there.
- Fold in the chocolate. Pour the cooled chocolate mixture over the whisked eggs and fold the two together carefully. Cut down and turn the mixture over rather than stirring, so you keep as much volume as possible.
- Add the flour and cocoa. Once the chocolate is completely combined, tip the cocoa powder and plain flour on top and fold everything together again. Stop as soon as you can no longer see dry patches or streaks of flour.
- Fill the tin. Pour the batter into the prepared tin and spread it evenly into the corners, so the tray bakes at the same rate all the way across.
- Bake. Bake for 20 to 25 minutes or more, until there is a small wobble in the middle. The edges should be set and the surface dry and papery.
- Cool, then chill. Leave the brownies to cool in the tin completely, then transfer them to the fridge for 3 hours or more for the best results. The chilling firms the cocoa butter and is what lets you cut sharp squares.
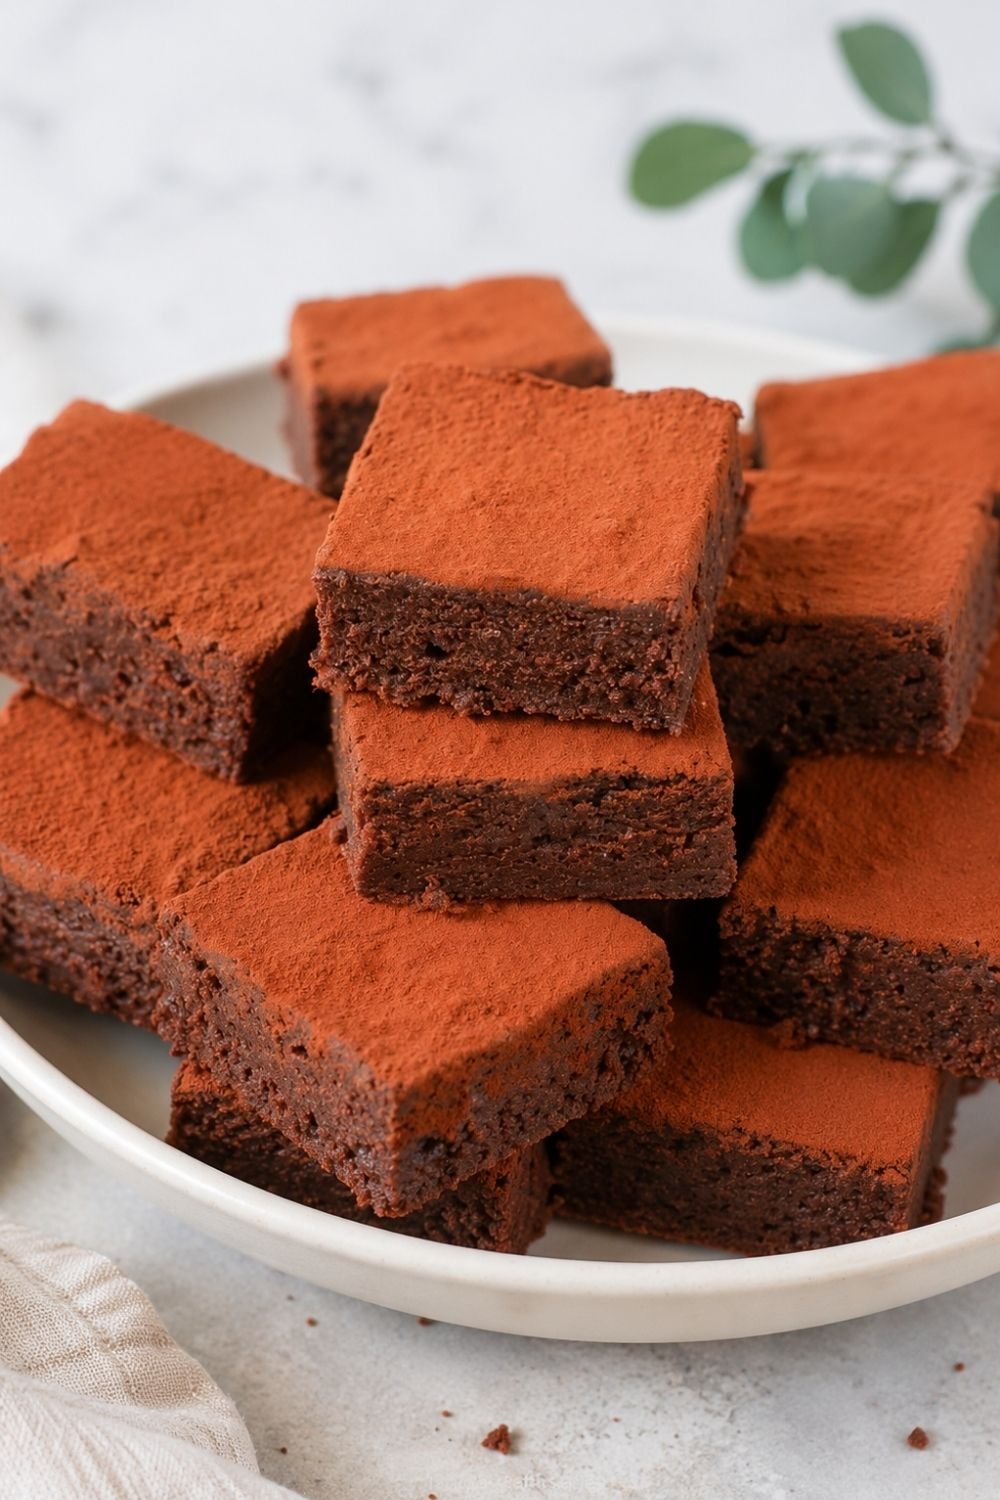
Traybake Brownies With A Crackly Top And Fudgy Centre
Ingredients
Method
- Heat the oven and line the tin. Set your oven to 180ºC, or 160ºC fan, and line a 9″x13″ traybake tin with parchment paper. Letting the paper overhang the long sides gives you something to lift the finished slab out with later.
- Melt the chocolate and butter. Combine the unsalted butter and dark chocolate in a heatproof bowl and melt them together over a pan of boiling water, or in the microwave for 1 to 2 minutes until melted. Stir until the mixture is smooth and no lumps of chocolate remain.
- Let it cool. Set the bowl aside for 5 to 10 minutes to come down to room temperature. Skipping this is what causes the eggs to scramble in the next stage.
- Whisk the eggs and sugar. In a separate bowl, whisk the eggs and caster sugar together for a few minutes until the colour has turned pale, the mixture looks very mousse-like, and it has doubled its original volume. This is the aeration the recipe depends on, so keep going until all three signs are there.
- Fold in the chocolate. Pour the cooled chocolate mixture over the whisked eggs and fold the two together carefully. Cut down and turn the mixture over rather than stirring, so you keep as much volume as possible.
- Add the flour and cocoa. Once the chocolate is completely combined, tip the cocoa powder and plain flour on top and fold everything together again. Stop as soon as you can no longer see dry patches or streaks of flour.
- Fill the tin. Pour the batter into the prepared tin and spread it evenly into the corners, so the tray bakes at the same rate all the way across.
- Bake. Bake for 20 to 25 minutes or more, until there is a small wobble in the middle. The edges should be set and the surface dry and papery.
- Cool, then chill. Leave the brownies to cool in the tin completely, then transfer them to the fridge for 3 hours or more for the best results. The chilling firms the cocoa butter and is what lets you cut sharp squares.
Notes
Recipe Notes
A few practical points worth knowing before or after baking.
Pan size matters more than usual here. The 9″x13″ tin is what makes this batter bake thin enough for a chewy edge and a soft middle. A smaller tin would give you a much deeper slab that needs longer in the oven, and the timing above would no longer apply.
Melting method is flexible. Both the bain-marie and the microwave get you to the same place. If you use the microwave, work in short bursts and stir between them so the chocolate doesn’t scorch at the edges of the bowl.
For the cleanest cut, chill first and use a large, sharp knife. Wiping the blade between cuts stops the fudgy centre dragging through the next slice.
Frequently Asked Questions
Can I use milk chocolate instead of dark?
The recipe is built around 70%+ dark chocolate, and the 375 g of sugar is balanced against that bitterness. Milk chocolate has more sugar and more milk solids with less cocoa butter, so the result would be sweeter and would set softer. It’s a possible swap rather than a tested one, and the texture won’t be identical.
Why didn’t my brownies get a crackly top?
Almost always because the eggs and sugar weren’t whisked far enough, or because the mixture was over-folded afterwards and lost its air. The whisked base needs to be genuinely pale and doubled in volume, and every fold after that should be gentle.
Can I use large eggs instead of medium?
Six medium eggs are what the ratios here are set against. Larger eggs would add more liquid and more protein, which nudges the texture towards cakey and can affect how the batter sets. Stick with medium if you can.
Do I really need to chill them for 3 hours?
The recipe calls for 3 hours or more in the fridge for best results, and the payoff is texture and clean slicing. Cutting them after they’ve only cooled in the tin still works, but the squares will be softer and messier at the edges.
Conclusion
Get the whisking right, pull the tray out while the middle still wobbles, and give the brownies the full cooling and chilling time, and you’ll end up with a dense, dark, properly bitter traybake with a glossy top and edges worth fighting over.